Footwear testing methods – Part 2

Footwear testing methods – Part 2

If you missed the first part, make sure to check it out by clicking on the buttom.

→  PART  1/2

Why do I need material testing?

The testing of footwear components and materials is key to test the sufficient functionality of the later shoe even before the shoe is designed, sampled, produced or fit tested. By choosing the right material test, footwear developers and designers save time, money and energy.

Depending on the purpose a material must fulfil on the shoe, the material requirements can be quite different. In the right choice of tests, it plays a major role in whether the component has a design function, whether the part is visible or hidden, whether the part must fulfil a safety-relevant aspect or whether the part must have a certain performance. Each sport or footwear category has its own guidelines, standard tests or benchmarks.

In general, one can say that material tests ensure the design intent, the function, the safety, manufacturability and longevity (and thus also the sustainability) of a shoe.

Navigation

Important definitions in material testing

Material tests done in the footwear industry

1. Color measurement

2. UV test

3. Hydrolysis test

4. Migration test

5. Blooming test

6. Water content analysis

7. Density test

8. Melt volume rate

Material tests done in the footwear industry

Optical tests

These are tests which usually deal with the color of the material e.g how it is affected by different weather. Visual inspections include UV resistance test, grey scale, blooming test, yellow index, translucency, color change after hydrolysis and migration fastness.

Physical tests

Physical properties are helpful when it comes to cost calculations and performance. They allow to determine the value of materials which are needed for tests such as the density test, moisture absorption and water content analysis.

Thermal tests

Physical properties are helpful when it comes to cost calculations and performance. They allow to determine the value of materials which are needed for tests such as the density test, moisture absorption and water content analysis.

1. Color measurement

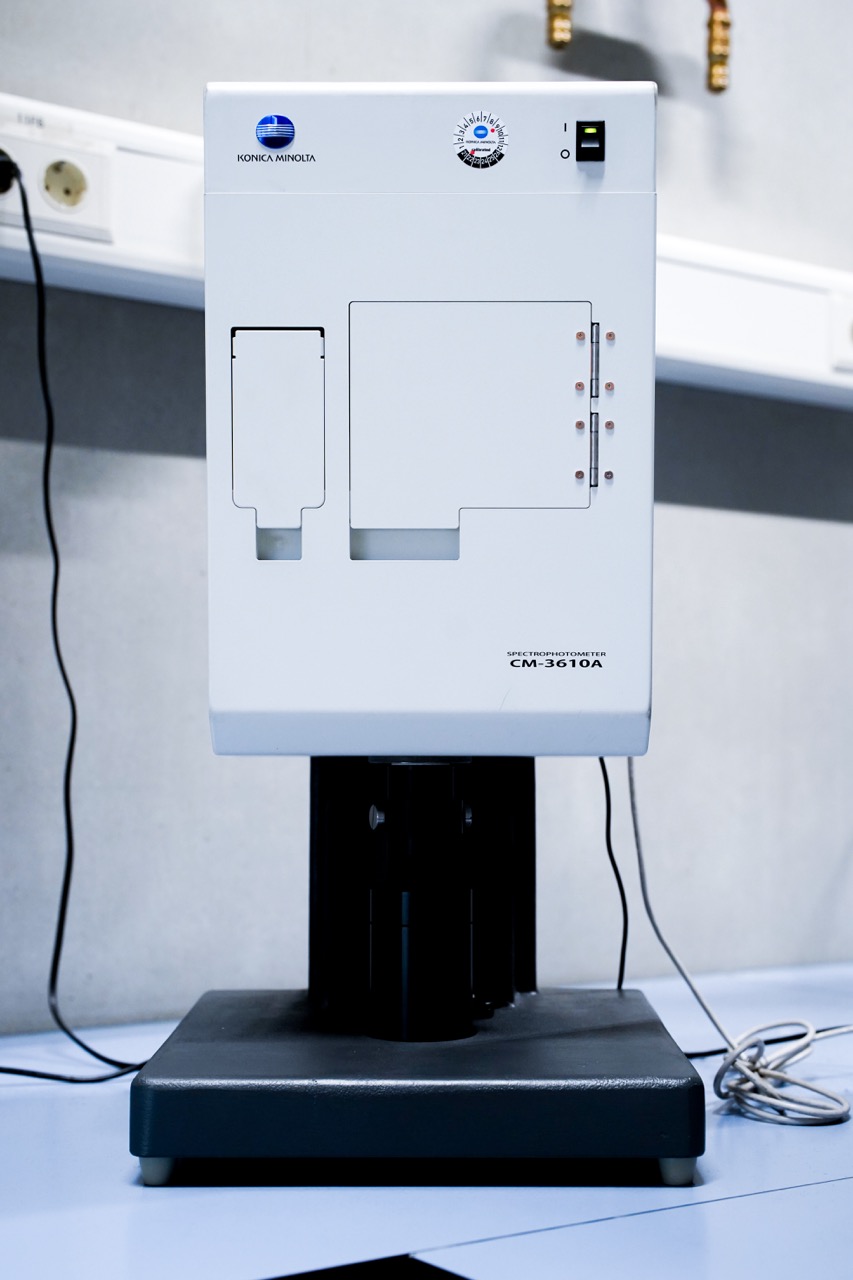
Purpose: To hit the design intent of a footwear sketch and to avoid negative surprises, a color matching test can be an important life insurance during a footwear development phase. The color measurement test is done regularly as it can also be an issue for component manufacturing to match the right color.

Setup and conditions: The machine used is called spectrophotometer. It has a lamp inside which shines onto the color. The reflected color is then compared to data provided by a tech pack and compared to a color spectrum by the computer. Additionally, the component is placed into a color viewing system

What is measured: The machine showing the deviation in Delta E of the component color from the desired color. Delta-E is a unit for the color distance between two colors. The higher the number, the higher the distance between the colors.

Interpretation of test result: The allowed deviation predefined by brand, footwear category and component. The interpretation of the result depends on the subjective assessment of the footwear developers and designer who are involved in the respective project. They decide what Delta-E is acceptable.

Tested materials and components: This test is done for materials which are used at the outer part of a shoe.  
2. UV test

Purpose: To see how the external footwear material changes after being exposed to UV rays from sunlight.

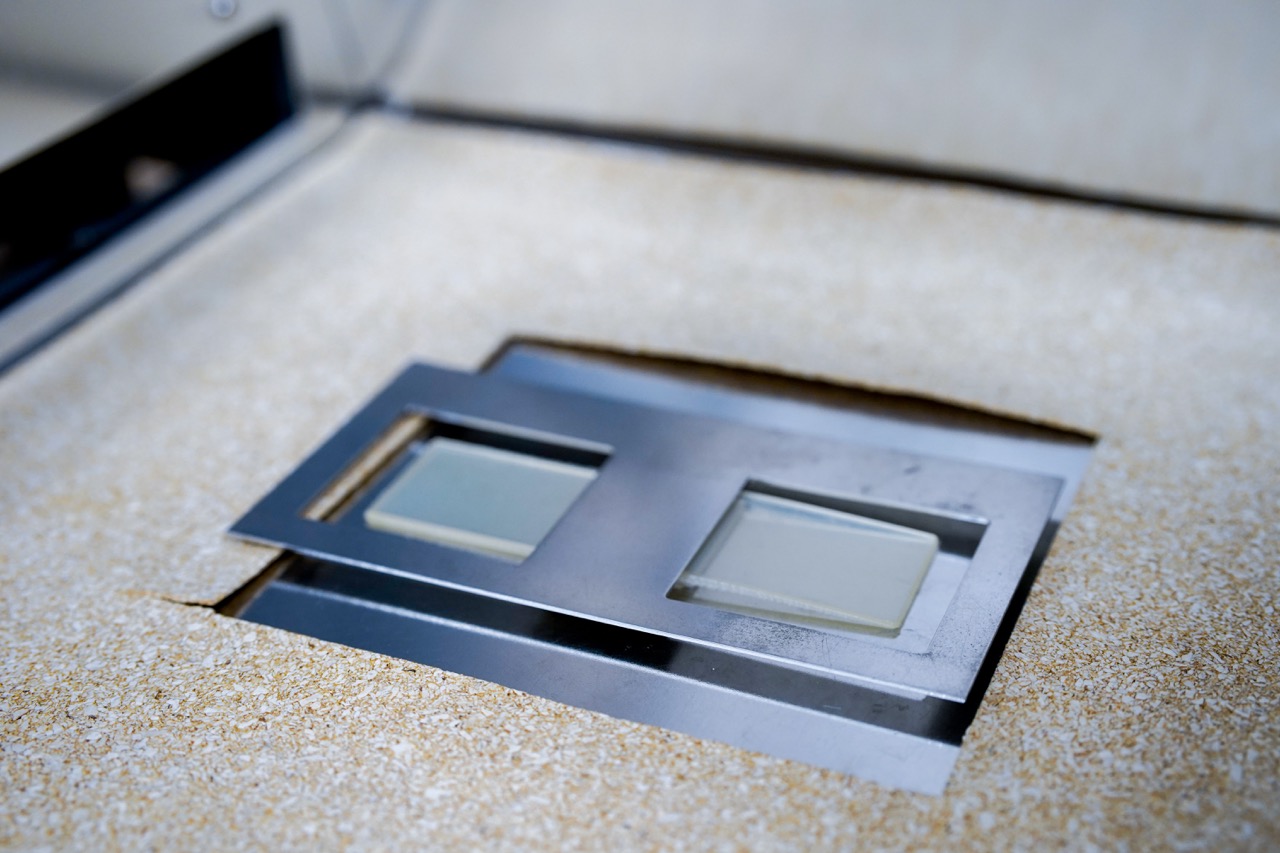
Setup and conditions: The machine is called Sun testing machine. The UV test stimulates around 200 days of sun inside a machine with UV rays. The material is partially covered to see the after and before.

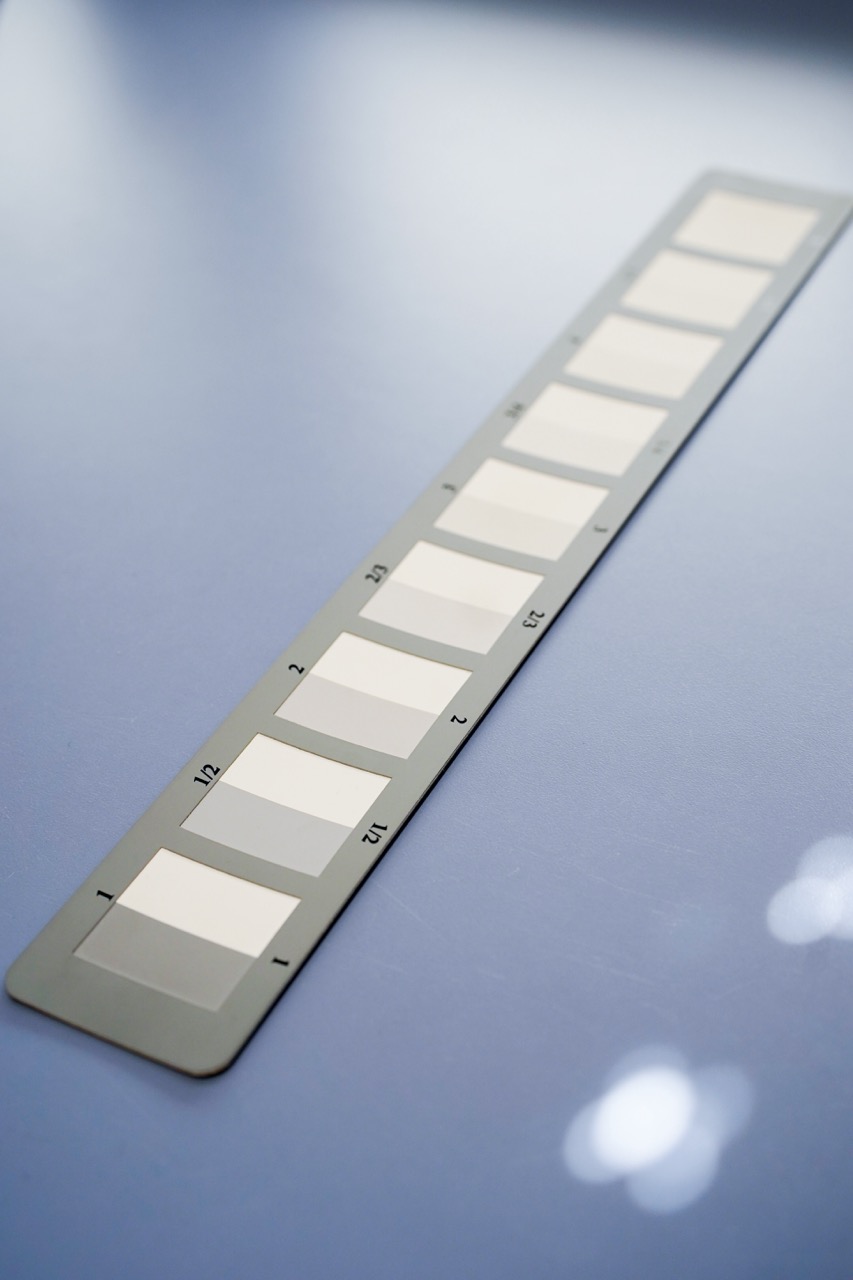
What is measured: The sample is compared to the grey scale after and prior test to determine a grade of discoloration intensity. The grey scale is divided in half and has 5 steps, starting with 5 (no discoloration) and ending with 1 (extreme discoloration).

Interpretation of test result: Generally speaking, the lower the value, the more intense is the discoloration after the test. The final interpretation of the result depends on the subjective assessment of footwear developers and designer involved. They set the acceptable grade of discoloration.

Tested materials and components: All components of footwear that are usually exposed to sunlight.
3. Hydrolysis Test

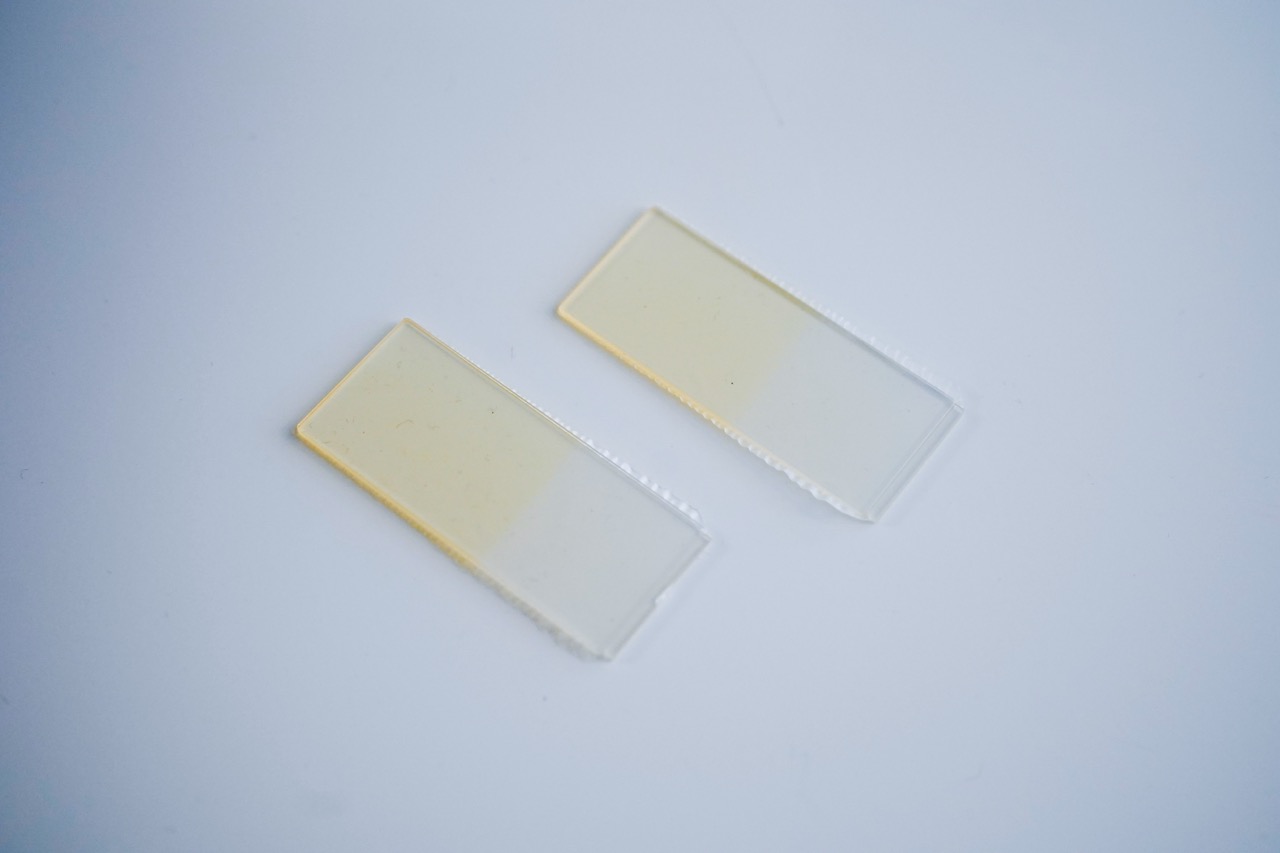
Purpose: Performance footwear must withstand extreme weather conditions. That could be a lot of rain, humidity, or wet ground. The hydrolysis test simulates those extreme wet conditions exposing a material and determine the change of mechanical and color properties through artificial aging.

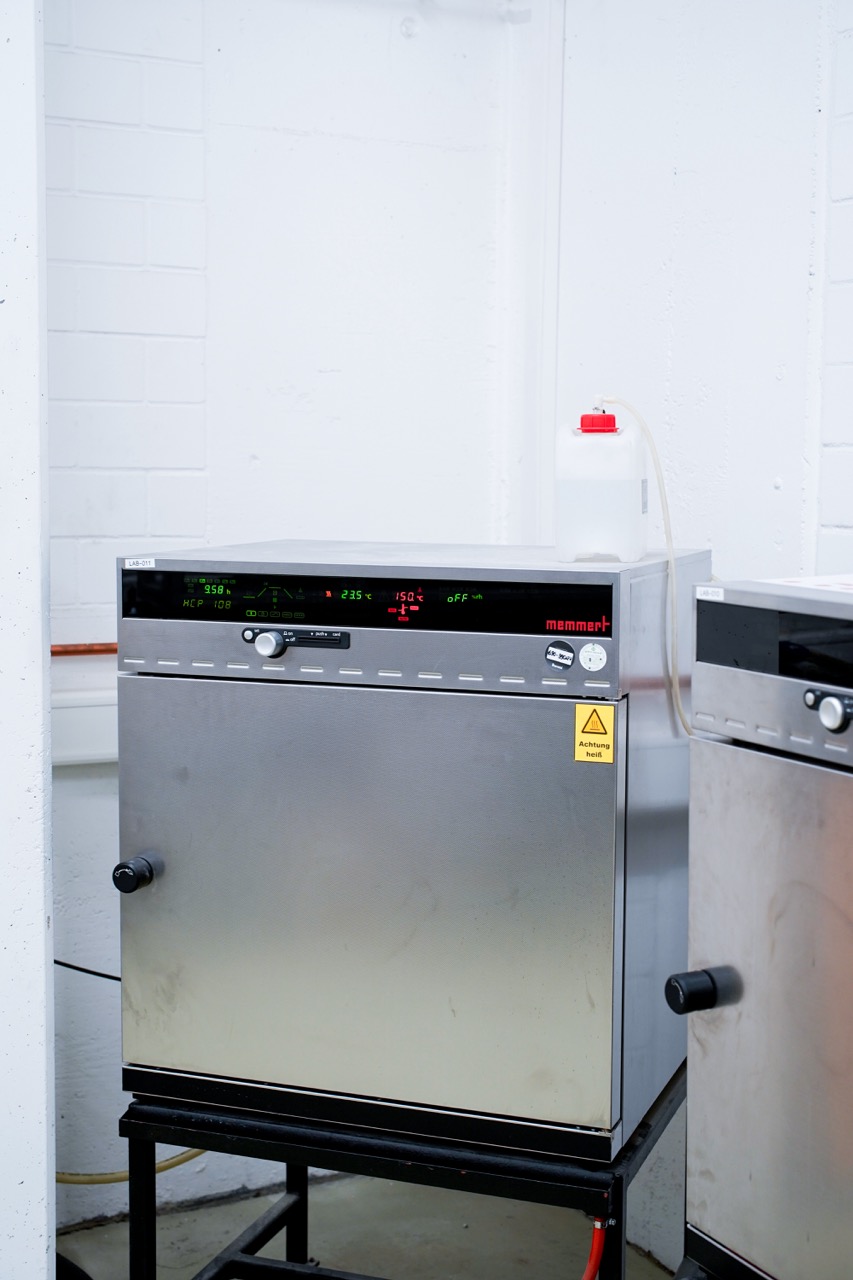
Setup and conditions: The device used is a humidity chamber which must be between 60C° and 70C° with 95% humidity. The specimen rests there for a predefined time e.g. 60h (depending on the requirements of footwear category, component, and brand). Then, the test specimen is getting removed and re-conditioned according to the specified conditions.

What is measured: Mechanical and optical properties before and after the test.

Interpretation of test result: To evaluate the result comparison to different material specifications, pictures of the material (before and after) are added to the test report. Also the specimens are checked on their appearance if there have been changes after the hydrolysis. There should be no visible. Material defects from hydrolysis could be color leaks, porosity or impairment of mechanical properties.

Tested materials and components: The Hydrolysis test is used on all upper and bottom materials containing PU because this material contains softeners. Those softeners can vaporize during the process of hydrolysis which would make the material hard and brittle.
4. Migration test

Purpose: Avoidance of color diffusion from a material to either other shoe components or consumer feet.

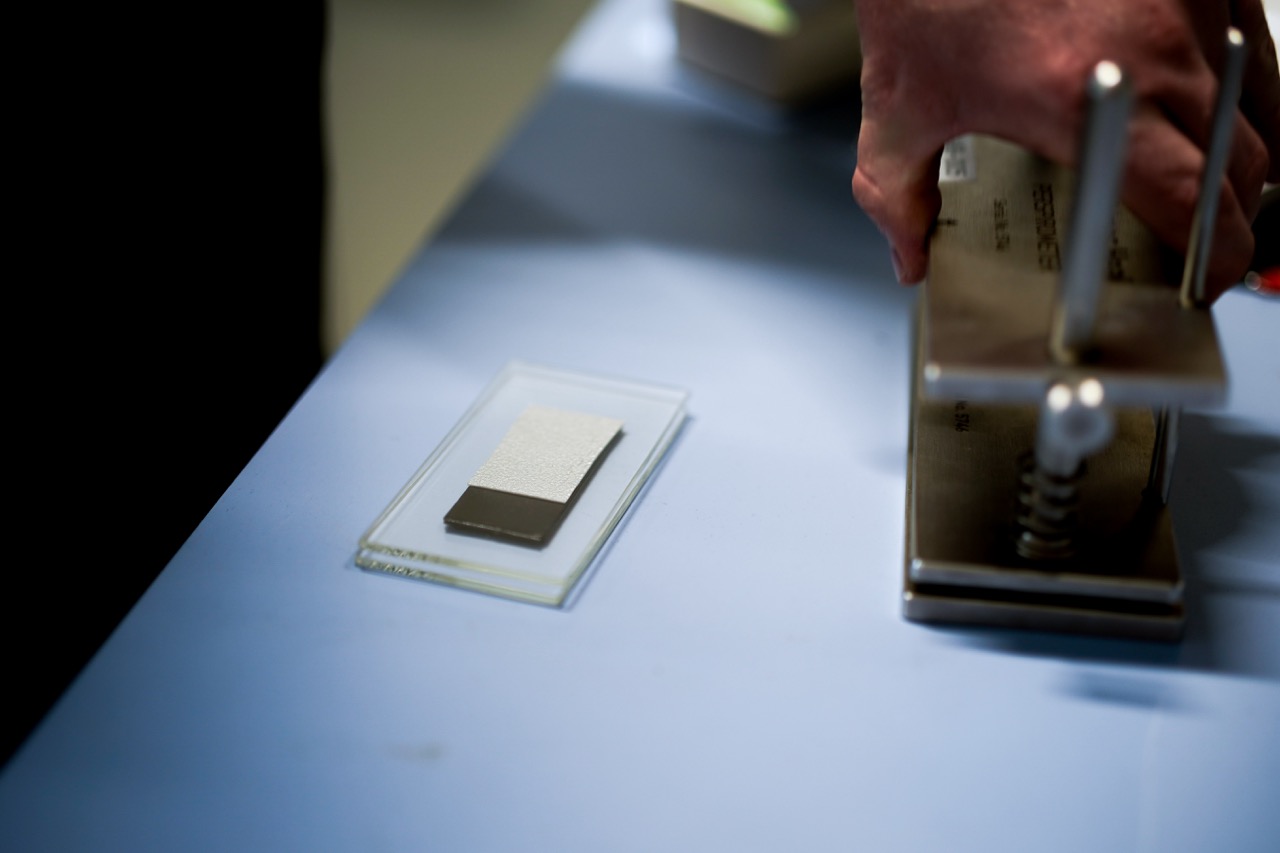
Setup and conditions: A test specimen is placed onto a PVC foil between two glass plates. Afterwards an additional weight is added, which holds the two materials together until the screws are fixed. The weight is removed, and the test specimen is placed in an oven at 50 degrees for 16 hours. After removing is from the oven it needs to cool down for approximately two hours before the PVC film is separated. The darkest part of the PVC film is then compared with a greyscale.

What is measured: Optical appearance of color diffusion from the test specimen transferred to a PVC testing foil.

Interpretation of test result: The test can be considered as passed when the material specimen is not discoloured by the PVC foil in any way.

Tested materials and components: Can be done with multiple of materials.
5. Blooming test

Purpose: Blooming is the migration of the surface color after an amount of time. In the shoe industry, this could cause the shoes to gain white edges around their black outsole after standing around for a while. The shoe would look degraded.

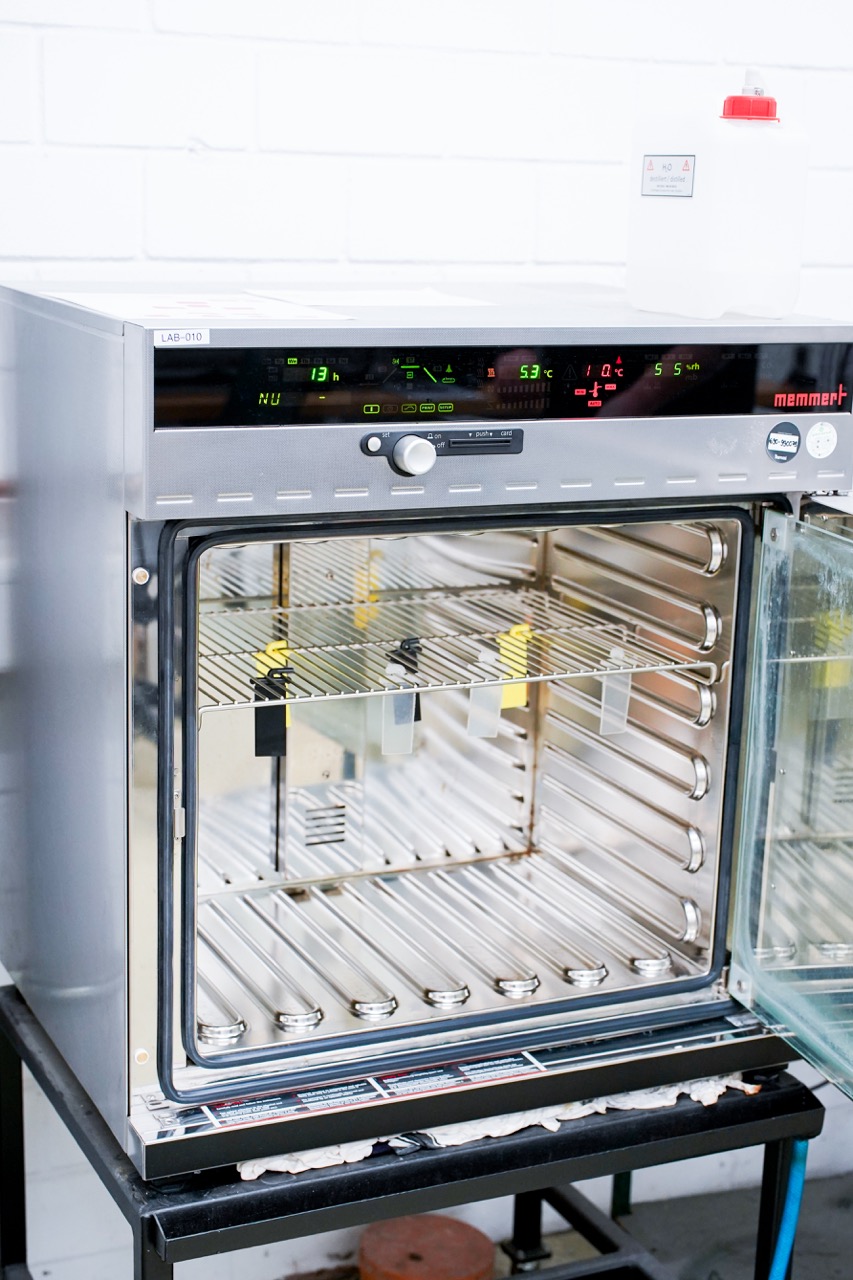
Setup and conditions: The blooming test is done in the humidity chamber using distilled water. To start the test, the raw material must be at least conditioned for 12 hours at standard room conditions. The test specimen must be cut out of a rubber plate or an outsole. Hang the specimen into the oven to avoid the condensation of water from vapor on the specimen surface. Close the oven and let the test run at 60°C and 95% humidity for 7 days (do not open otherwise drop in humidity and temp). After 7 days take the specimen out of the oven and let it cool down to standard room conditions for 12 hours.

What is measured: Check appearance of the specimen and with the help of a special black wipe to to check whether a white film already appears in the oven after 7 days.

Interpretation of test result: If there is a white film on the surface (blooming) of the specimen the material must be rejected.

Tested materials and components: The blooming test is done on all rubber materials, components to assess the blooming possibility under extreme conditions of temperature and humidity.
6. Water content analysis

Purpose: The water content test is an important test to assess manufacturability of a material. The test determines the material’s water content. If a material has a wrong content, this could cause processing problems.

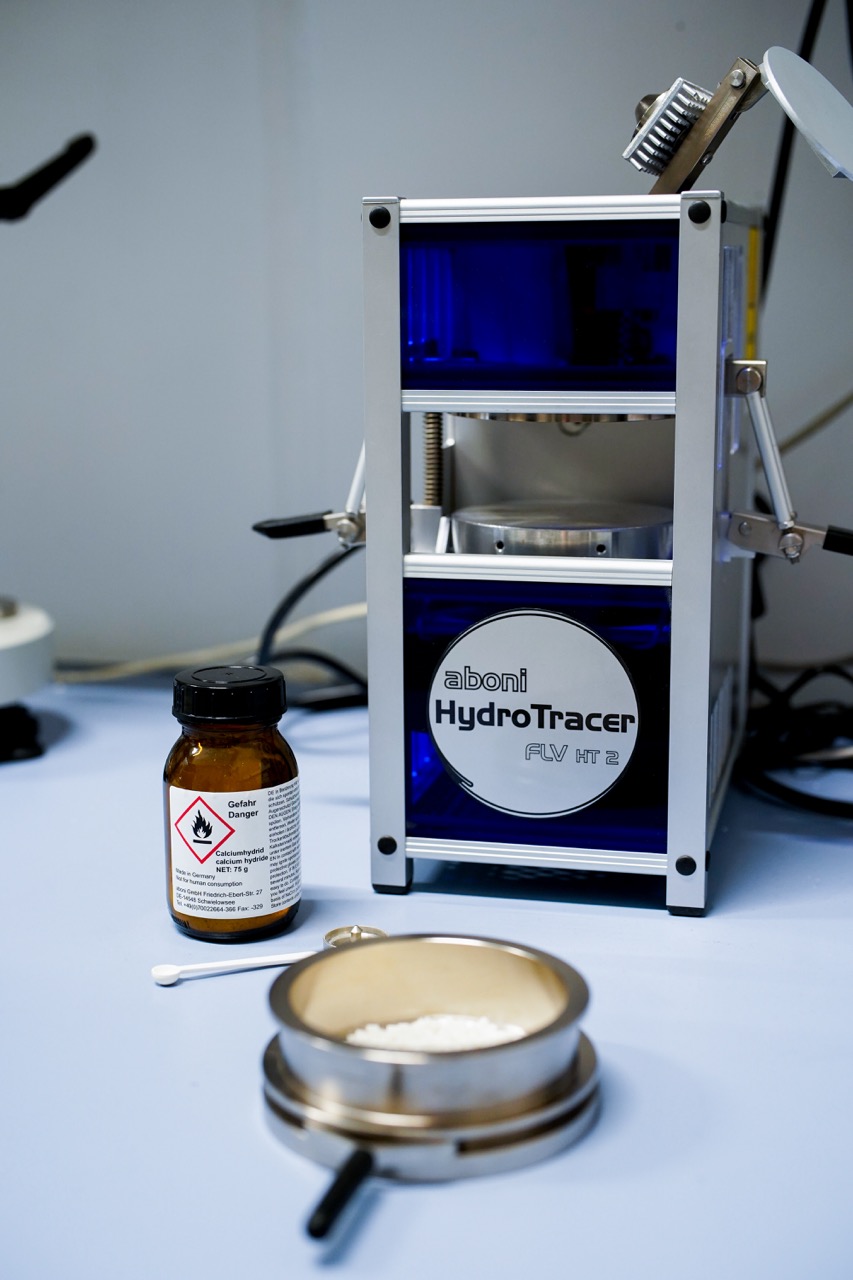
Setup and conditions: The test is done in a water content analysis reactor. It is the first step to put 8g of the granulated material in a bowl. Subsequently, calcium hydrate is placed in the section above. The final test is stared when the reactor is heating up to cause condensation from the water content of the granulated material. The condensed water is then reacting with calcium hydrate resulting in the gas hydrogen which is spreading within the reactor.

What is measured: A sensor in the the reactor is measuring the concentration in % of the hydrogen as soon as the concentration value stabilizes.

Interpretation of test result: You can say, the higher the concentration of hydrogen, the more water the material was containing. Each material has a specific water content which must be further processed. Depending on the water content, footwear component manufacturers decide if the material needs to be further dried before processing or not. This is all done to ensure manufacturability and also sustainable matter, to not waste material in production.

Tested materials and components: This test is done with all kind of raw materials, e.g., TPE, PEBA, and PA.
8. Melt volume rate 

Purpose: The melt volume rate test determines the strength of pressure and degree of heat the material can handle. It helps to steer the setting for manufacturing of the material.

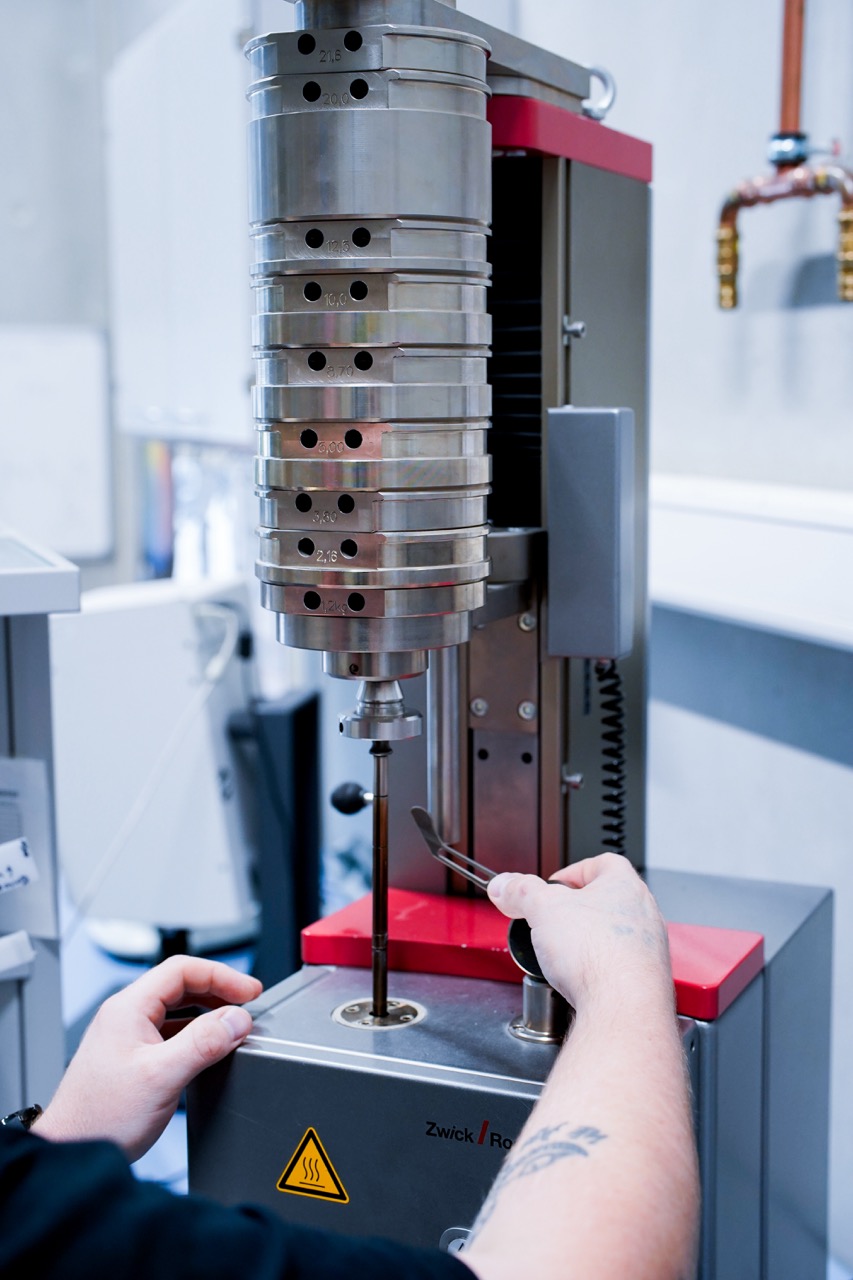
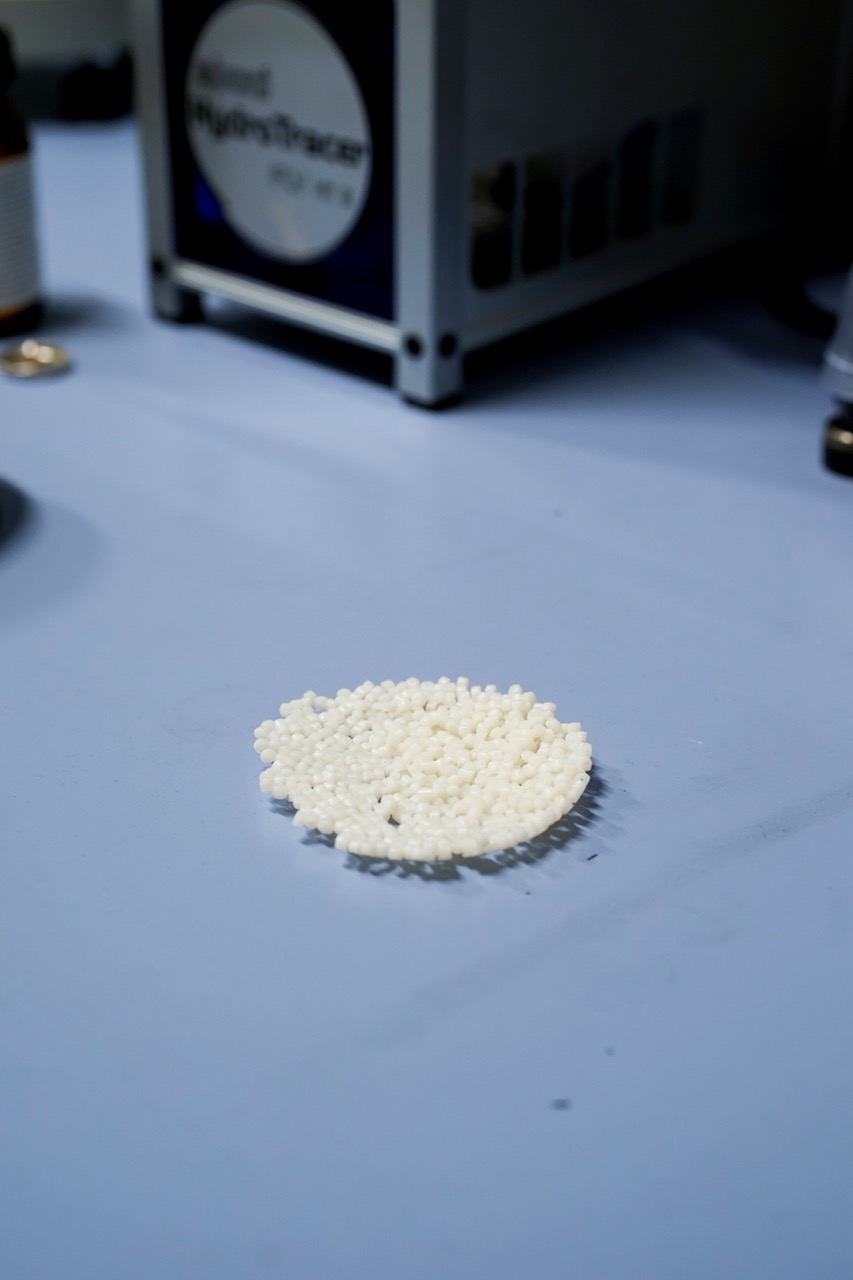
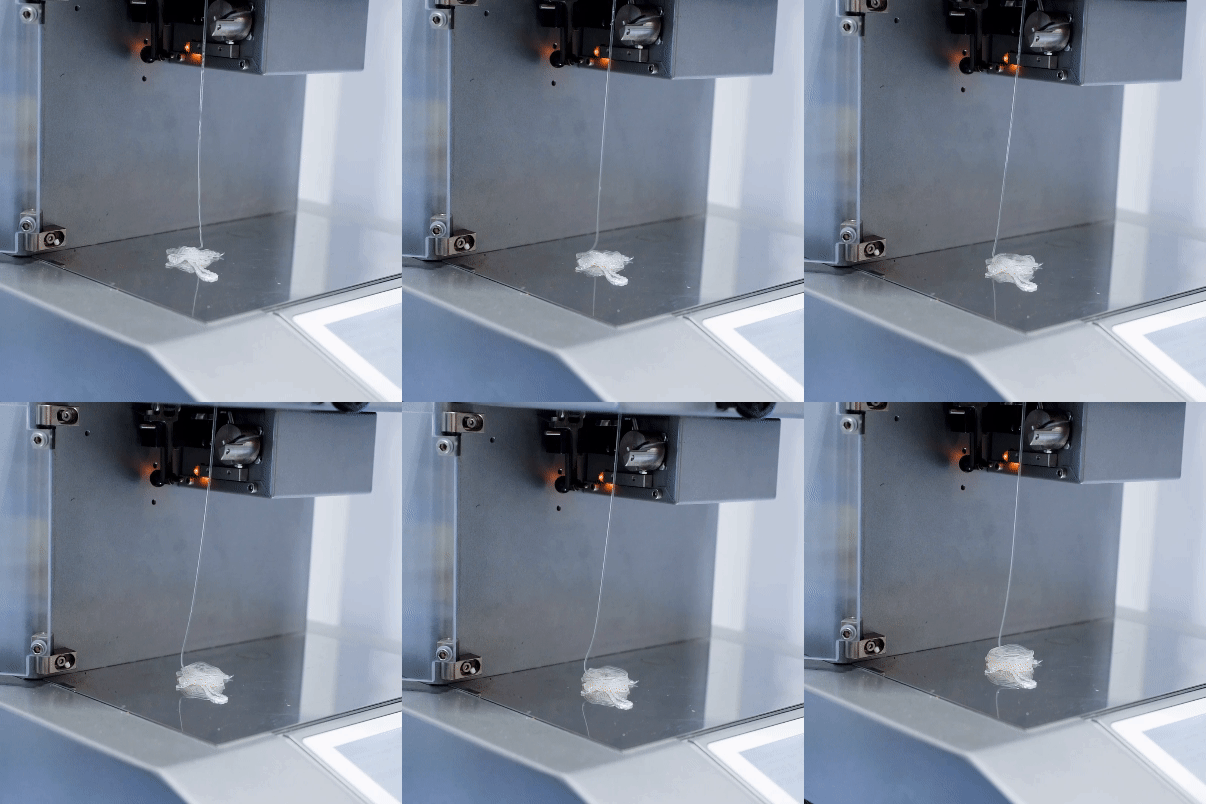
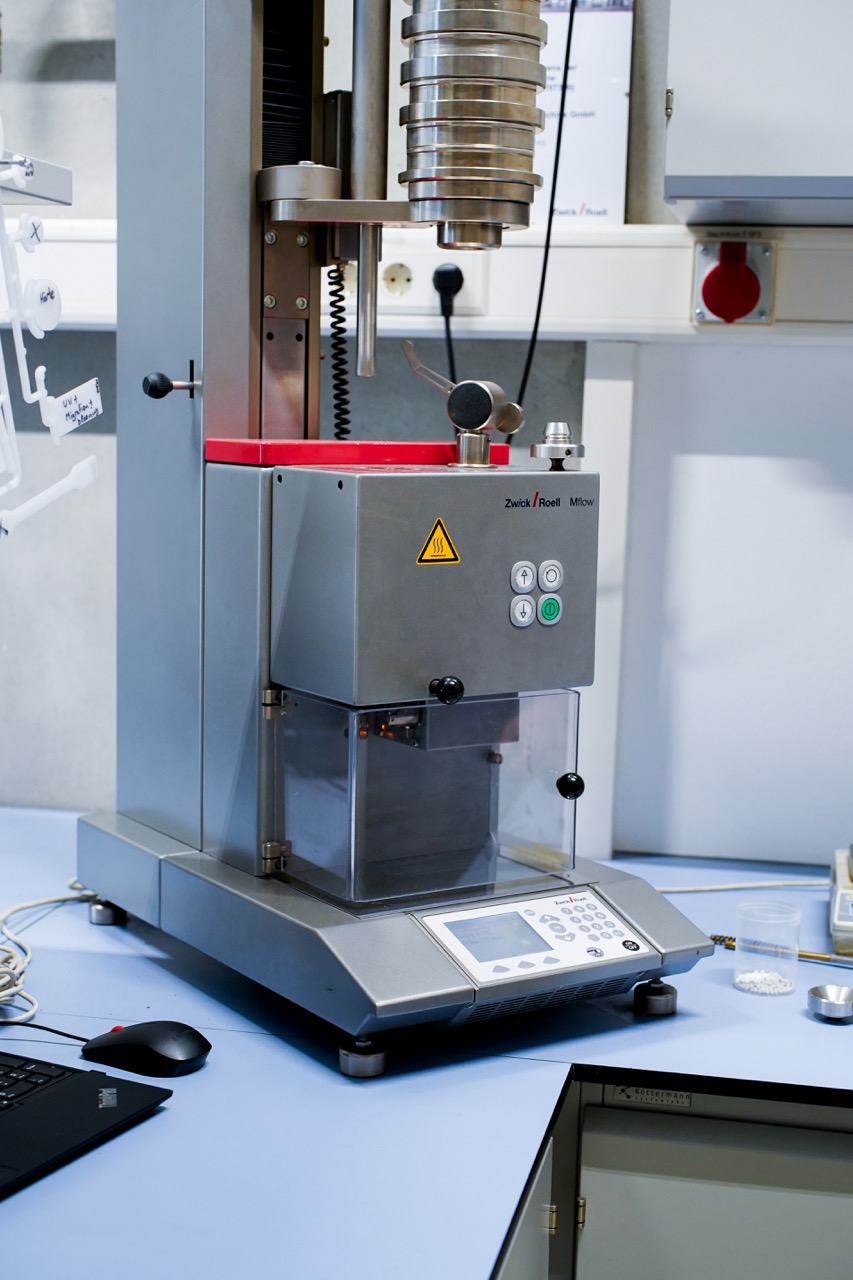
Setup and conditions: The machine used is Mflow together with material granulates. The machine is set to a standardized temperature, then the material is added. The material is compressed for a time of around 5 minutes to extrude all air which is still in the material. As soon as all air is extruded the already melted material is pushed through a injection pipe with a preset weight.

What is measured: It is measured how fast the material is flowing through the 2mm injection pipe, Using the melt volume rate (MVR) cm3/10min. Viscosity is a measure of the viscosity of a fluid. The reciprocal of viscosity is fluidity, a measure of the flowability of a fluid. The higher the viscosity, the more viscous (less flowable) the fluid is; the lower the viscosity, the more thin (more flowable) it is.

Interpretation of test result: With the results the injection machine can be calibrated and set to the right parameters for the corresponding material. Thus, the information helps to avoid high material waste during the preparation time of an injection machine.

Tested materials and components: The test is done with all new delivered materials or to control certain materials already in use if something is not set right in the injection parameters.
7. Density test

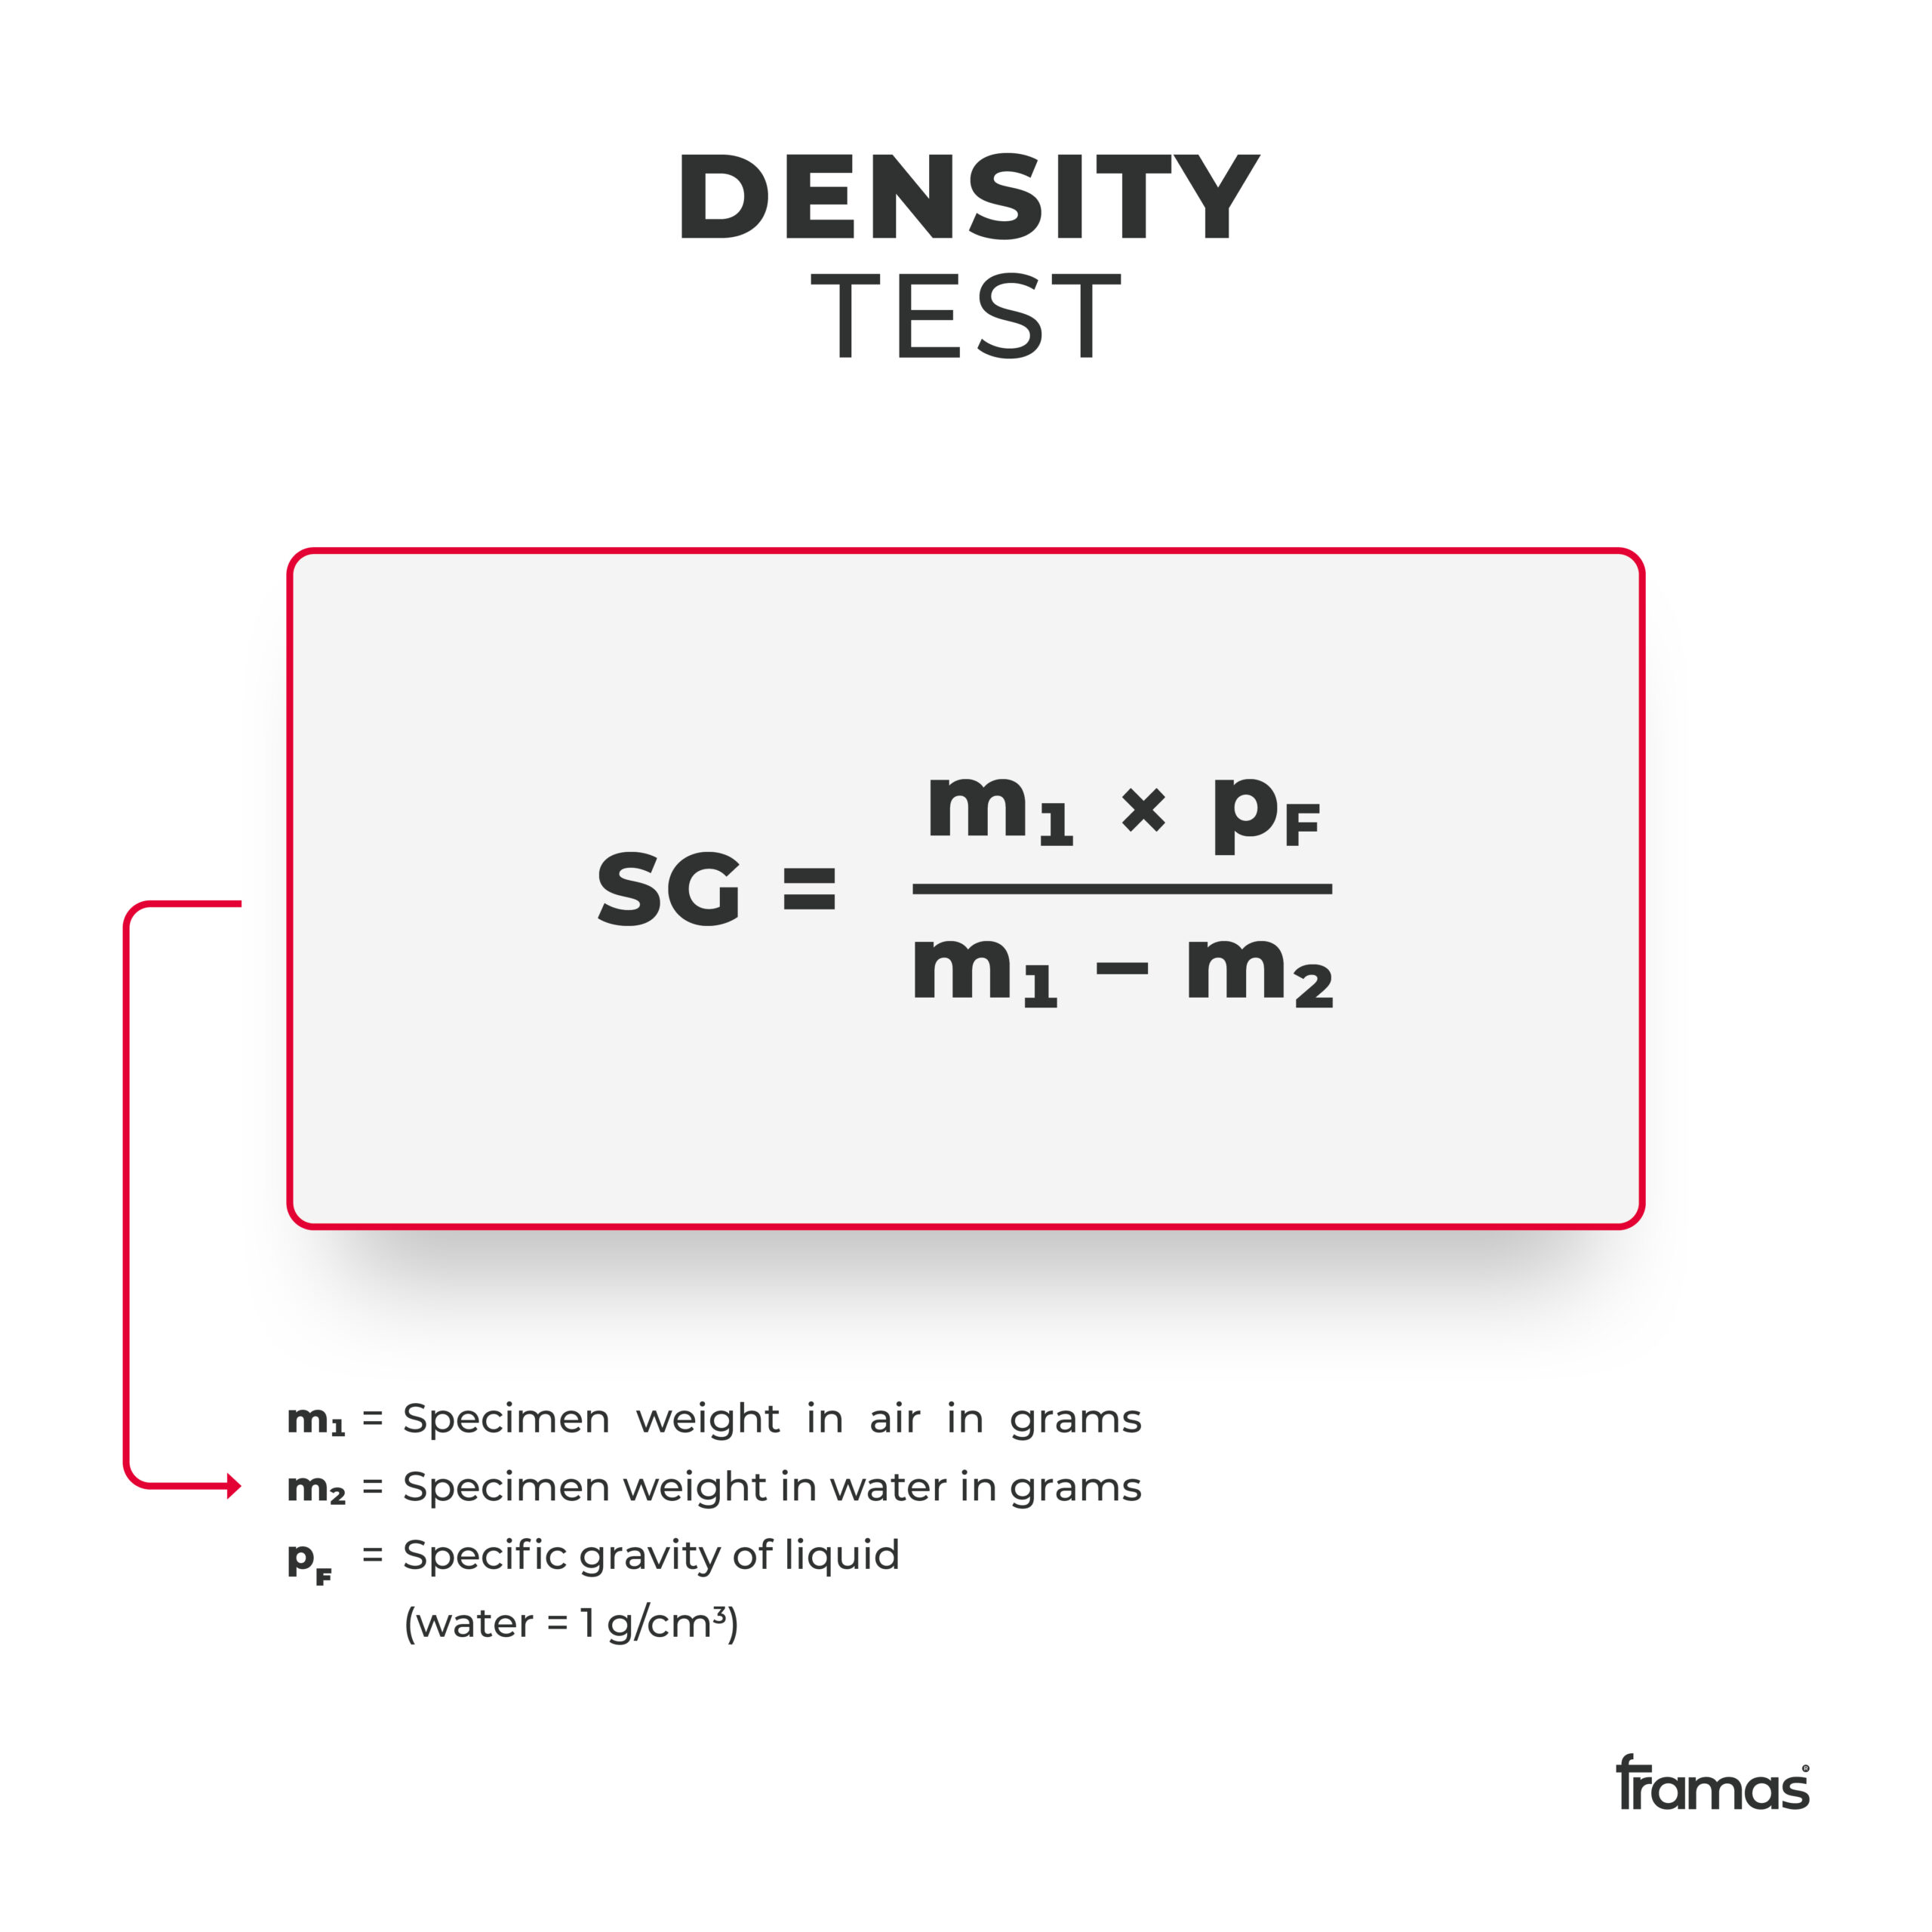
Purpose: The lighter the shoe, the lower the density. The density test is important for other tests, such as the abrasion test where the density value is needed for the formula.

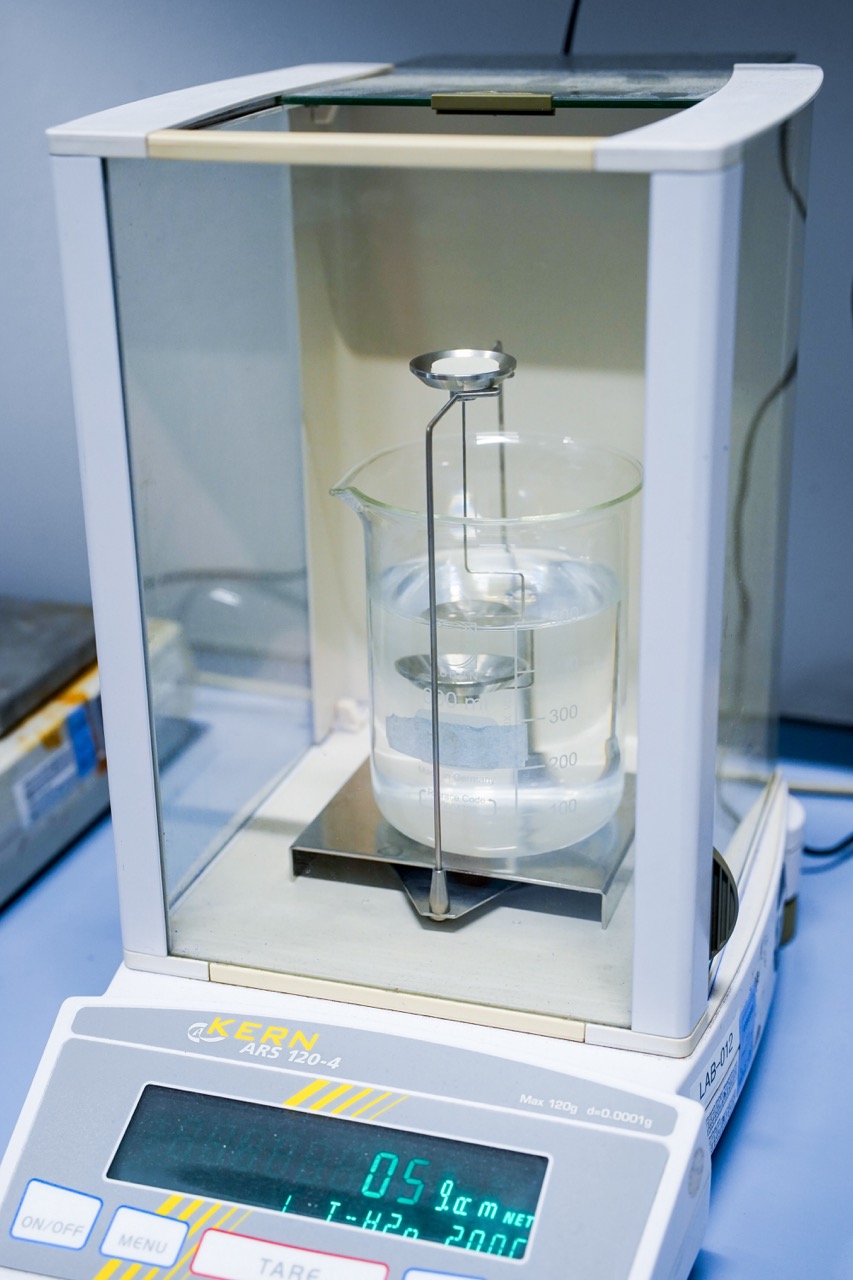
Setup and conditions: For the test to be done, a scale with a 0,0001g accuracy is needed as well as a beaker. To make sure the right density is calculated, there are a few quality assurances to take into consideration. There should be no air bubbles on the test specimen during the test, the specimen should not be in contact with the walls or bottom of the water tank. The specimen should be totally immersed when weighed in the water.

What is measured: To calculate the density, take the specimen and weigh it in the air and then in the water. Use then the values in the formula to get the specific gravity.

Interpretation of test result: The density depends on the material used. Specific materials should have specific densities. This is important for the abrasion test. The density plays an important role when it comes to midsole foaming. Modern foaming technique for high performing footwear achieve a density down to 0,19 SG. As a comparison, running TPU Outsoles have typically a density of 1,1 to 1,25 SG.

Tested materials and components: The density test is done for all materials to determine their specific density.
If you liked this article, make sure to follow our Social Media channels. You can contact us anytime via LinkedIn, Instagram & Facebook. We are happy to receive any feedback and tell us what other topics are of interest to you. We will try to address them in the near future.


Thanks for checking out our blog!

Footwear testing methods – Part 1

Footwear testing methods – Part 1

In this blog post we would like to introduce to you the commonly used testing methods within the footwear industry. It should give footwear developer, designer, and engineers a guide on what tests to select and conduct when it comes to the selection of the right materials for footwear developments.

Why do I need material testing?

The testing of footwear components and materials is key to test the sufficient functionality of the later shoe even before the shoe is designed, sampled, produced or fit tested. By choosing the right material test, footwear developers and designers save time, money and energy.

Depending on the purpose a material must fulfil on the shoe, the material requirements can be quite different. In the right choice of tests, it plays a major role in whether the component has a design function, whether the part is visible or hidden, whether the part must fulfil a safety-relevant aspect or whether the part must have a certain performance. Each sport or footwear category has its own guidelines, standard tests or benchmarks.

In general, one can say that material tests ensure the design intent, the function, the safety, manufacturability and longevity (and thus also the sustainability) of a shoe.

Navigation

Important definitions in material testing

Material tests done in the footwear industry

1. Tear strength

2. Bonding test

3. Tensile strength

4. Stud tip pulling

5. Rebound / Resilience

6. Shore hardness measurement

7. E-modulus / 3-point bending

8. Flexing tester / Fatigue bending

9. Abrasion

10. Compression set

11. Slip safety

Important definitions in material testing

Condition a material

Taking a material from its original form to a state of how it can be used in production.

Tensile tester machine

Though the name of the machine is a specific test, this machine is used for the majority of tests as it can function with different speeds and distances. For each test, it is altered and put into the start position to start the tests.

Elastic material properties

Elastically means that the material will return to its original dimensions after deforming.


Plastic material properties

Plastically means the deformation of the material. Some fractions remain permanently and non-reversible.

Yield point

The limit between elastic behavior and the beginning of plastic behavior is called yield point (or yield strength). In brittle materials the ultimate tensile strength is close to the yield point, whereas in ductile materials the tensile strength can be higher. Polymers used in footwear applications belong usually to more ductile materials.

Test Specimen

A test specimen is the material injected into a standardized shape/form to ensure that the test is comparable and can be conducted easily.

Material tests done in the footwear industry

Mechanical tests

Mechanical properties concern mostly performance requirements. These tests focus on how the material is built, what it can endure in different aspects such as stretch, humidity, and abrasion. The tests include shore hardness, tensile strength, breaking elongation, E-Modulus, tear strength, abrasion resistance, traction, fatigue bending, resilience, 3-point bending test, stud tip pulling, dome test, shrinkage, slip safety test, compression set and bonding.

1. Tear strength

Purpose: Ripping materials in footwear can turn into serious function and safety issues. Moreover, ripping damages can reduce the lifetime of a shoe and are therefore sustainability issues. A material with a good tear strength ensures that the shoe does not rip when it gets stuck somewhere. The tear strength test determines the force at which a material with a cut or slit will begin to rip.

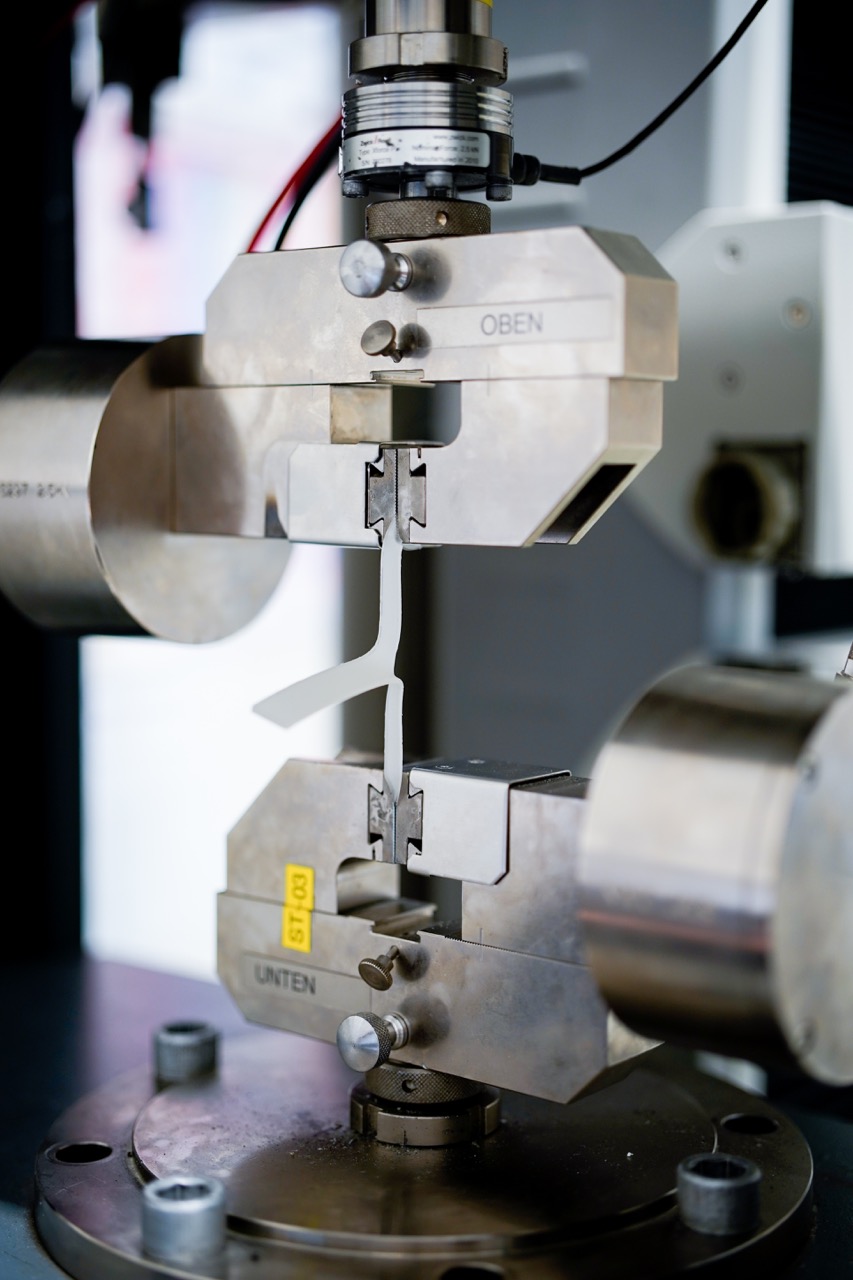
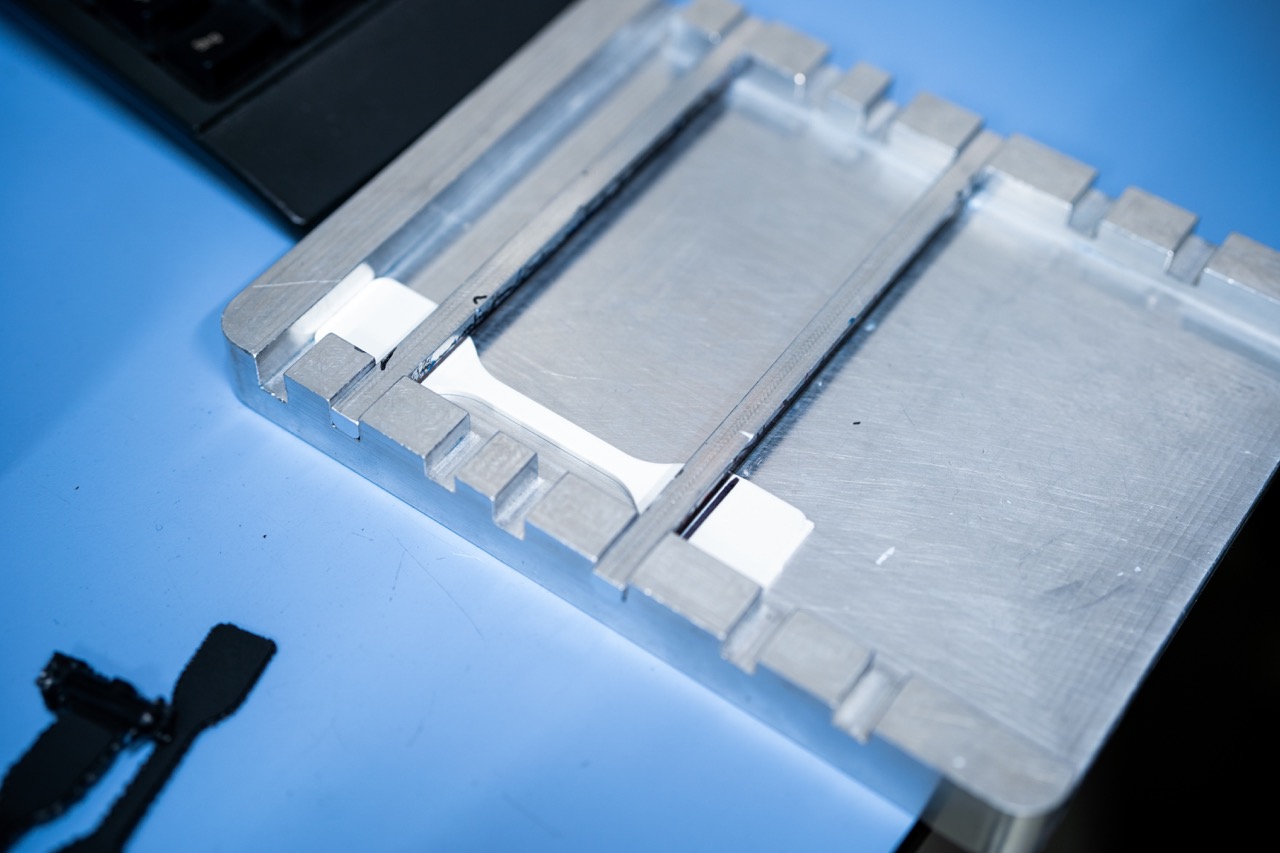
Setup and conditions: The machine used is a tensile testing machine. The test specimen has a length of 10cm, a width of 1.6cm and a thickness of 0.2cm. Each material type has its own way of being cut but the test is always conducted under normal room temperature conditions at around 23 degrees Celsius and at a relative humidity of around 50%. To start the test, the tensile machine must be set to the required test position which involves the right distance between the clamps and at the right velocity. Then, the load is set to zero and the test specimen with the pre-cut tear is placed between the clamps so that each shank of the test piece is held by the upper and the lower clamp. The test is then run at a predefined speed until the material totally breaks. Depending on the material, the tensile machine will stretch the material at different speeds.

What is measured: The measured value is the so called “moment of force” in Newton millimeters (N/mm). It tells us how much force was needed in the test to tear the test specimen 1 millimeter.

Interpretation of test result: The more force to tear a millimeter material is needed, the better the material will perform in your shoe. The required minimum value of the test to determine if the test passed or failed depends heavily on the application of the footwear and the individual footwear brands standards. You can say that usually footwear application should exceed a tear strength of 15 N/mm to succeed the tear strength test. The longer the test specimen takes to break, does not mean that the material is better. To compare two tested materials in their tear strength the same base force must be used.

Tested materials and components: The tear strength test is reasonable to conduct for a vast of materials. TPU and rubber outsoles are often tested.

2. Bonding test

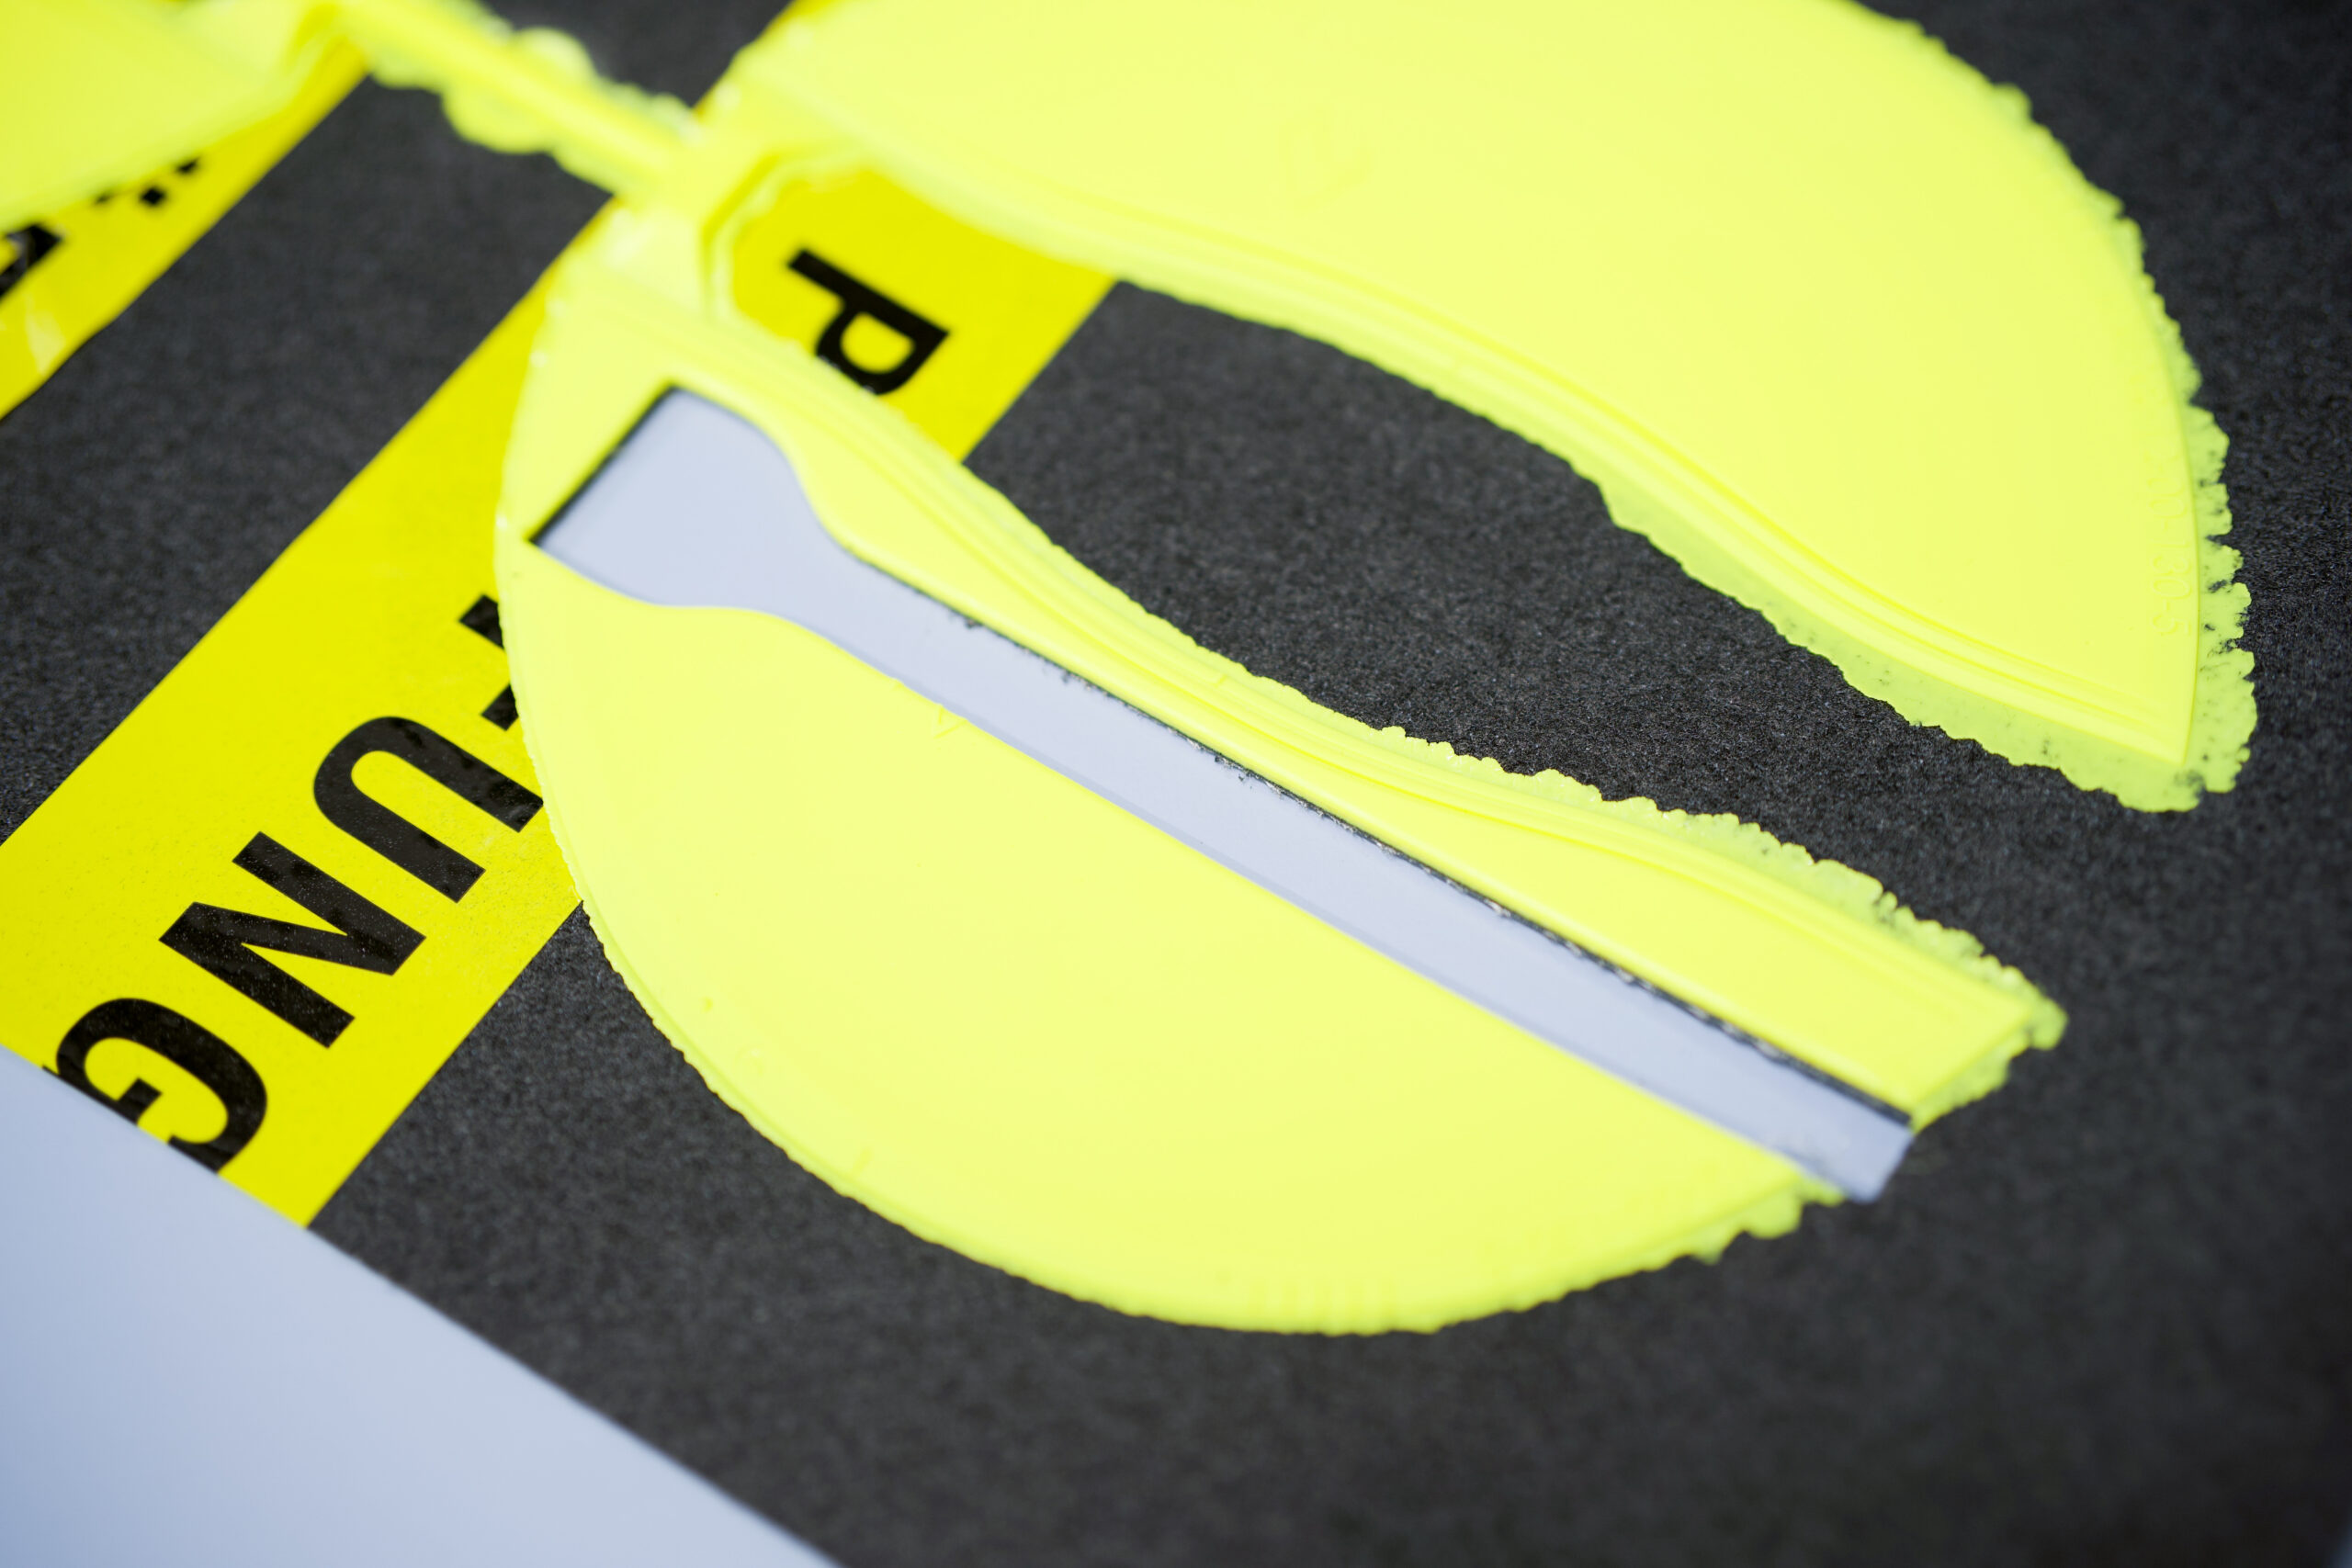
Purpose: Each shoe consists of different materials which are glued or stitched together. In order to guarantee a good performance and a long endurance they must hold the shoe together. The bonding test is used to see how much force is needed to separate two materials or in other words how good a material bonds to another one. This is tested e.g. to check the bonding ability of an out- and midsole.

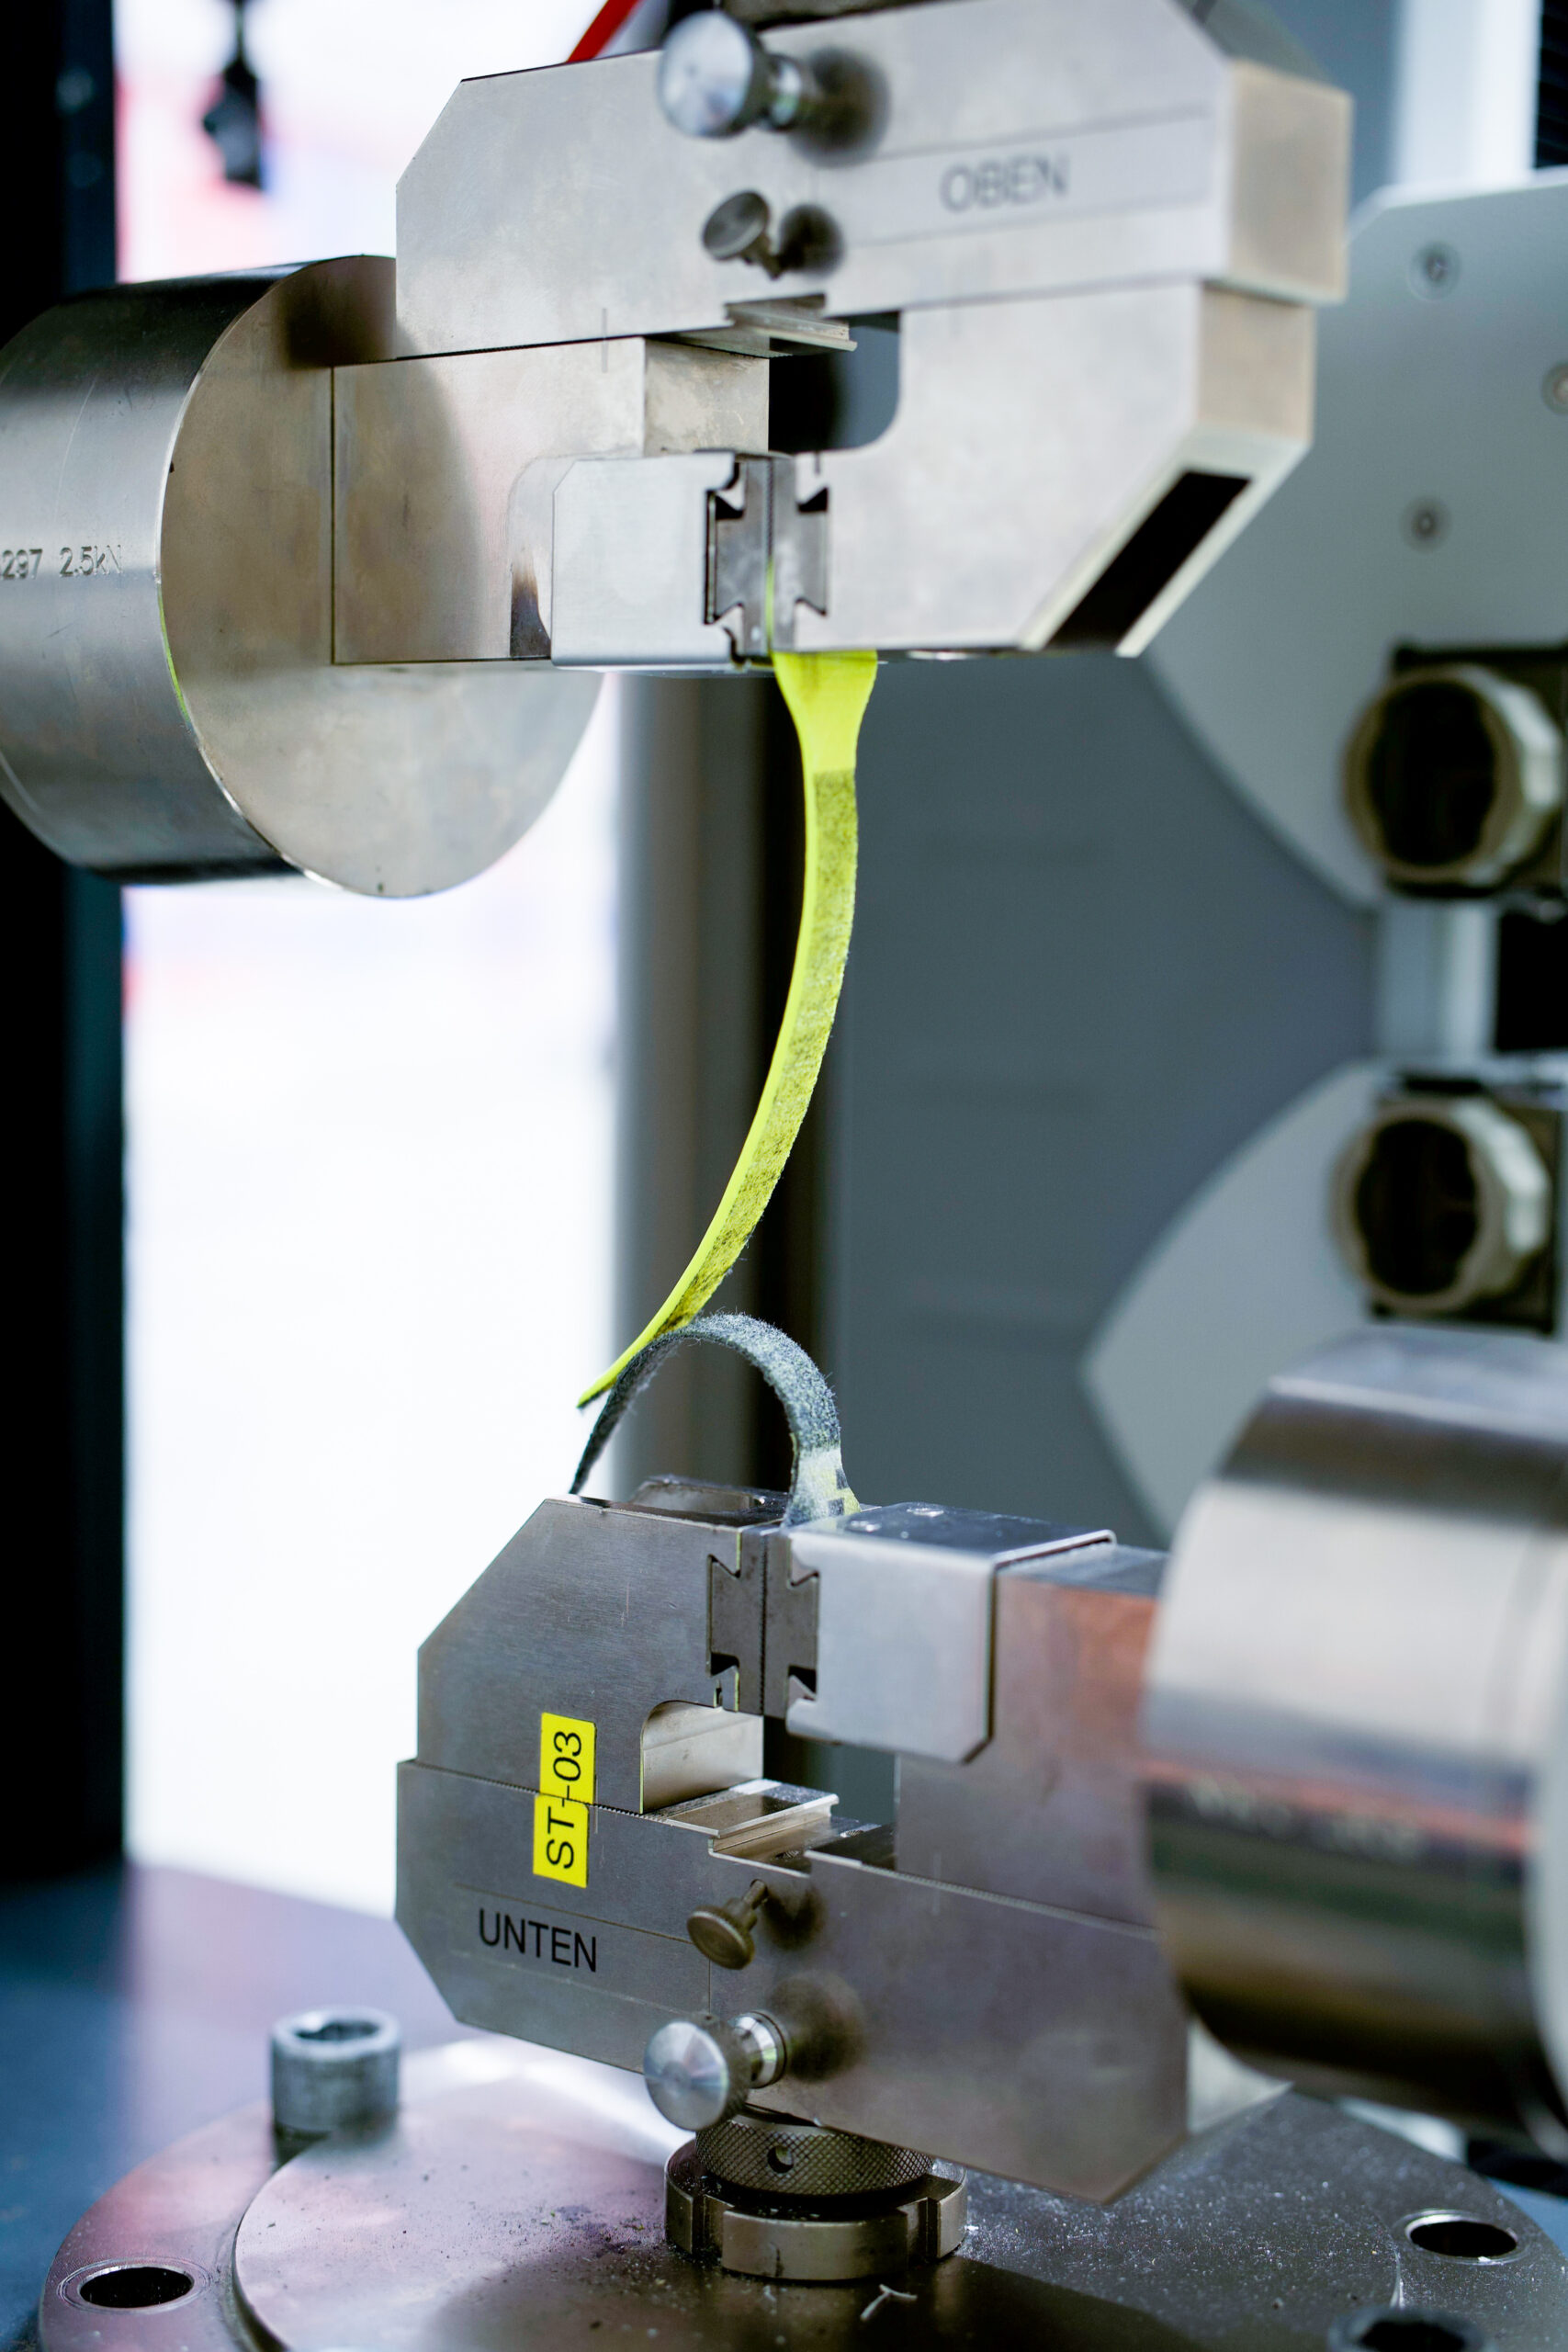
Setup and conditions: This test is done using a tensile strength testing machine. Four parts are tested per fabric for every size and color. The specimen is inserted into one clamp and the material into the other clamp. The machine is then started and observed until the two fabrics get separated. This test is similar to the tear strength test, the only difference is, that two materials are tested instead of one.

What is measured: Besides tensile strength and elongation of break, the bonding test takes especially the adhesion strength into consideration.

The adhesion strength (AS) [N/cm] is the relation of the recorded force and the width of the material specimen. It shows how much force is needed to initially start a detaching process of the bonding.

Interpretation of test result: Typical requirements for a footwear bonding are a minimum adhesion strength of 70 N/cm for polymers with a hardness >80 Shore A and 40 N/cm <80 Shore A.

Tested materials and components: There are several combinations of materials that could be tested: midsole with outsole, insole with midsole, inlining with toe caps and so on.

3. Tensile strength

Purpose: Some footwear categories require shoes to function under extreme high pressure, even though the material is stiff, which is usually an indicator for less elasticity. For instance, the material of track & field sprinting plate must be rigid to ensure the perfect power transition from runners body on the ground. And still, it must be flexible and withstand highest forces during a sprint competition without breaking. Here the tensile stress test is used. It tells you the maximum stress that your footwear material can withstand while being strained and stretched before it breaks.

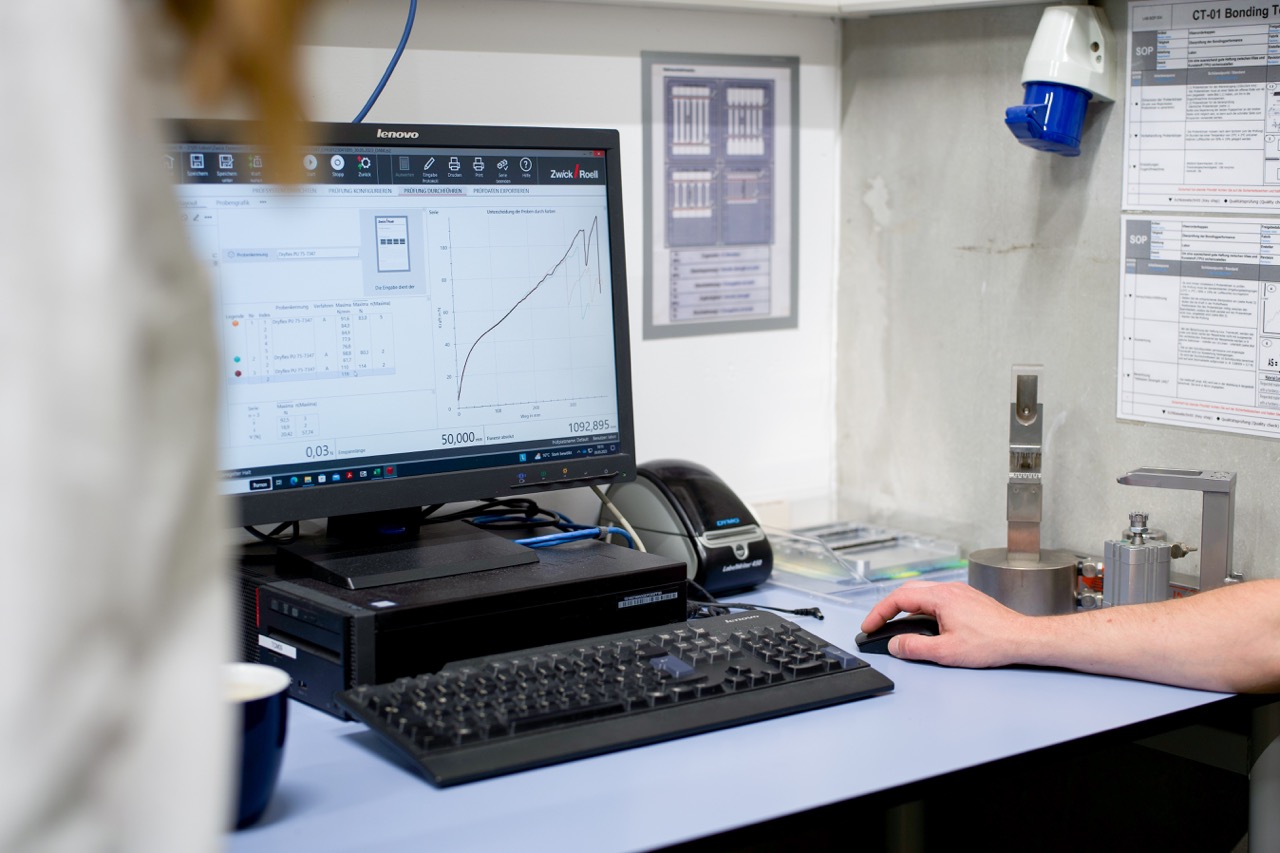
Setup and conditions: The tensile strength test uses the tensile testing machine, which simulates material stress versus strain. The machine records the stress versus strain over time on the test specimen material whilst the distance increases.

To start the test, the tensile machine is set to the required test position and velocity (predefined depending on brand and footwear category specific requirements). Then, the specimen is clamped, and the load of the machine is set to zero. Finally, the machine is run at the required speed until the material breaks. 

What is measured: The tensile strength test records two important values: Elongation at break [%] and the Tensile strength [Mpa]. The (ultimate) tensile strength is shown in the unit MegaPascal [Mpa], which is a basic unit of pressure or tension. The MegaPascal value shown in the test is the force needed to break the material entirely.

The elongation at break shows how much distance a material can be stretched compared to its original shape before it breaks in percentage. To measure the value, the final length of the materials is compared to its original length. The value is a measurement showing the amount a material will elastically or plastically deform up to fracture. Polymers used in footwear applications belong usually to more ductile materials.

Interpretation of test result: A higher percent elongation usually indicates a better-quality material when combined with good tensile strength. Of course, for evaluation, there exist reference values (benchmarks) depending on brand, footwear categories, and specific footwear component a material must fulfil.

A typical requirement for footwear outsoles is a minimum tensile strength of 12 Mpa and a minimum elongation at break of 400%.

Tested materials and components: Can be used for all materials, components, and complete uppers.

4. Stud tip pulling

Purpose: The stud tip pulling test is used on soles with studs (cleated shoes) such as football shoes. Studs should never bend, break, or drop off football plates, so this must be tested before production.

Setup and conditions: To test, a tensile strength machine with specialized stud tip pulling installation is used. The machine pulls the studs plates until the stud breaks. The test is repeated with every single stud of a football plate.

What is measured: For this test, two parameters are decisive

  1. the location of break
  2. the maximum force in N

Interpretation of test result: Depending on the location of the breaking points, there are different conclusions for the quality of the stud stability. The first parameter to look at, is the location of break. There are three different cases of how the bonding could break:

Case 1: The stud breaks exactly in between stud and outsole plate material. It is considered as a natural break and approves the stability of the stud and outsole plate.  

Case 2:  The stud cuts-off only on the stud material. In that case the bonding strength of the outsole plate and the stud material exceeds the basic strength of the stud itself. Here further assessment of the maximum force (in Newton) would be necessary.

Case 3: The cut-off is located on the outsole plate material. In that case the bonding strength of the outsole plate and the stud material exceed the basic strength of the outsole plate. Here further assessment of the maximum force (in Newton) would be necessary.

The best possible location of break would be case 2. It is already a first indicator, that the bonding of plates and studs is more stable than the tensile strength of the softest element of the shoe. If case 1 or 3 occurs, the maximum force shown on the tensile strength machine must exceed brand and category requirements.

Tested materials and components: Running plates with plastic spikes, cleats with studs of the footwear categories Football, American Football, Baseball and Rugby. Metal cleats are not possible.

5. Rebound / Resilience 

Purpose: It is not uncommon for the rebound capability of a shoe to play a major role in marketing strategy brands have for their newest footwear release. Therefore, footwear developers often keep a close eye on the rebound / resilience tests to make sure, the brands marketing can hold what they are promising: The material is bouncing or is contrary shock absorbing. The test can tell you exactly that about your material.

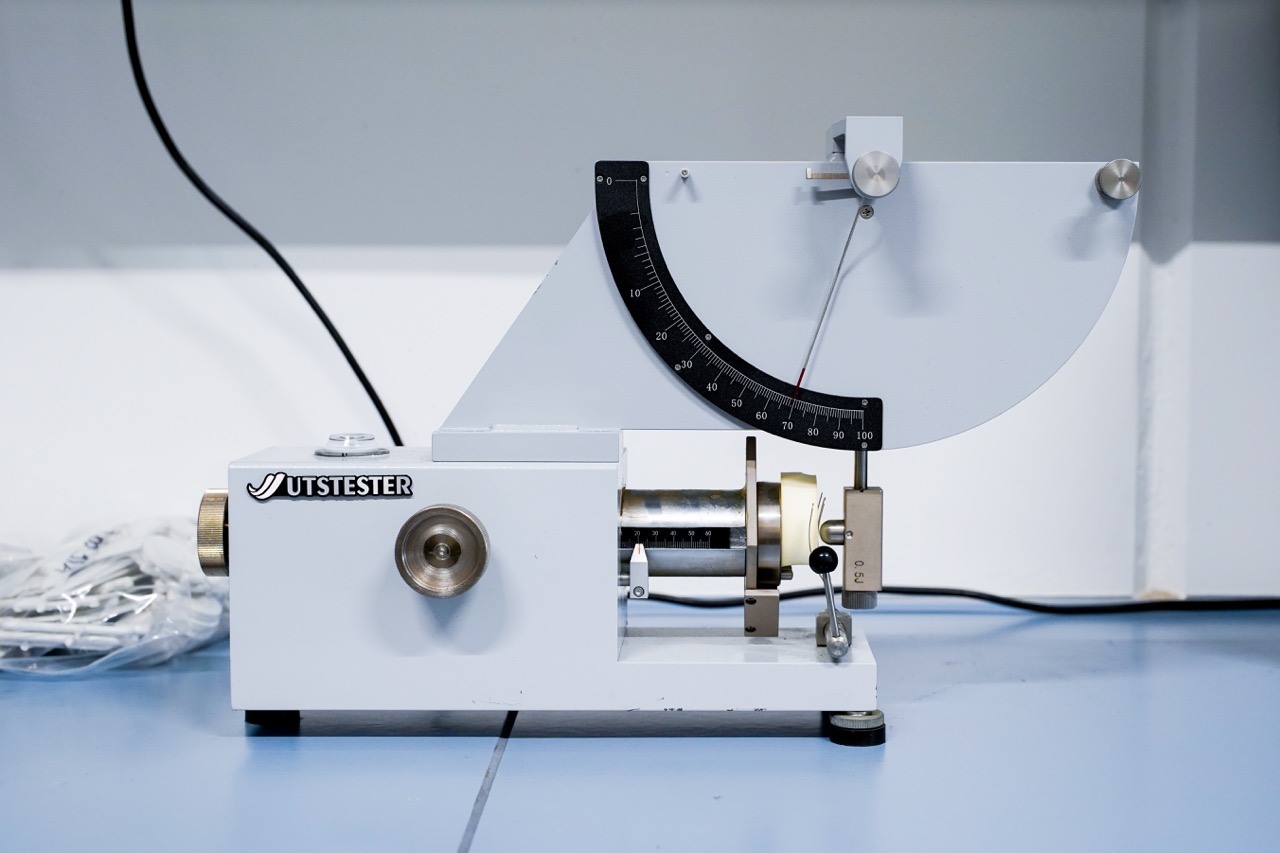
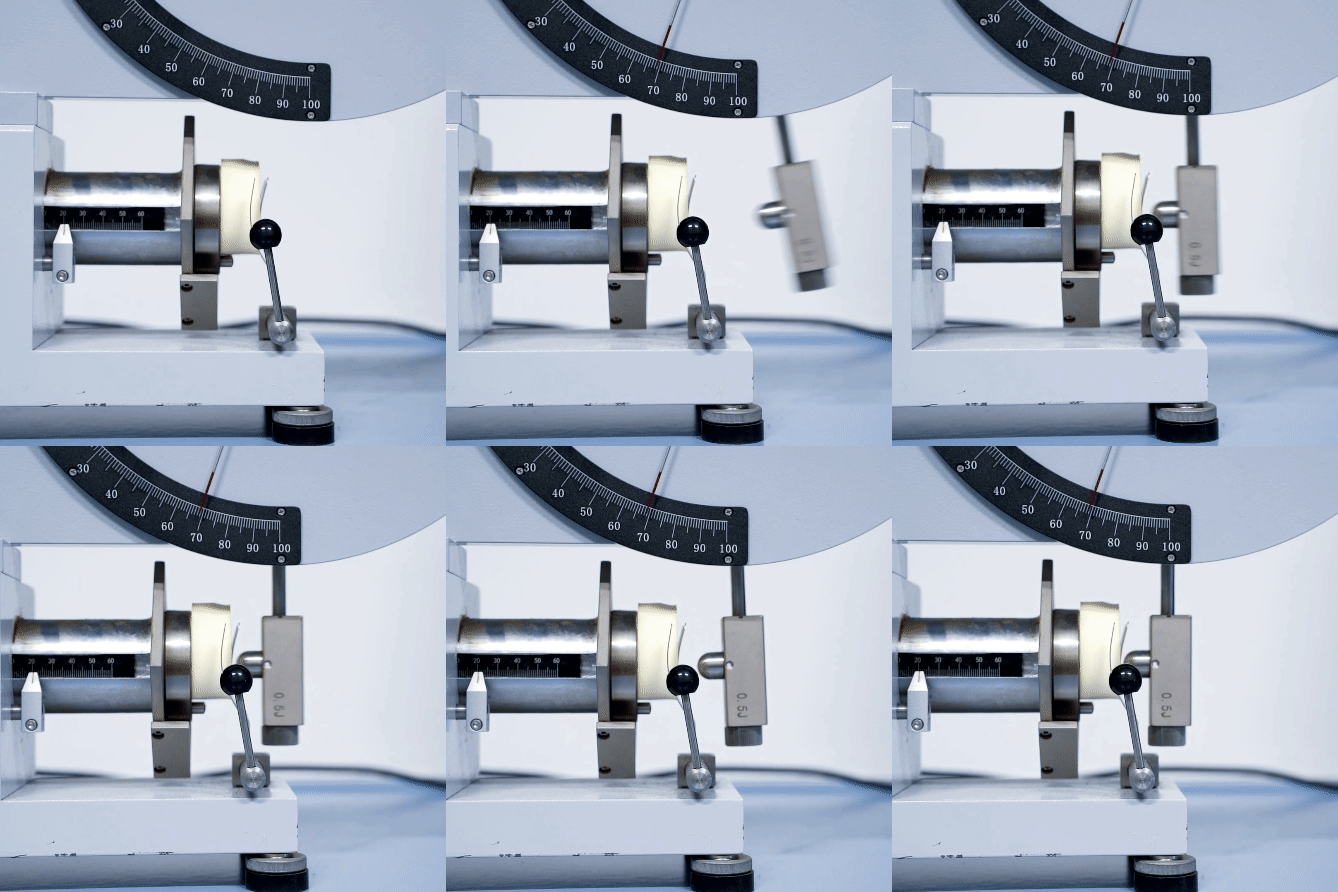
Setup and conditions: The test specimen should have a diameter of 29-53mm and a thickness of around 11mm. This is then placed in the clamping device. The hammer should be placed in a 90-degree vertical direction to the test specimen and finely touching it. The pendulum is dropped onto the same part of the test specimen 3 times from a horizontal position to mechanically condition the test specimen. The pendulum is dropped another 3 times and the elasticity is read from the scale. The average of the last 3 readings is the result which is then reported.

What is measured: The test shows how much percentage of the impact shock rebound from the material (and how much percentage of the impact shock a being absorbed by the material).

Interpretation of test result: Depends on the footwear category and component and specific brand requirements. You can say, that a midsole should have a value higher than 60%.

Tested materials and components: The rebound / resilience test can be applied to all rubbers, elastomers and midsole and sock liner foam materials. Outsoles do not require the rebound test.

6. Shore hardness measurement

Purpose: The hardness or shore of a component is mostly important for the manufacturability of a shoe. It also gives footwear designers and developers an indication of how flexible the material can be for the desired application. To get a clue or doublecheck a raw material suppliers hardness declaration, the hardness/shore measurement test will help to determine precise hardness/shore values.

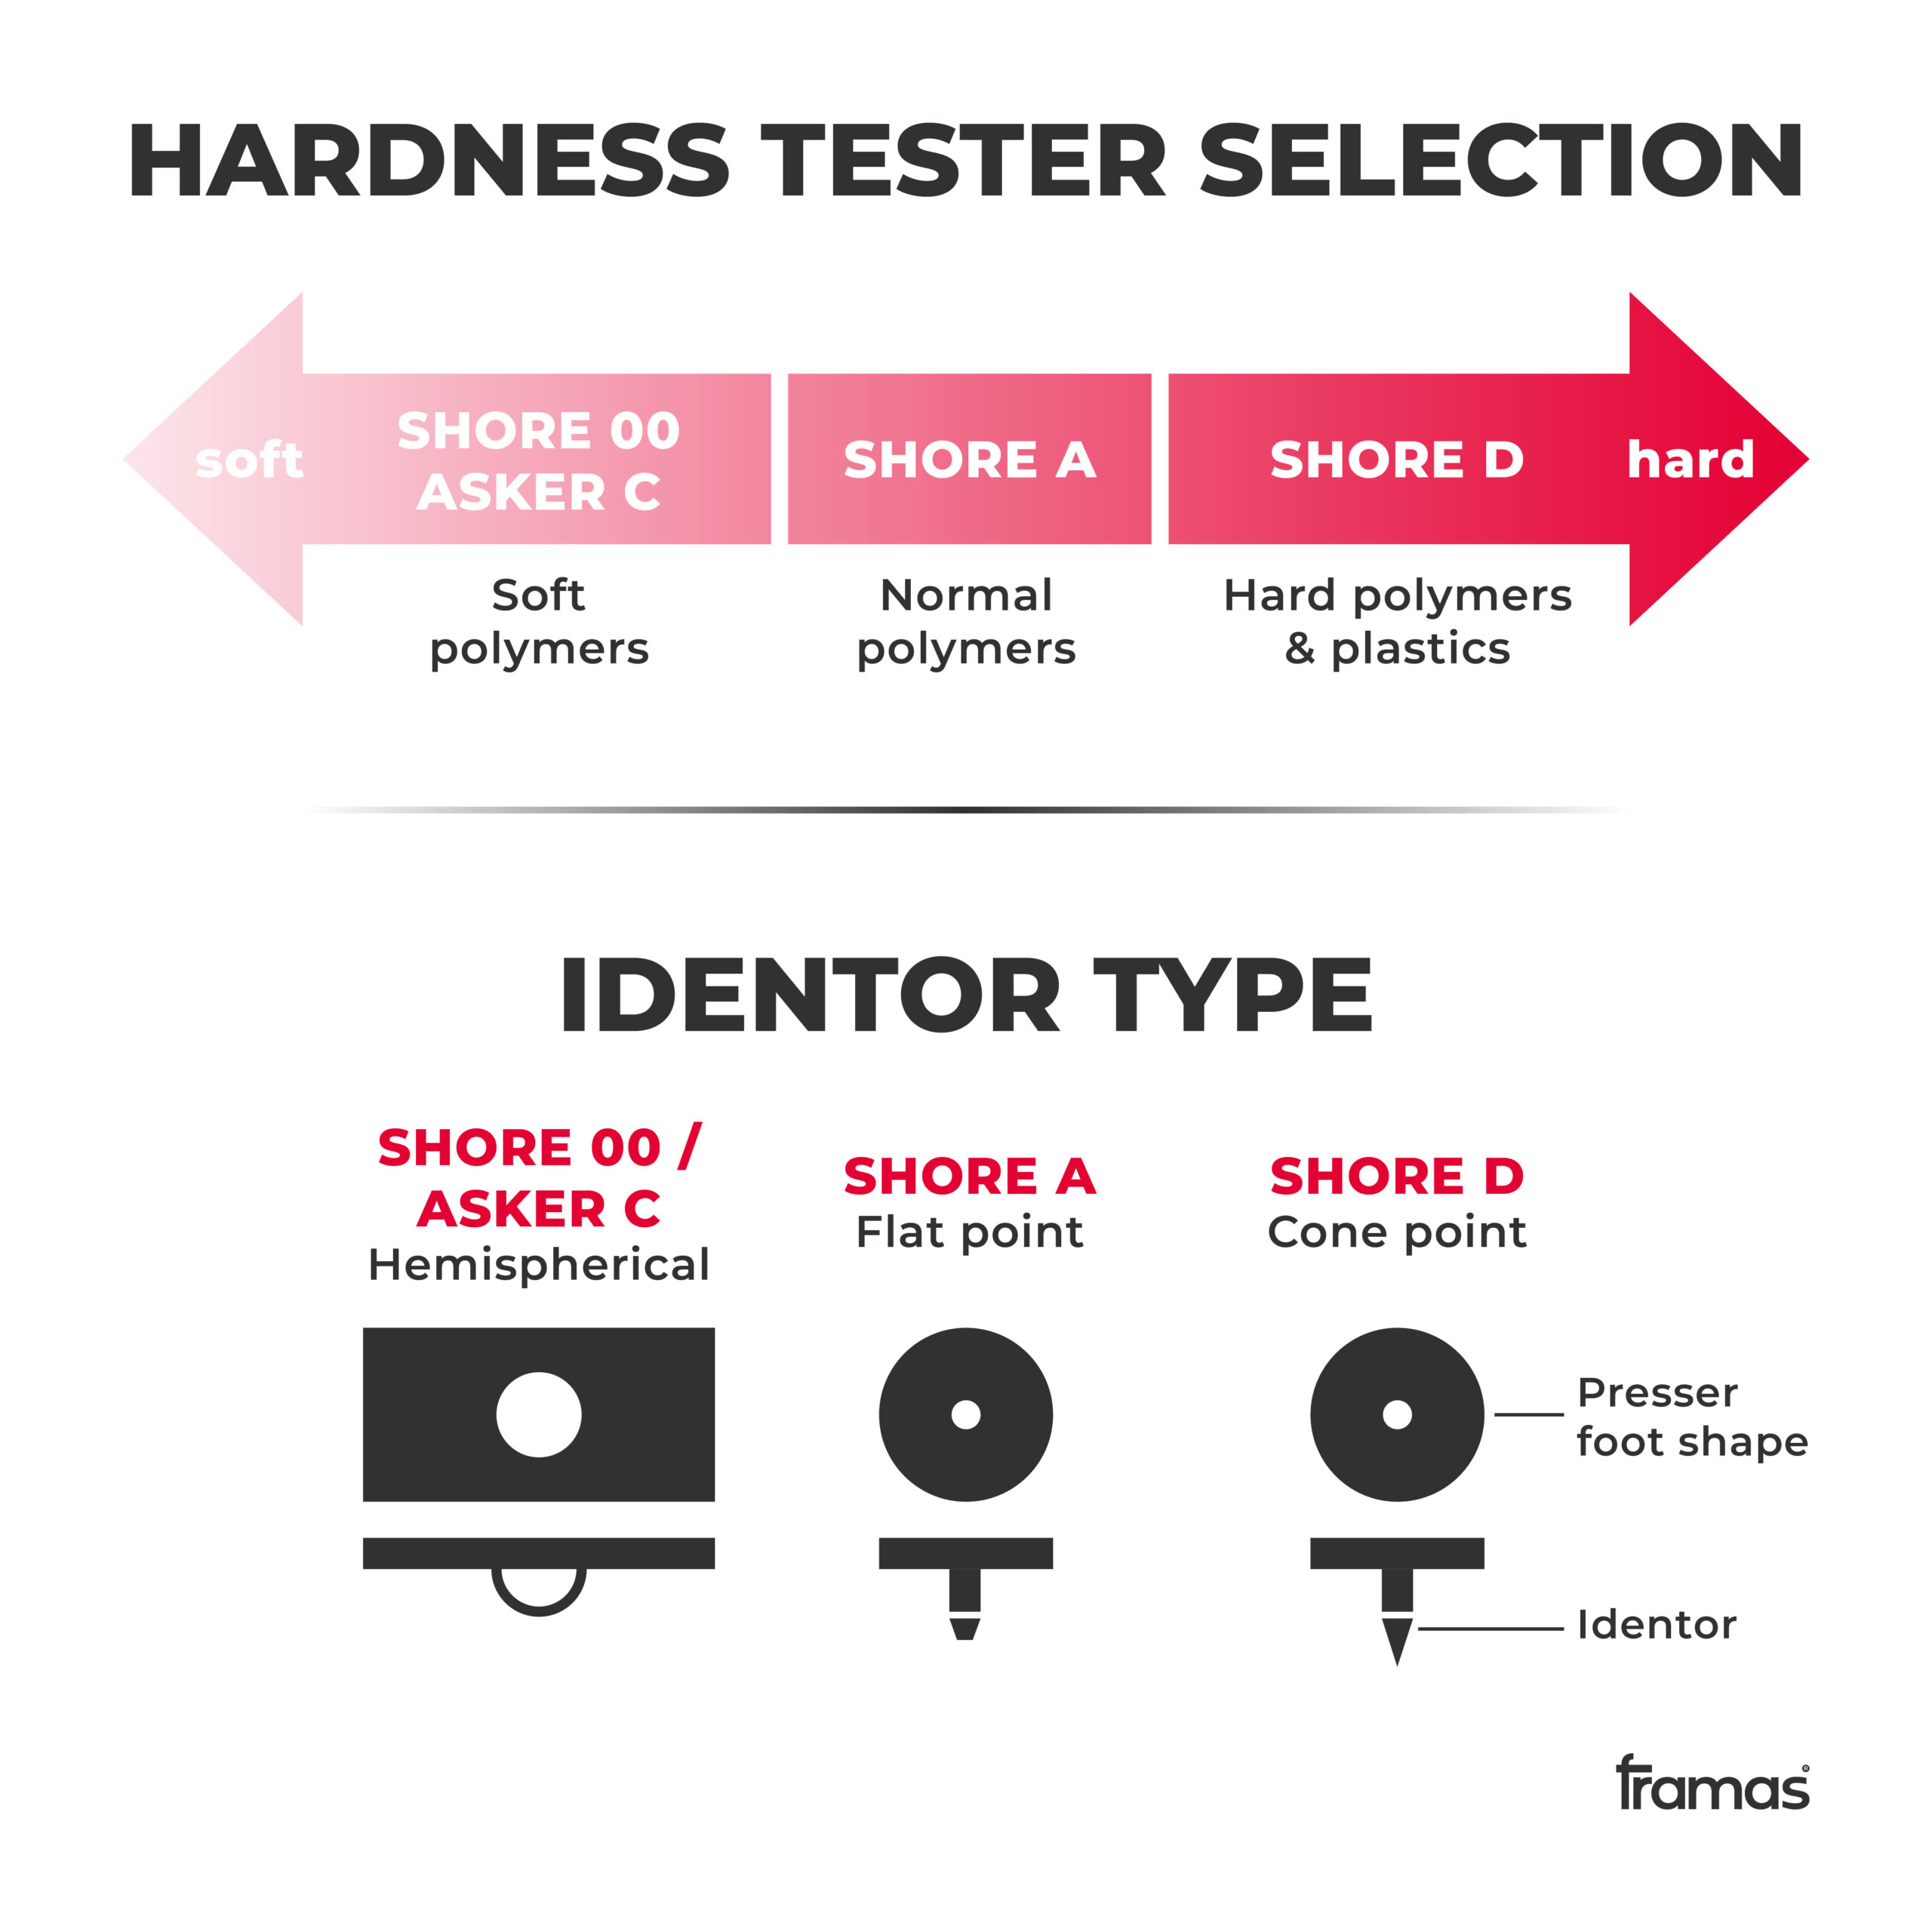
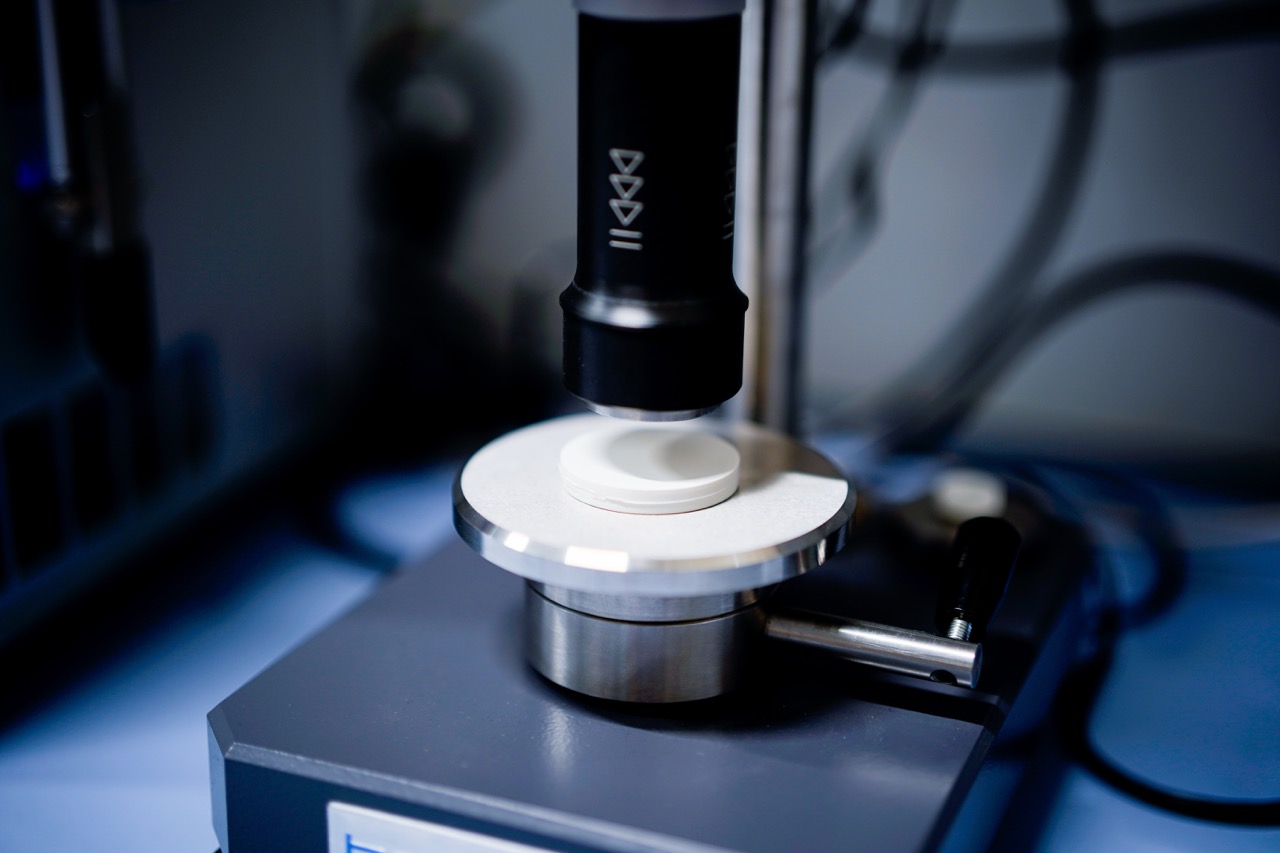
Setup and conditions: A durometer shore and a durometer asker are used. The hardness/shore measurement test determines the resistance of a footwear material against the penetration of a body, of a specified shape, under a specified loading. This test has 3 main conditions. For hard materials, shore D, the machine uses a needle. For foam materials such as midsoles, a machine with a ball tip is used. A softer material, shore A, undergoes a machine with a flat needle tip.

First, the test needs to be done at 23 degrees with a relative humidity of 50%. Further, all materials need to be conditioned for 24 hours before testing and this should be mentioned in the test report. Lastly, the storage room must be air conditioned, and the specimens should be stored on trollies. The general steps for the test procedure starts by placing the durometer on the adaptor plate and fixing it with the set screw. Switch the machine on and wait until you hear an acoustic signal to start the measurement. Press the specimen slowly against the durometer tip until the yellow light appears and keep the pressure constant until the light turns green. The hardness is then displayed on the machine and evaluated with a given hardness range given by the brand.

What is measured: The Shore 00 Hardness Scale measures rubbers and gels that are very soft. Asker C measures soft rubber, sponges, and foams. The Shore A Hardness Scale measures the hardness of flexible mold rubbers and polymers that range in hardness from very soft and flexible, to medium and somewhat flexible, to hard with almost no flexibility at all. Semi-rigid polymers can also be measured on the high end of the Shore A Scale. The Shore D Hardness Scale measures the hardness of hard rubbers, semi-rigid polymers and hard polymers. 

Interpretation of test result: The interpretation of the results strongly depends on the desired footwear application. A running outsole has typically a hardness of 60–80 shore A. Modern running midsoles have typically a shore of 35-55 Asker C. 

Tested materials and components:  All polymers and components can be tested.

7. E-modulus / 3-point bending

Purpose: In a shoe, the forefoot is where the maximum bending stress takes place so it is important to know how much bending it can endure. The purpose is to assess the resistance of a material to tearing and tear growth under a dynamic fatigue bending load. This is for example useful for heel counter materials to make sure it does not break when people slip into their shoes but the test is done most often on soles.

Setup and conditions: The machine used is the tensile testing machine, plus a specialized bending fixture with movable supports and a caliper for measuring accurately. The material specimen (outsole) is placed onto two supporting points so that the stamp (placed in the upper clamp of the outsole) is in the middle of the bending area. The test is normally conducted under 23 celsius (Room temperature) or -20 celsius and 50% humidity. When everything is set, the tensile machine is run in a downwards direction at brand required velocity until the material breaks or a loss in force can be seen on the diagram on the computer.

What is measured: The test measures the bending stress (BS) in “Newtons per square millimeter” N/mm². It is also known as the flexural E-modulus (modulus of elastic) in MPa (N/mm² is equal to MPa) which is the ratio of stress to strain during flexural deformation.

Interpretation of test result: A lower BS indicates that the material bends easily and is stretchy. Opposed, a high BS refers to a stiffer material with low bending possibilities. The higher the resisted bending stress, the better.

Tested materials and components: The flexing / fatigue bending test is used for all bendable materials not harder than shore A 98.

8. Flexing tester / Fatigue bending

Purpose: The 3-point-bending test determines the maximum bending stress a footwear component can withstand and the tendency for a footwear component material to resist bending. In the footwear industry, it is often used to determine the bending functionality of especially fiber reinforced materials. For instance, Soccer or running outsoles need to have a certain bending flexibility whilst being exposed to highest exposed forces. Thus, the test can figure out footwear bending properties already at development stage.

Setup and conditions: The machine used is the Ross Flexing device. The first step is to bend the sole until squared edges are formed then draw a line cross the sole where the bends are. The sole is then put into the machine and the part with the bends gets flexed 250 000 times at 23 and -10 celsius to mimic the usage of the shoe. The deformation angle is 60 celsius.

What is measured: The amount of bend cycles a material can endure before breaking.

Interpretation of test result: If the sole did not break after 250,000 bend cycles, then it’s a success. The specimen is checked upon every 10-15 minutes to make sure it did not break in between. 

Tested materials and components: The test is conducted on all fiber reinforced and composite materials, particularly on footwear categories with cleated outsoles.

9. Abrasion

Purpose: The purpose is the measurement of the volume loss of the tested piece to see how good its durability is. The better abrasion resistance is the more miles a runner can run with his shoe. The higher the abrasion resistance the less material we need for manufacturing of an e.g. outsole.

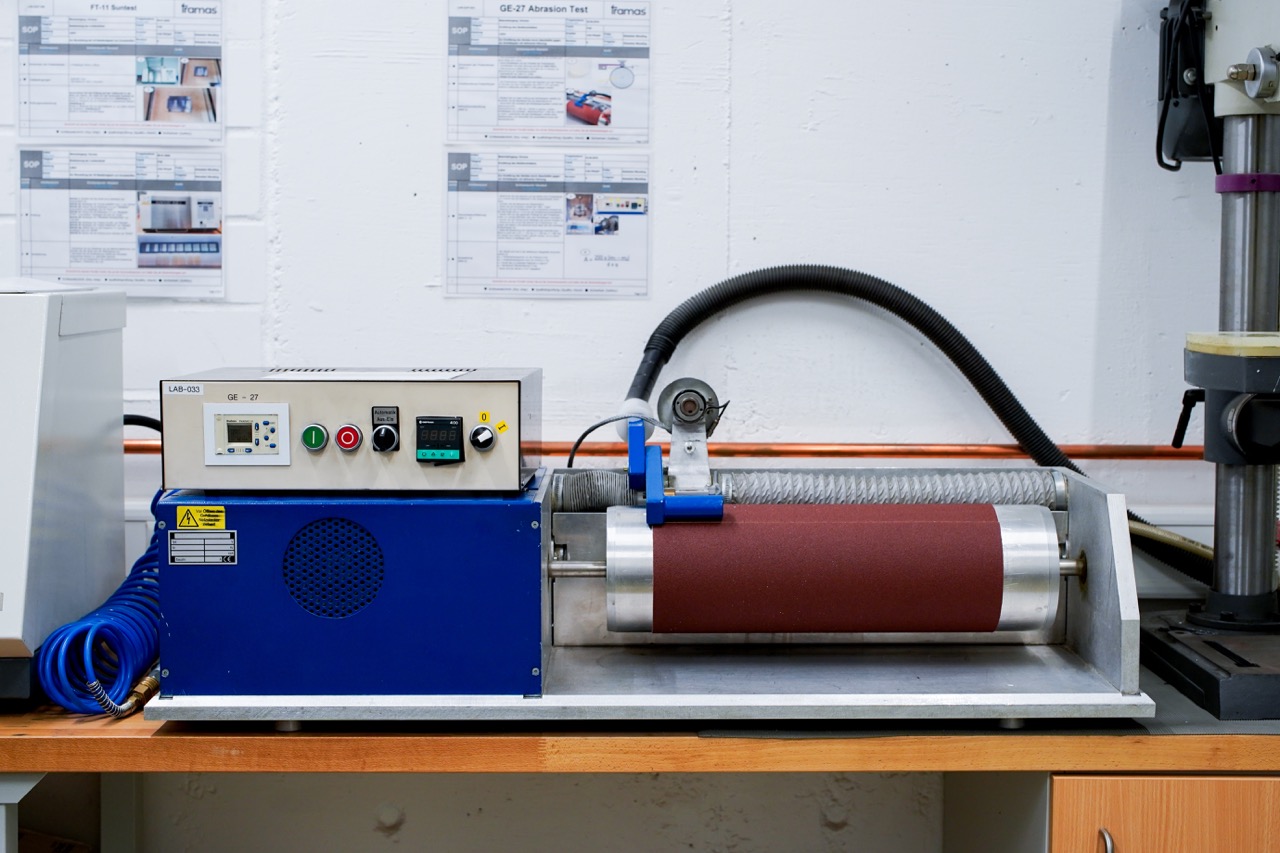
Setup and conditions: The abrasion tests simulate 40-meter of intensive labor on a rough surface. The used machine is the DIN abrasion tester. This test uses sandpaper with a defined grade which is rubbed onto a sample body to mimic the sole of the shoe rubbing onto a surface when it is being used. To prepare, the materials must be conditioned at least 16 hours before testing in standard room conditions (23 degrees and a humidity of 50%). The test specimen should also have a diameter of 16mm and a thickness of 6mm. The specimen is weighted before testing and the density is measured as well. The test is conducted with 3 test specimens.

What is measured: The test is conducted, and the specimen is weighed again to see the effect of the abrasion. To evaluate the results, the loss in mass (average of the two values from before and after the test) is converted into volume loss from the density of the material concerned.

Interpretation of test result: For the abrasion test, the lower the abrasion the better. A soft material is permitted to have less abrasion resistance than a harder material.

Tested materials and components: Materials used for this test are all types of rubber and plastic outsole materials.

10. Compression Set

Purpose: Footwear foam midsoles are exposed to constant compression while walking, running, jumping, or standing. The compression could harm the function and the design of footwear over time. To ensure a high durability of the midsole foam, the compression set of a foam is determined during development processes. The test determines the ability of a midsole foam to return to its original thickness after being compressed/deflected at certain temperature and duration.

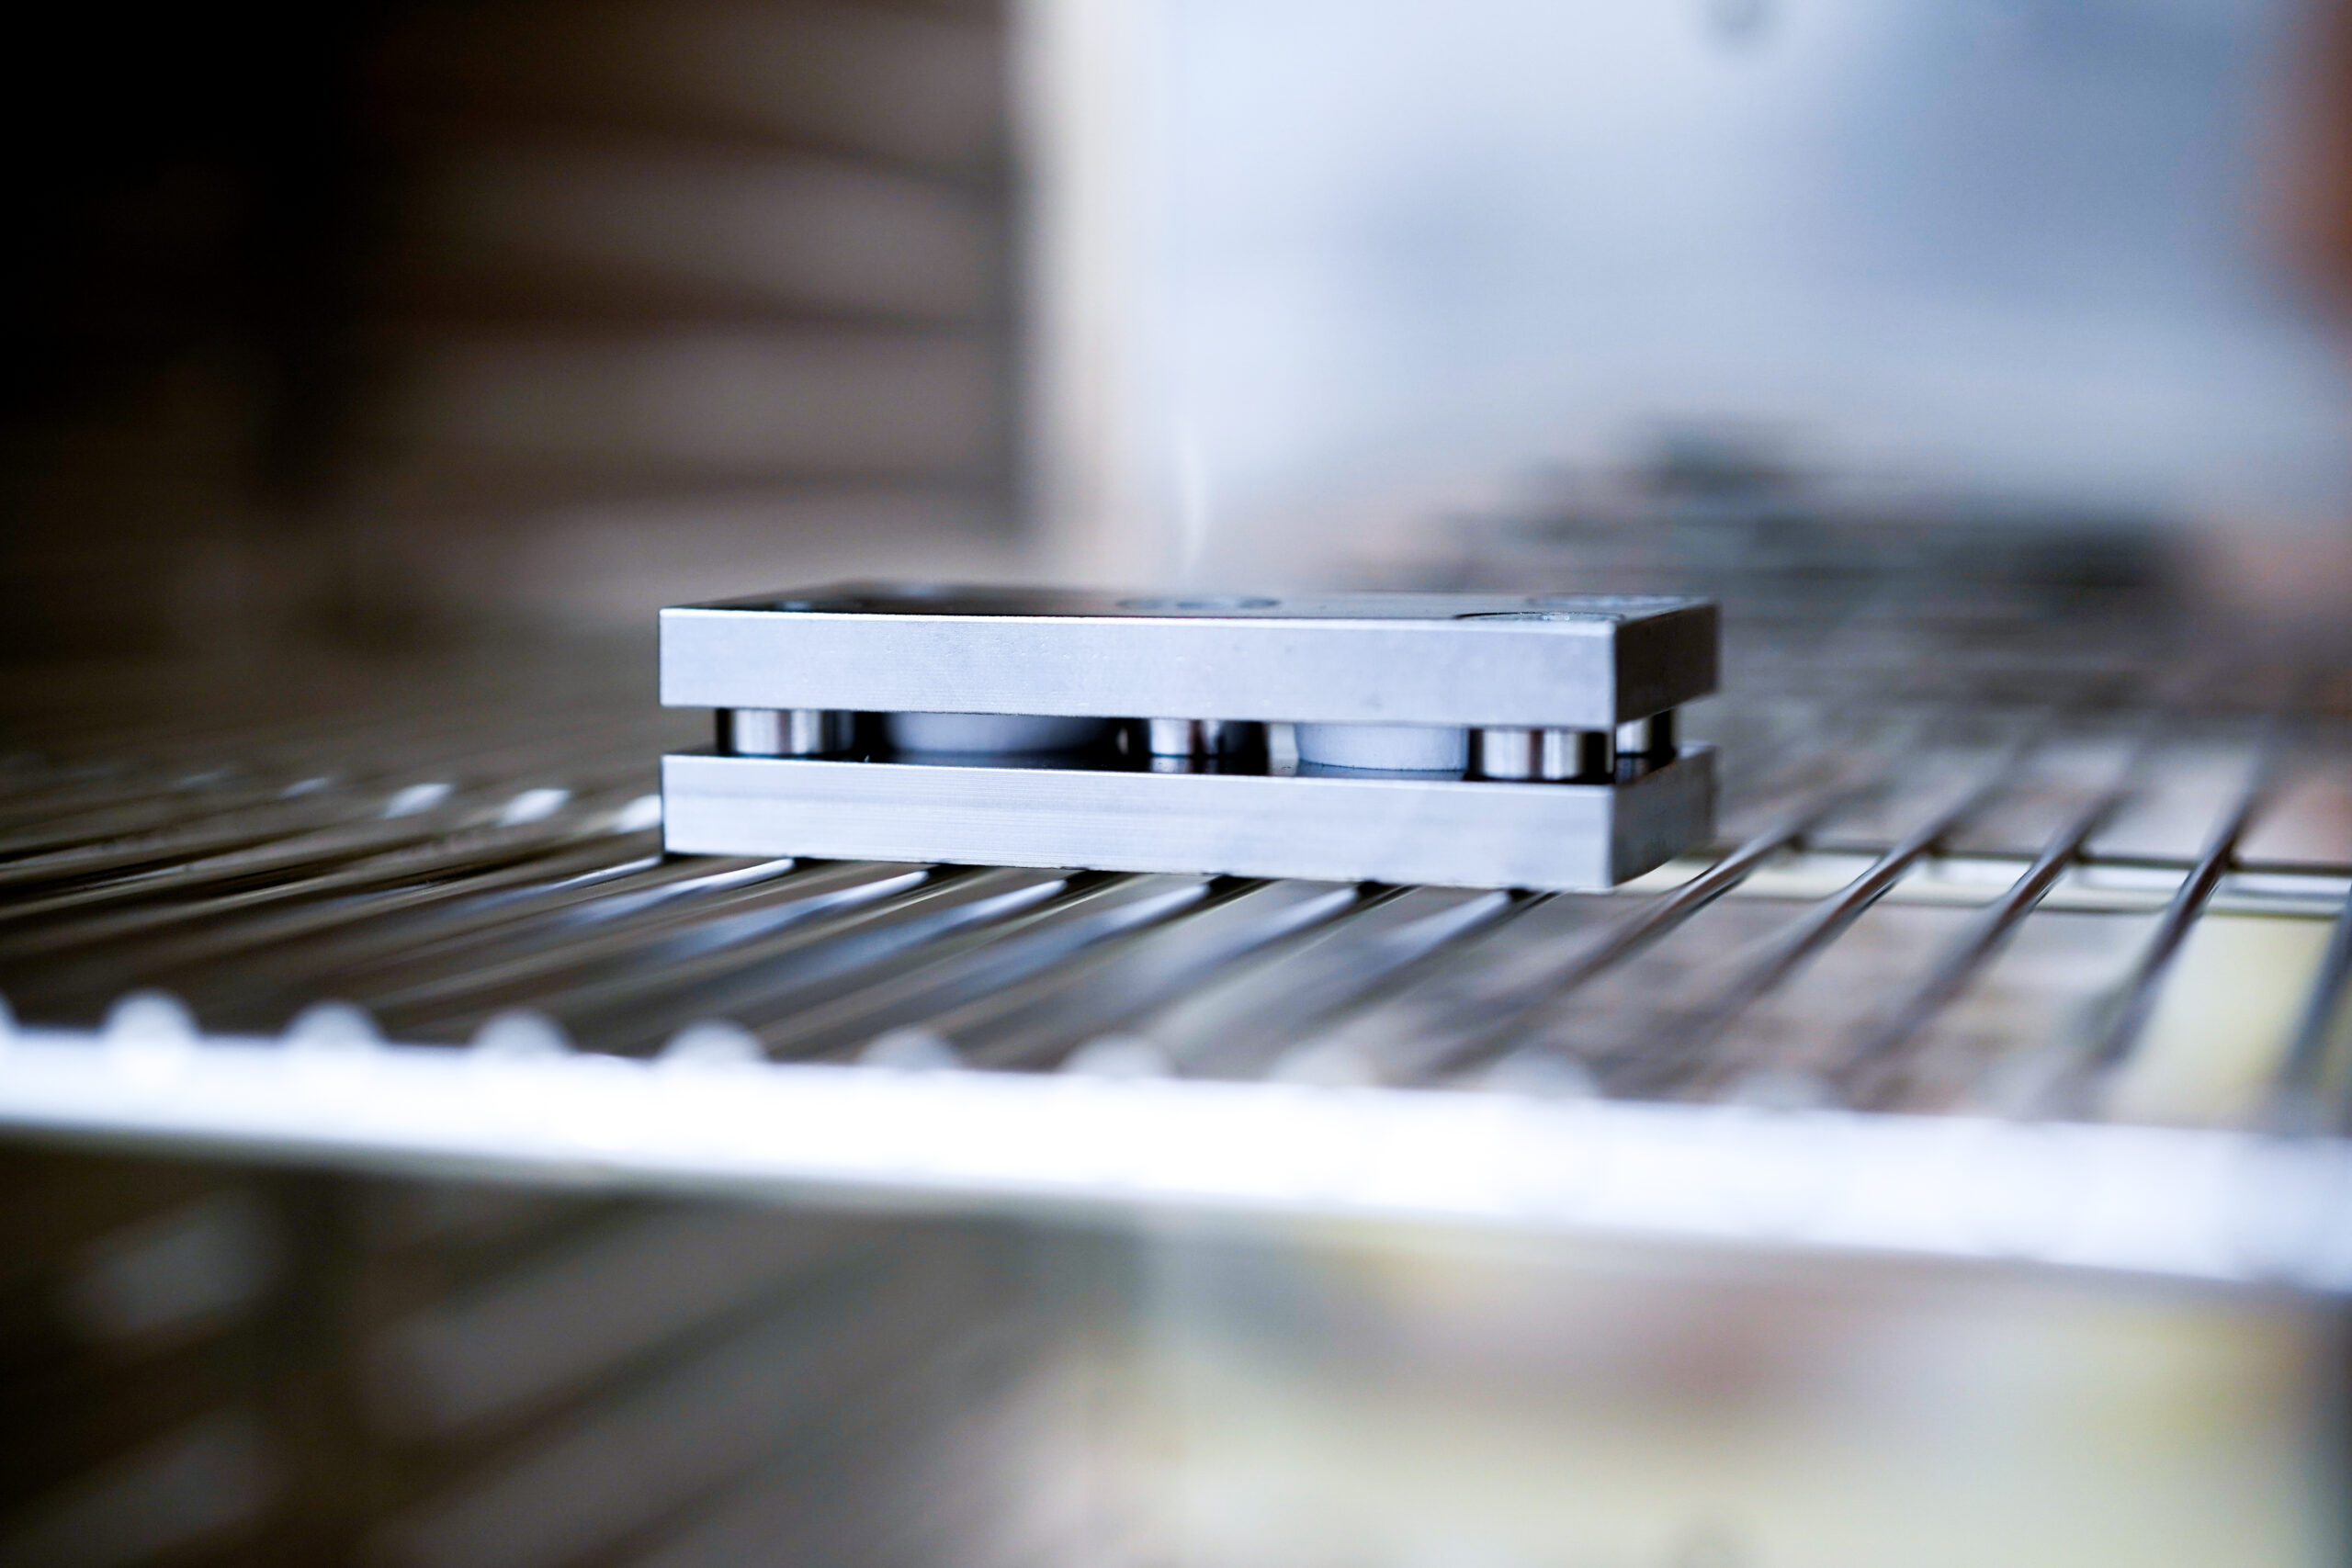
Setup and conditions: To prepare the test, round test specimens are cut out from different areas of the desired midsole material. The measurement equipment are basically two metal plates, a caliper, some screws, and a spacer which size depends on the specimen thickness.

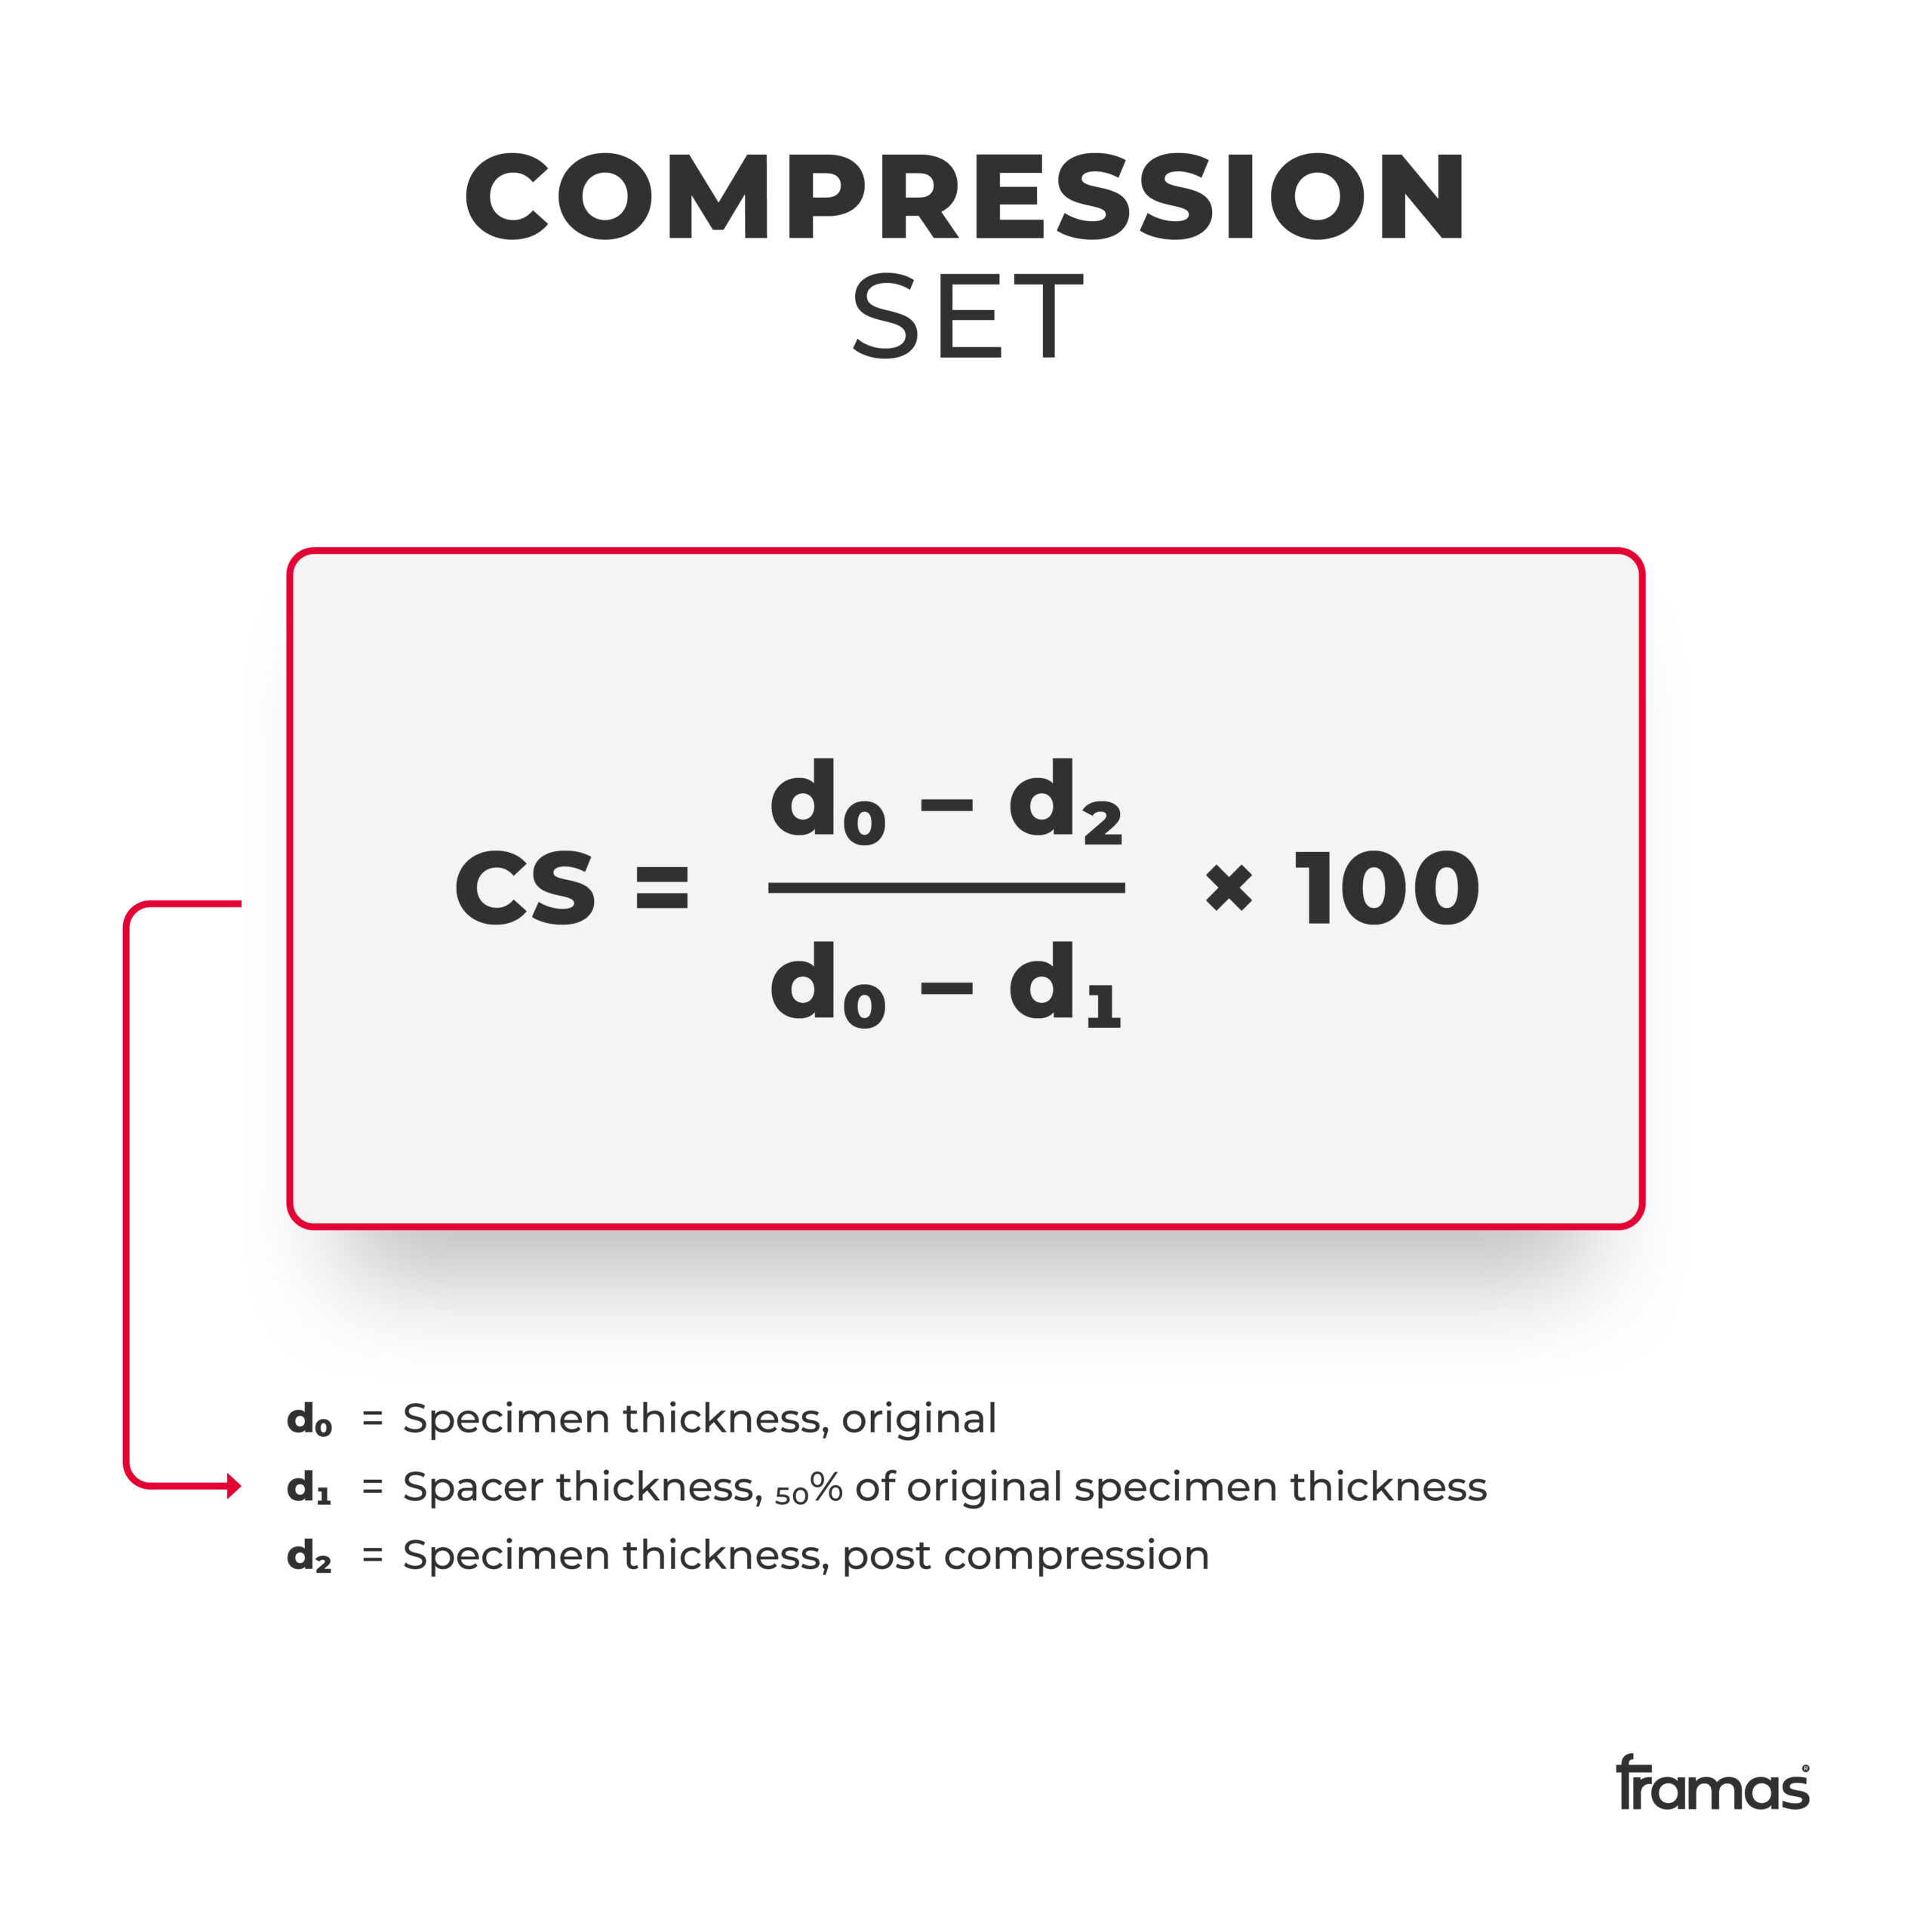
What is measured: First, the original thickness of the test specimen with a caliper [d (0)] is measured. Secondly, the specimen is placed between two metal plates and then screwed down to 50% thickness of the test specimen [d (1)]. The entire test apparatus remains 6 hours at 50°C in an air circulating oven. After the required time the test specimen is removed and cooled down for 30 minutes at room temperature (23°C ± 2°C) on poor thermally conducting surface, such as wood. After the resting time, the thickness of the test specimen is tested one last time [d (2)].

Interpretation of test result: To evaluate, the Compression Set (CS) is calculated. It gives the CS figure as a percentage. A low CS percentage indicates a longer durability in both function and design intent of the midsole foam. It can withstand long lasting compression at high temperatures without loosing its ability to return to its original shape.

Tested materials and components: All kinds of midsole materials

11. Slip safety

Purpose: The slip safety test is mainly done for safety shoes to make sure they follow the EN ISO 20345 standards (to read more about safety shoes, check out our other blog post). But also for other footwear categories it can be reasonable to conduct this test, if you want to ensure the outsoles of the shoe function even on slippery floor.

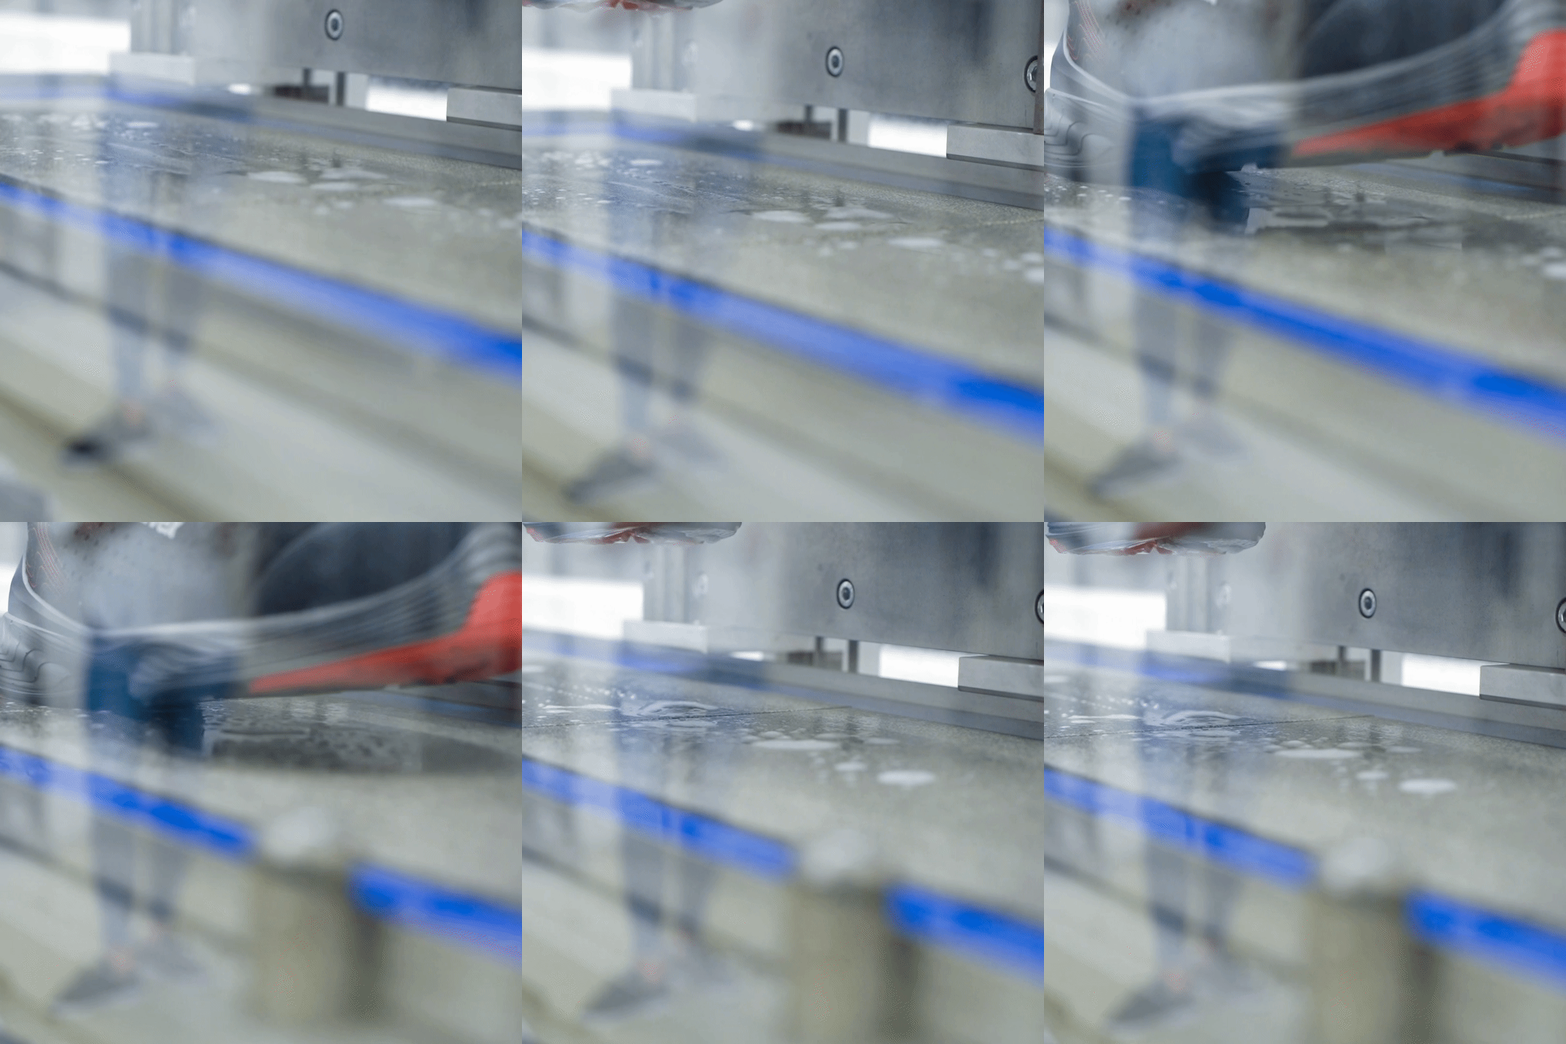
Setup and conditions: To prepare the test, three parameters need to be set. The first parameter is the tested floor. Do you want to test your outsoles on steel or ceramic tile ground surfaces? If you have decided for the first parameter, you can select the lubricant to mimic the slippery floor as a second parameter. It can be chosen between sodium lauryl sulfate, glycerin, or water. Sodium lauryl sulfate and water are suitable for surfaces like ceramic tile. Glycerin would be suitable for steel surfaces. The last parameter to set is the normal force of the testing machine which depends usually on the shoe size. For shoes size 40 (UK 7) and larger, the normal force should 500 ± 25 Newton. For shoe sizes below 40, the normal force is 400 ± 20 Newton. Other normal forces can also be set, depending on the requirements of brand and footwear category.

To start the test, either an entire shoe (lasted or not lasted) or only a single outsole is attached to the machine and pressed onto the selected floor surface which is sprayed with the selected lubricant. The test can be carried out in one of the the following test methods:

  1. Forward sliding of the heel with the shoe placed at an angle: the shoe moves forward at a contact angle of 7°. The footwear to be tested is attached to the shoe last.
  2. Sliding backwards on the front sole: The shoe performs a backward movement at a contact angle of 7°. The footwear to be tested is attached with a shoe last.
  3. Smooth forward glide: The shoe or outsole moves forward while lying flat. The shoe is attached via a mechanical foot.

What is measured: This test finds out how much pressure is needed for the shoe to slip. The pressure is the so-called coefficient of friction. It is usually symbolized by the Greek letter mu (μ). The evaluation of the test is done through the average of the 5 measurements per test method.

Interpretation of test result: The higher the coefficient of friction, the more pressure is needed for the shoe to slip. The minimum required values for safety shoes to pass this test are 0.36 μ for the front sole method and and 0.31 μ for the heel method. Minimum values for other footwear categories are usually set by the brands individually.

Tested materials and components: All safety relevant footwear applications but also running shoes etc.

We hope you liked this insight into the world of material testing. Stay tuned as we will soon launch our second part, in which we will talk about physical, thermal and optical material testing methods.

If you liked this article, make sure to follow our Social Media channels. You can contact us anytime via LinkedIn, Instagram & Facebook. We are happy to receive any feedback and tell us what other topics are of interest to you. We will try to address them in the near future.


Thanks for checking out our blog!
Laceless Challenge 2023

Laceless Challenge 2023

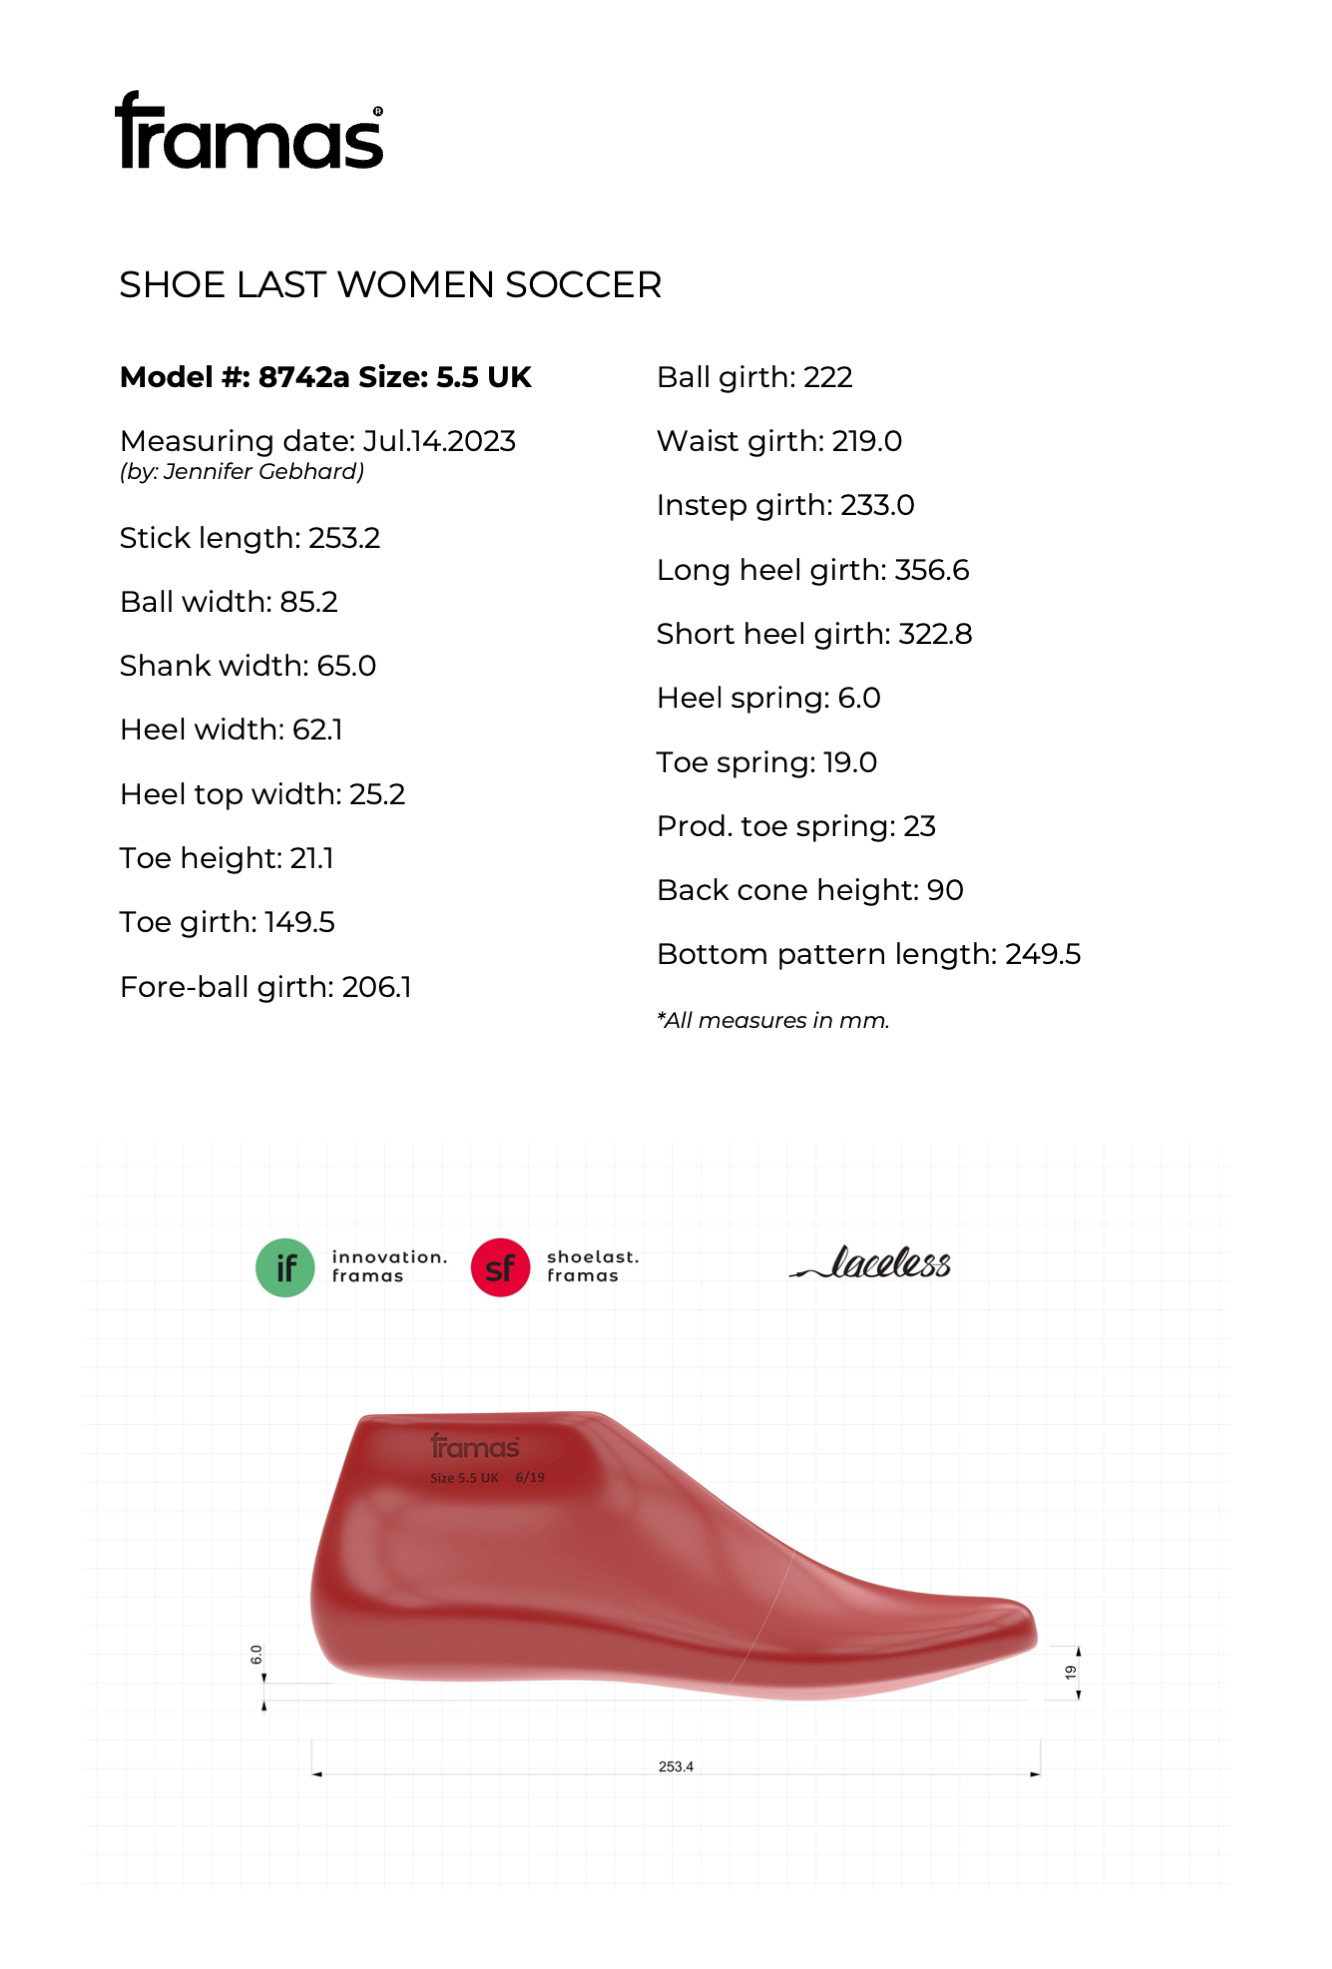
The Laceless Challenge is ongoing! We as framas would like to contribute our part and developed a women soccer last, which can be used by all participants to create a shoe.

Women Soccer Last

Good luck to all designers of the Laceless Challenge 2023. #lacelesschallenge

Please feel free to use this women football 3D last we developed.

Size: 5.5 UK
Toe Spring: 19.0mm
Heel lift: 6.0mm
Ball girth: 222.0mm

Access the 3D files of the shoe last here:

If you would like to know more about the production and measurements of a shoelast, make sure to check out our blog article.

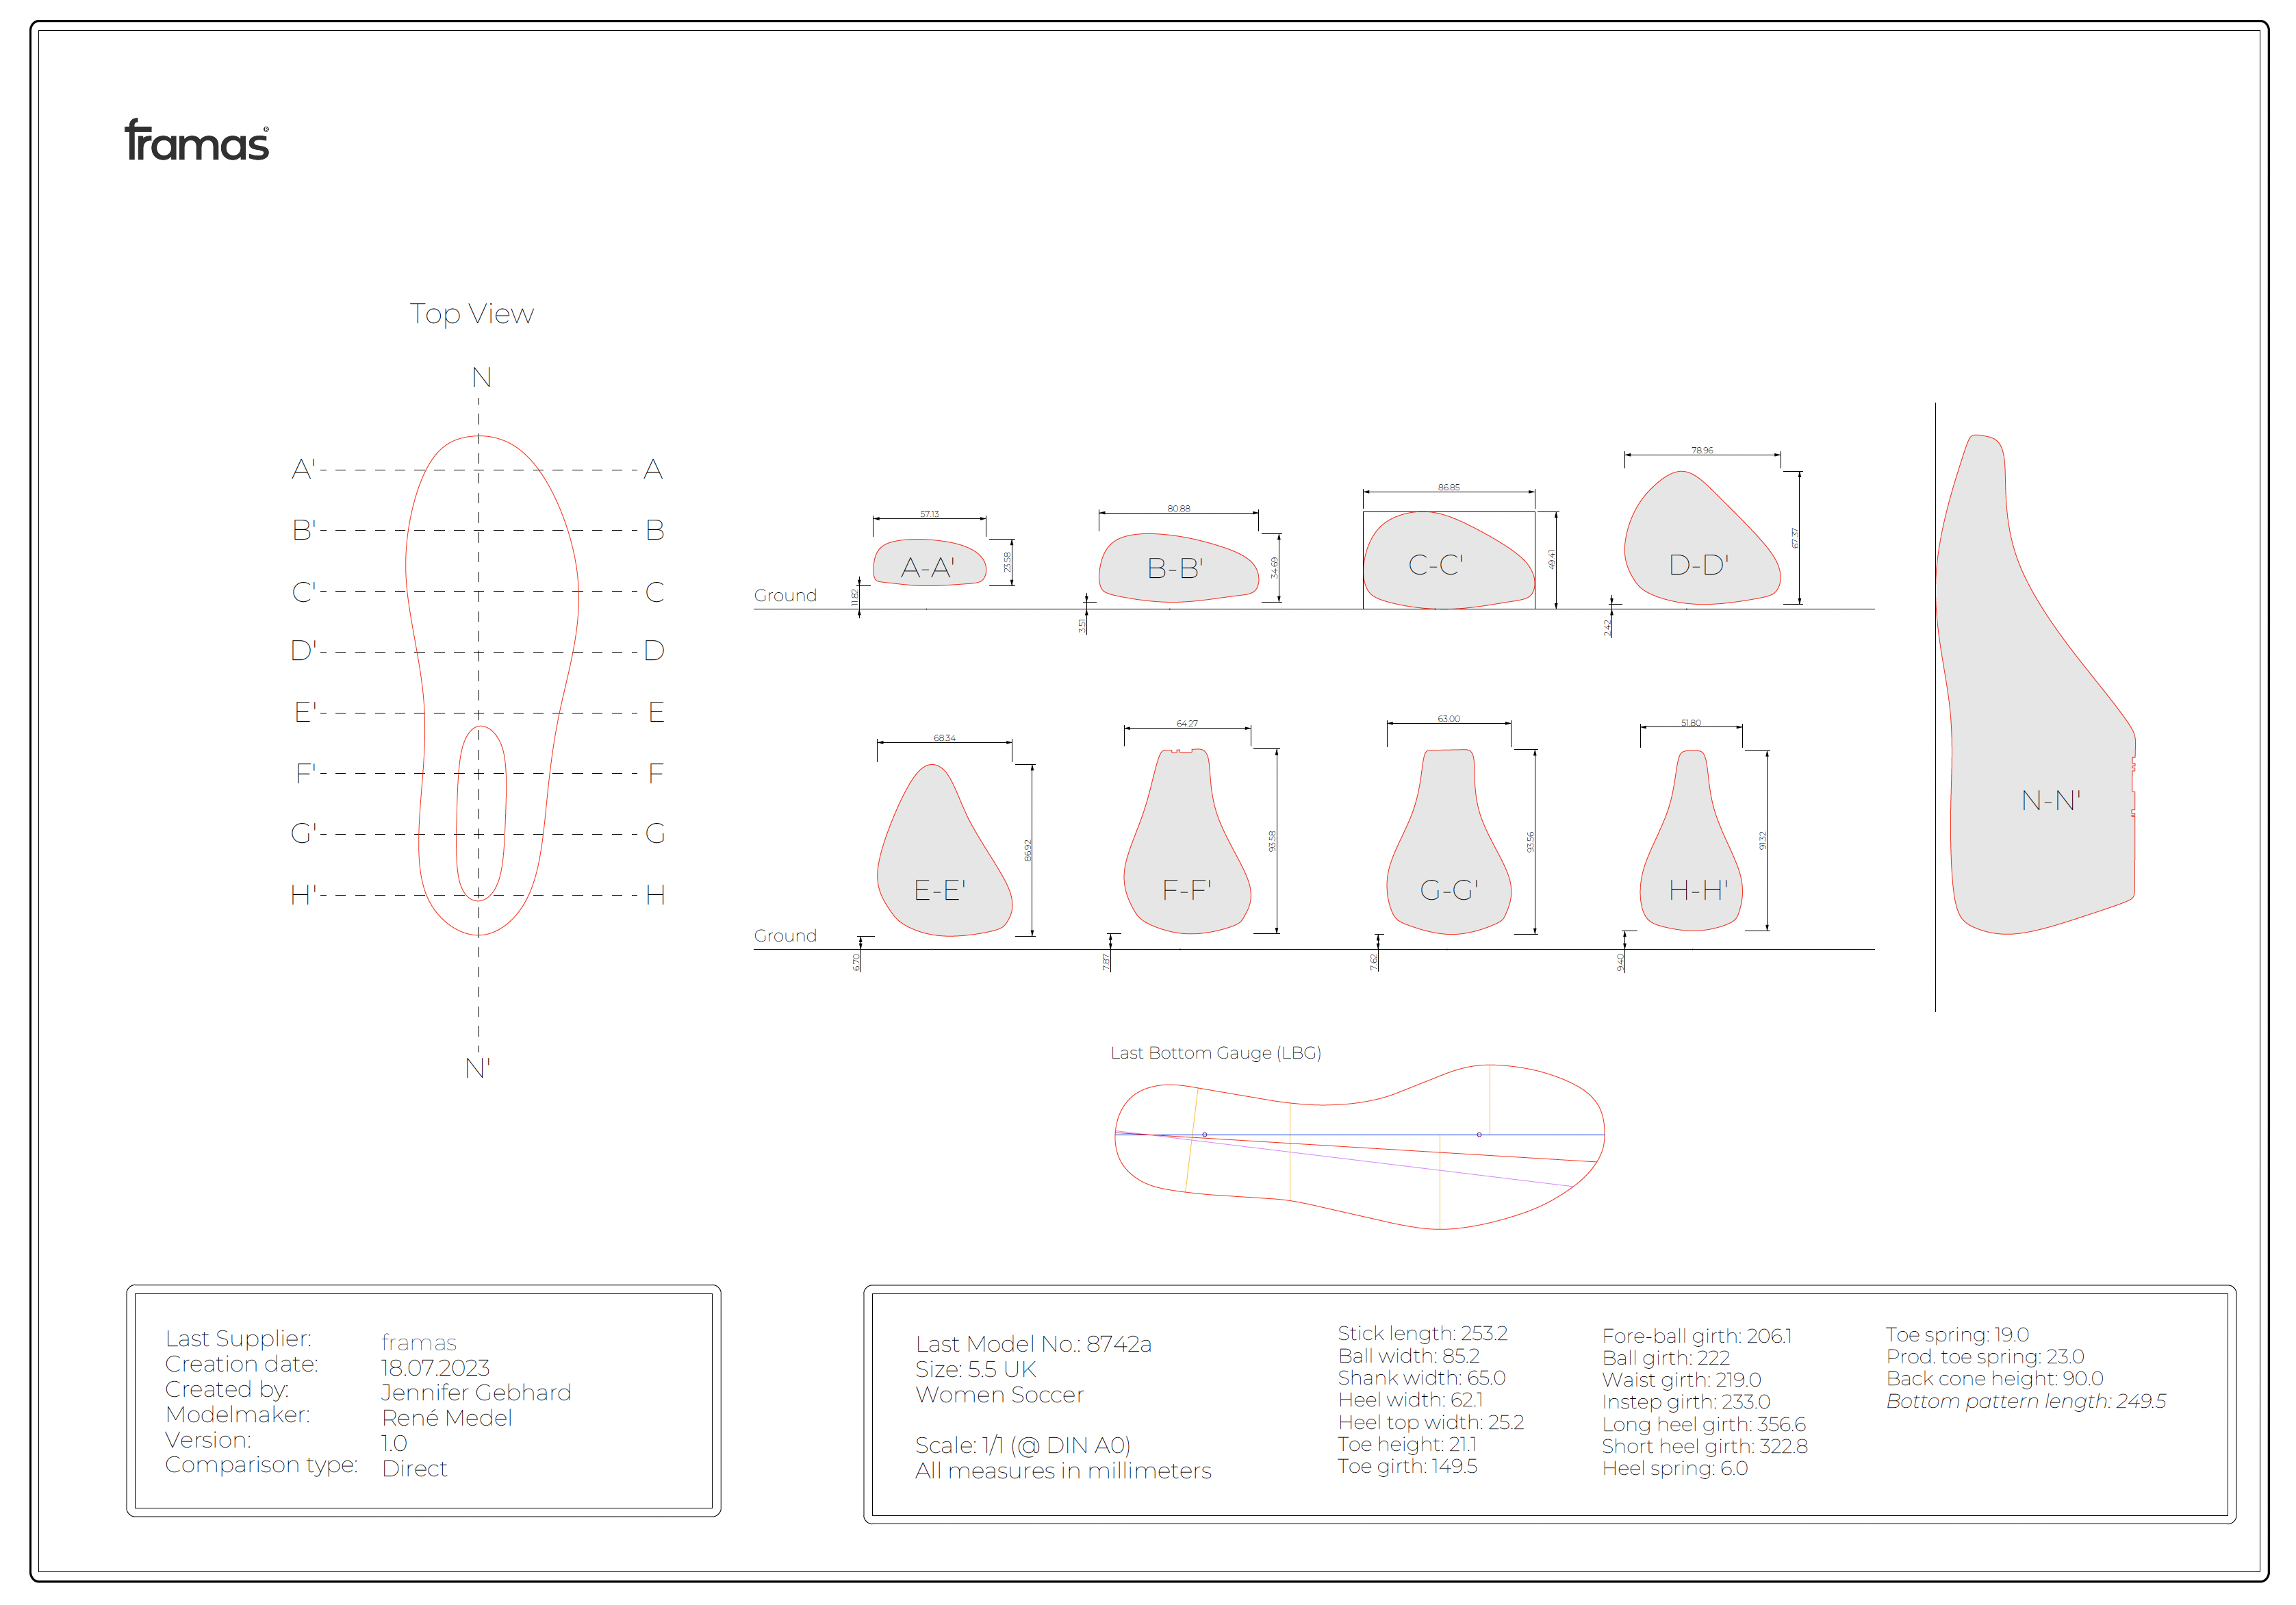
Section Sheet

Please click on the image to access the PDF file. This way you can print it on a scale of 1:1.

Football Last

A football shoe needs to sit tight on the foot. Therefore, a last for this category must have a narrow heel clip, a slim forefoot area and arch.

These functions provide extra stability for the whole foot and give a better connection to the football. As well the side walls of the last are rounded which makes it easier to handle the football. A football shoe must be comfortable as well because the players run a lot.

Difference Men & Women Football Last

A women football last is in total tighter in the forefoot area. The heel form of the women football last is rounder and more curved.

In general football shoelasts contain more running shoe elements than in earlier times.

Make sure to follow our Social Media channels. You can contact us anytime via LinkedIn, Instagram & Facebook. We are happy to receive any feedback.

Thanks for checking out our blog!

Castor oil – bean based footwear

Castor oil – bean based footwear

Partner Content in cooperation with*

What is castor oil?

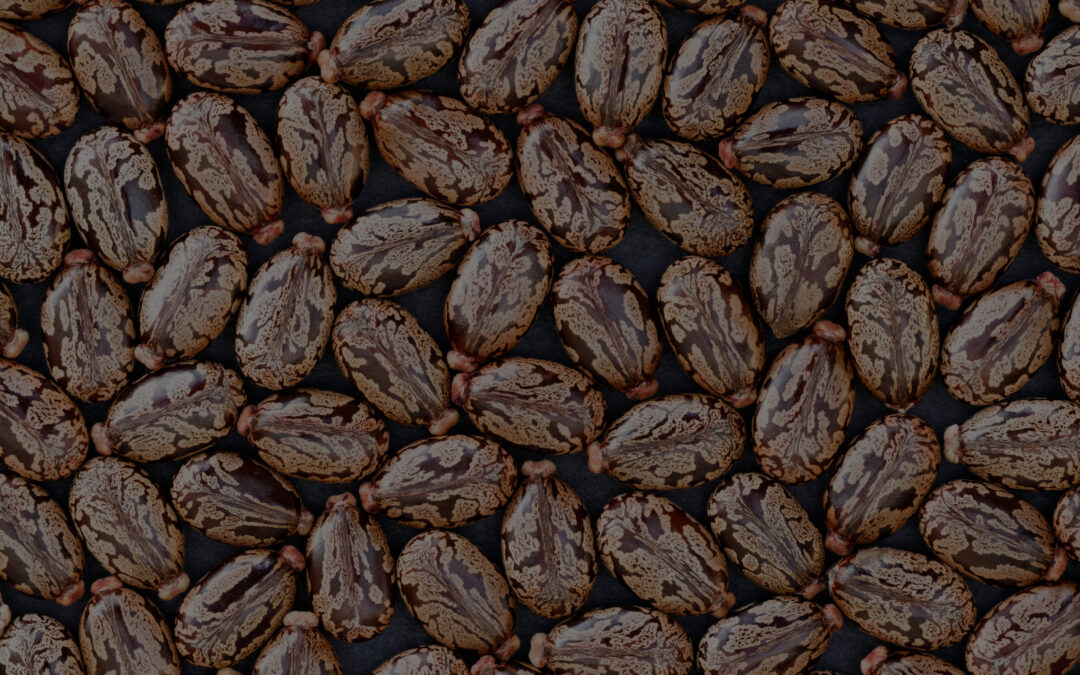
Castor oil is a non-edible oil extracted from castor beans, also known as Ricinus communis. Ricinus is the Latin word for tick because the seed resembles a tick through its shape and markings. The plant grows wild in varied climatic conditions, in an abundant amount and can survive harsh environments, such as drought and flooding. Castor oil is part of the vegetable oil family which are natures’ renewable resources.

It is mostly produced in the Gujarat region/state in India; the country makes more than 80% of global production in a unique eco-system with more than 700,000 family farming growing castor among other crops. Yearly, India produces around 800,000 tons of castor oil. India is often favored for the extraction process as the country has a labor-intensive cultivation method, which is important for extraction of the seeds. Other producing countries includes China, Brazil, countries in Asia Pacific and South America. The major castor markets are the USA, China, and the EU.

Nowadays the oil is used for many different applications, but its bio-application is seeing increasing interest. It is often used as the basis for producing PU foam, casting resins and adhesives. An important point to note is that even though castor oil produces bio-based materials, these materials are not necessarily biodegradable as the focus might lie on using the materials for a longer lifetime.

Castor plants are usually three to four meters tall and produce spiky fruits with large leaves from August to October. The shell of the fruit resembles those of chestnuts and each fruit contains three seeds, which are known as castor beans.

Navigation

How does the harvesting work: individuals or machines?

How is the valuable castor oil extracted?

Why is the use of castor oil beneficial for the climate?

In which industries is castor oil used?

Castor oil and the shoe industry

Arkema Rilsan® PA 11 and Pebax® Rnew® TPEs

What changes are needed to make the castor plant more available and user friendly?

Summary

How does the harvesting work: individuals or machines?

For the common varieties of plants, the extraction process requires manually intensive labor .

How is the valuable castor oil extracted?

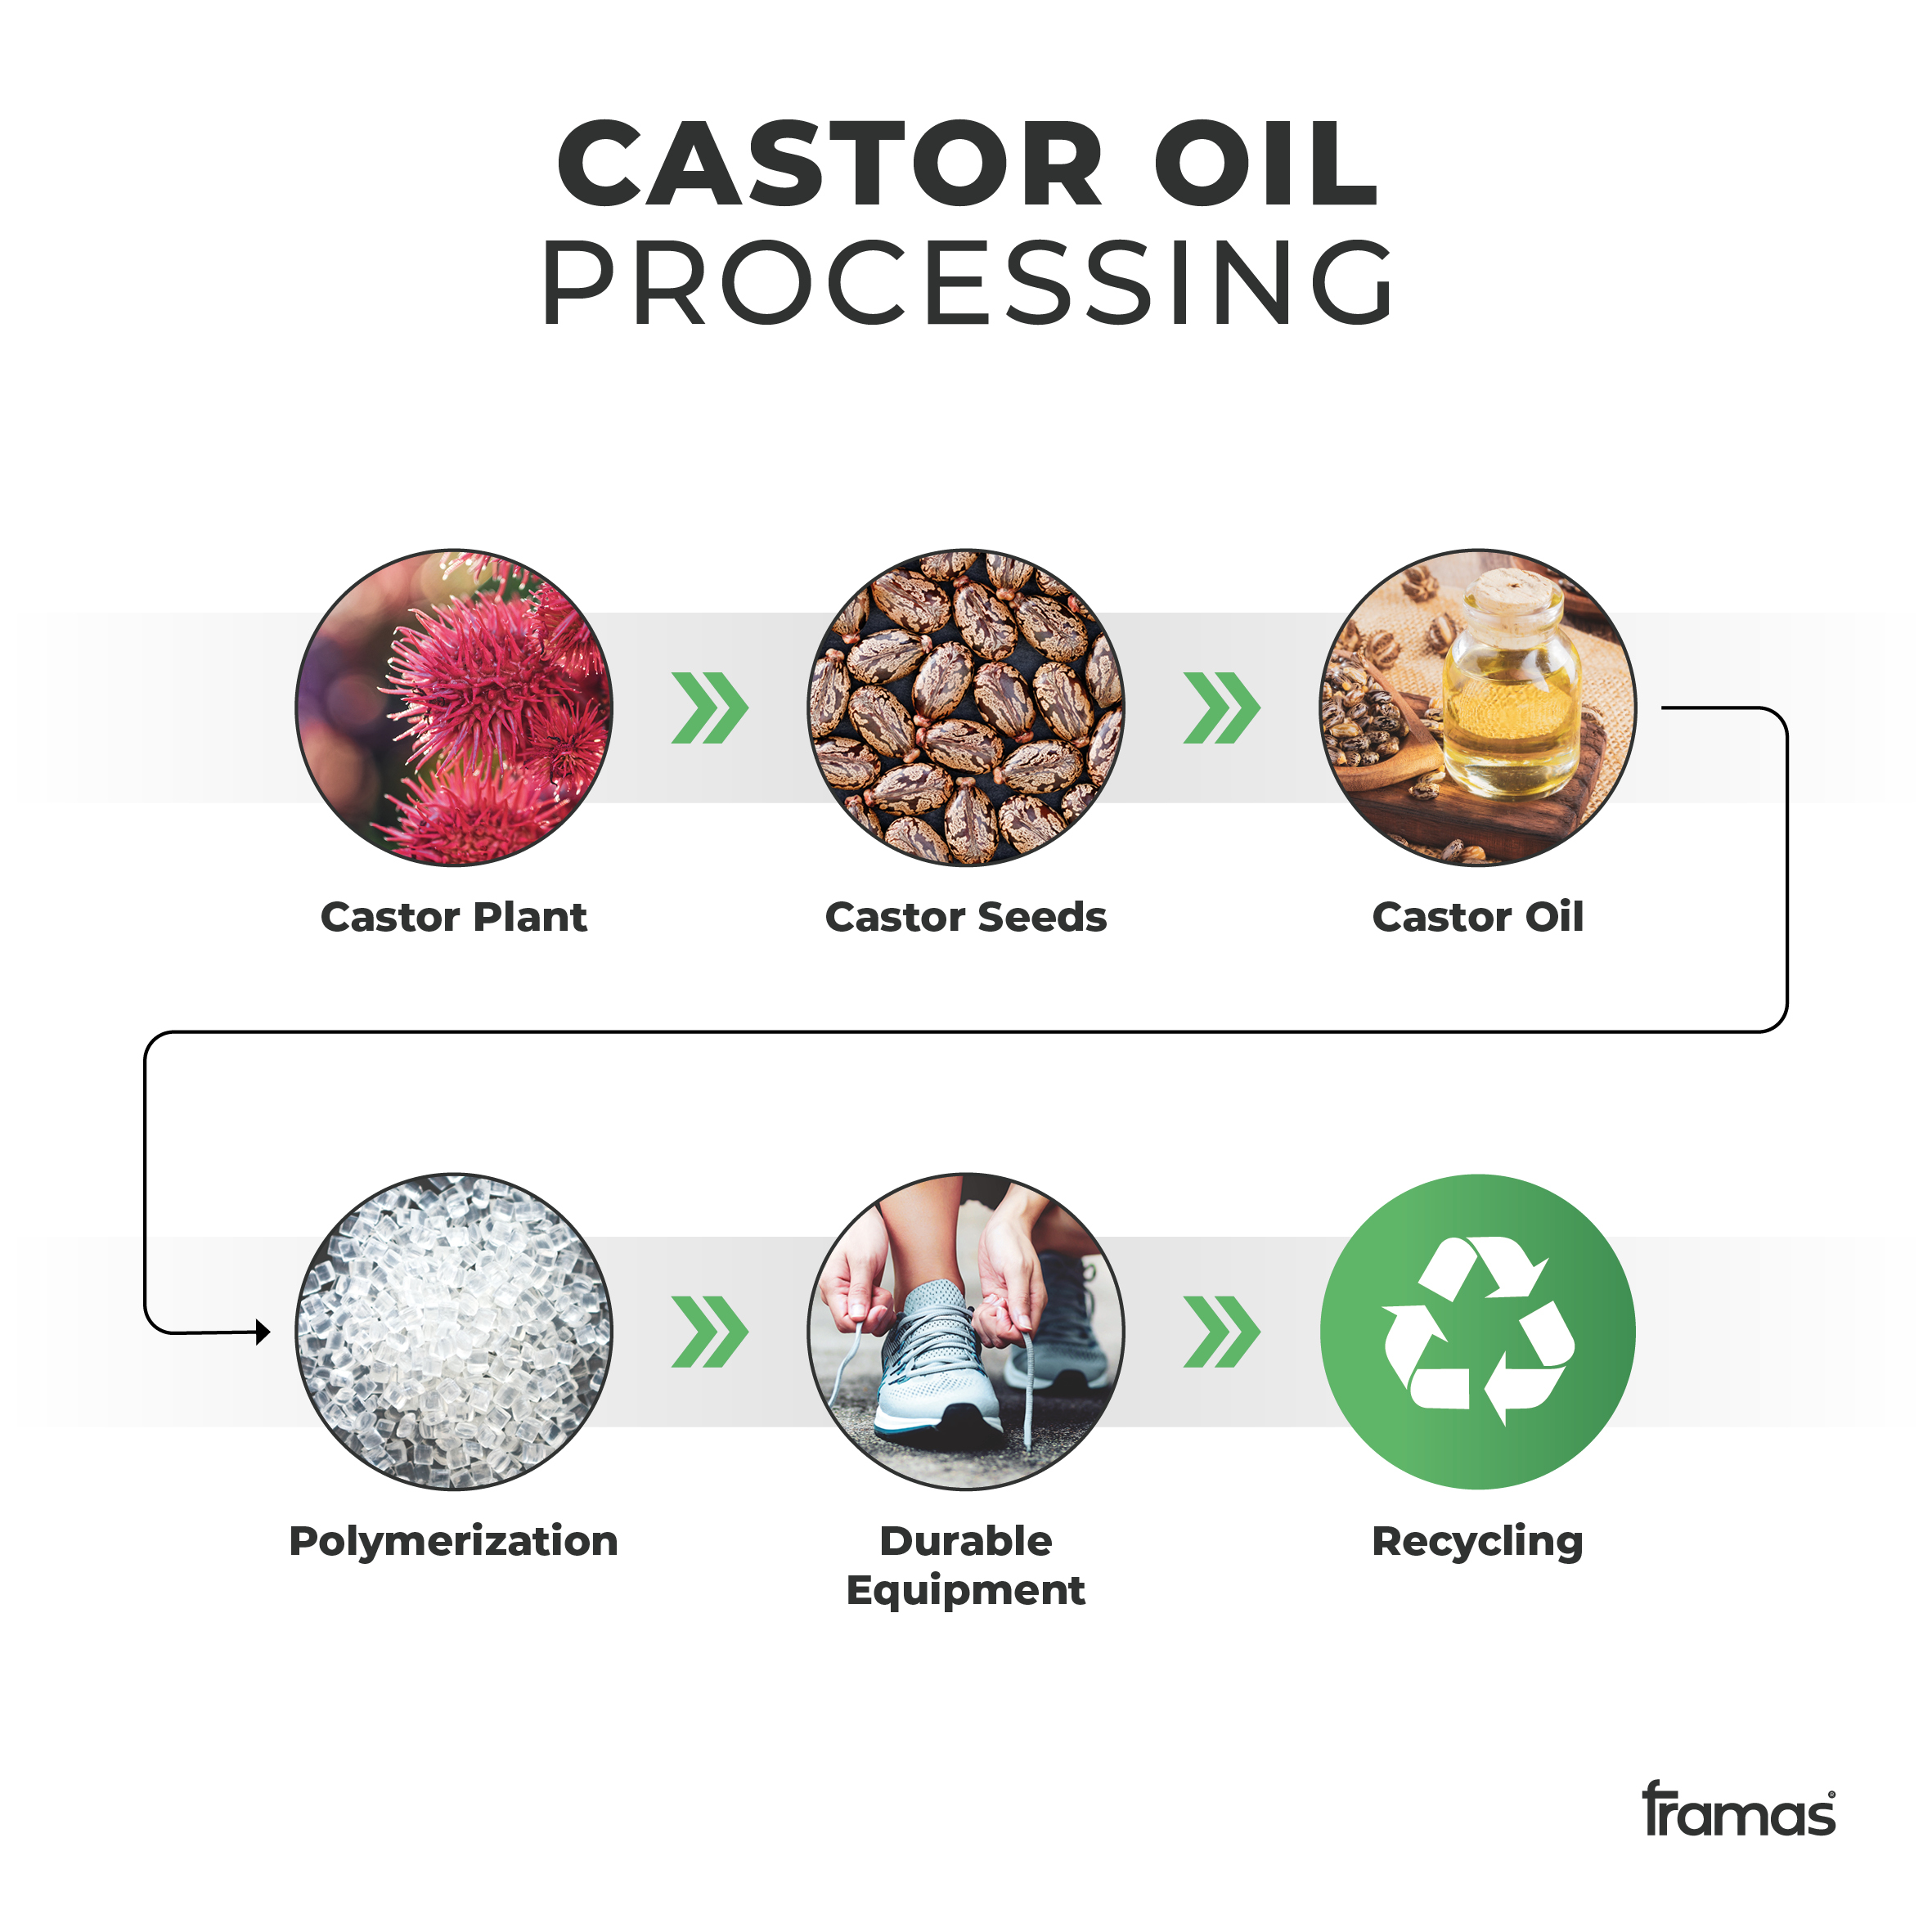
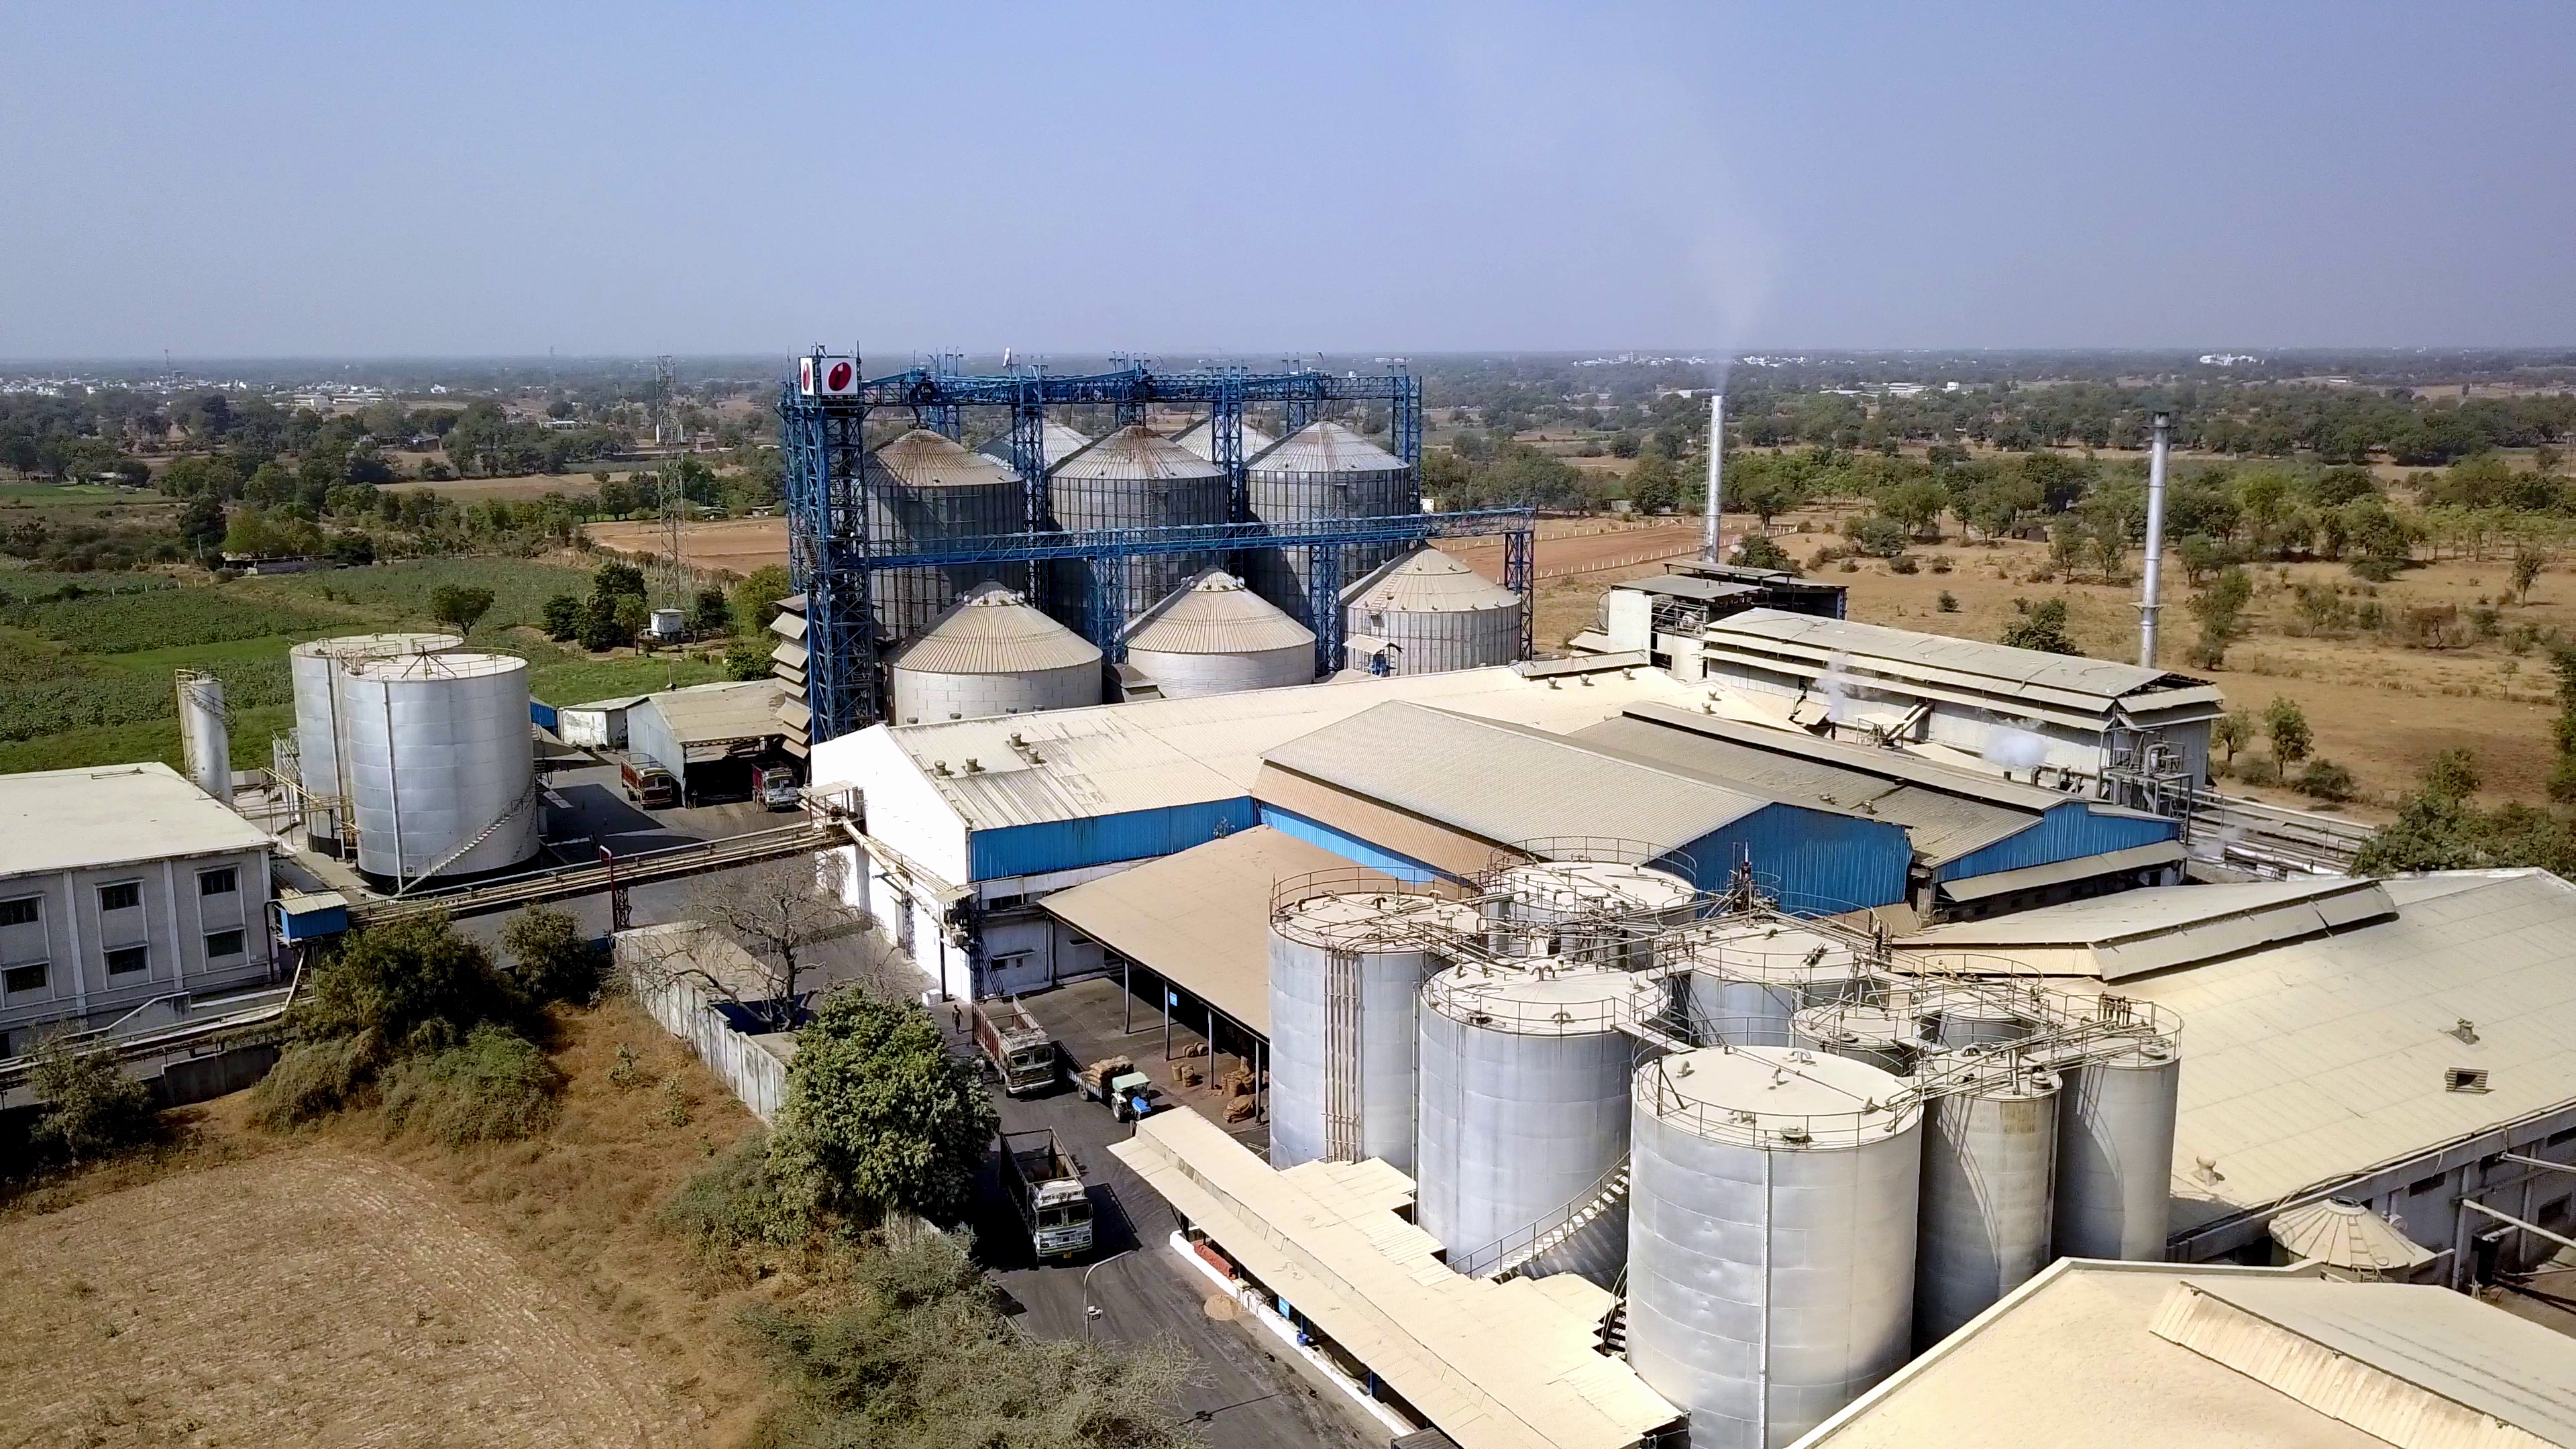
Once the seeds have been collected, the seed is removed from the hull by hand or with a machine. The seeds are then cleaned and heated because high temperatures allow for a higher percentage of oil extraction. Castor oil can be extracted 3 ways. Through mechanical pressing, solvent extraction, or a combination of both. Mechanical pressing uses a machine, hydraulic or screw press, to crush the seed to get crude oil out. Solvent extraction uses a chemical method to extract crude oil out. This is sometimes used additionally to the mechanical pressing to produce certain lower value oil grades.

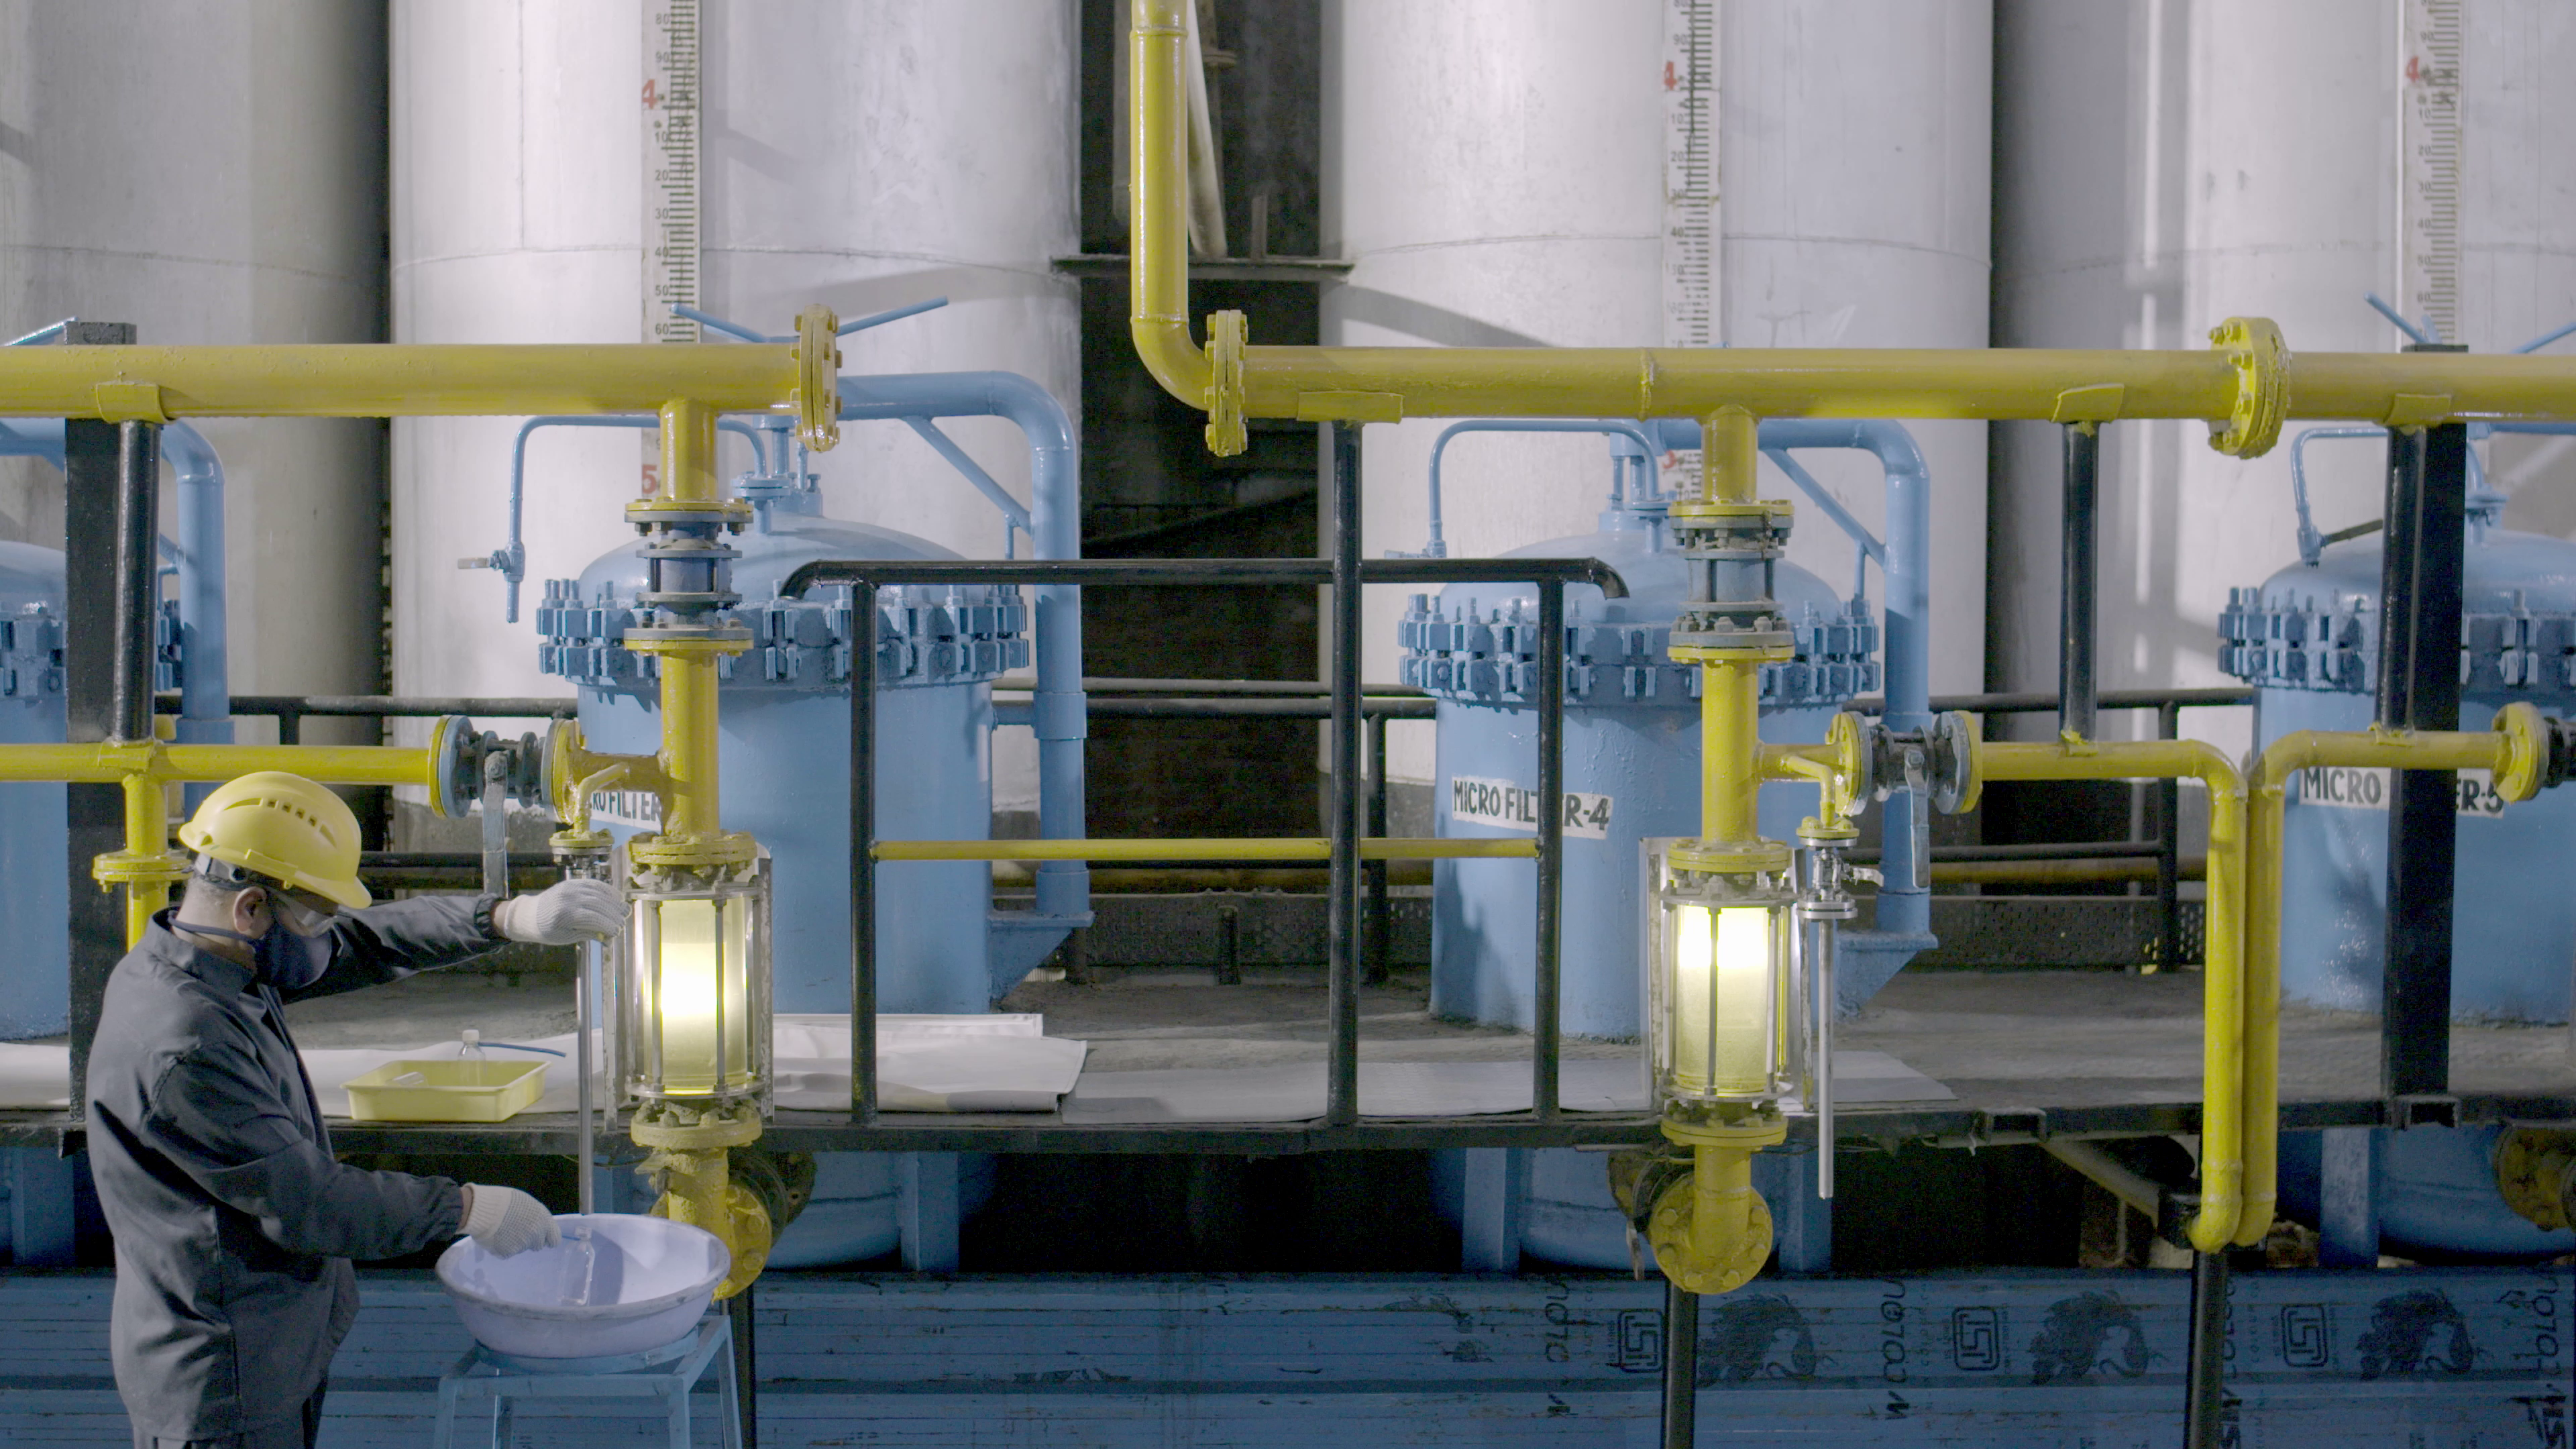
After harvesting the seeds, they are heated then crushed through the mechanical pressing. The oil is then filtered and combined with new seeds for repeat extraction. On average, a castor seed contains 45% oil by weight, meaning that harvesting 1000kg of castor seeds will yield 450kg of oil. Depending on the seeds varieties, climatic conditions and agricultural practices some seeds contain more oil than others. Once all the seeds have been pressed, the residual bulk, also called castor cake or meal, is removed from the pressing equipment. Castor cakes usually retain 10% of oil so it is beneficial to also recover the oil through solvent extraction. The oil is once more filtered and then sent to the refinery for processing. The remaining seed cake is then mainly used as an organic fertilizer.


Why is the use of castor oil beneficial for the climate?

Global warming has become an increasingly important subject. Burning fossil fuels to produce energy contributes to the increasing level of CO2 in the atmosphere. The consumption and emission of fuel is set to rise so finding a sustainable material source is of high importance. The castor plant is a bio-based source which can take on multiple materials such as textile and plastic thanks to its high oil content. In the footwear industry this is beneficial for the environment as it elongates the CO2 usage due to the strong nature of polymers. They can endure multiple lifecycles, so the CO2 used to produce a castor-based material is being re-utilized when the material is being used multiple times.

Castor oil price is typically double compared to other vegetable oils such as palm and soybean oil, that are produced in much higher quantities.

The castor plant is also seen as a favorite non-food crop for the future as it does not compete with the agriculture of food. So even if demand grows, there is no fear of decreasing food plantation by increasing castor plant plantation. If there would be a competition for land between food crops and the castor plant, the castor plant would be moved into marginal soils due to its capability to adapt to different environments.  

Not only is the sustainability of the material important but also how the material is produced. A number of initiatives to support the farmers and to improve the three main aspects of the activity: social (such as working conditions, compensation etc), economic (such as good agricultural practices to improve yield and reduce costs) and environmental (optimal use of water, fertilizers etc).

(If you would like to learn more about other green materials, then make sure to check out our blog post.)

In which industries is castor oil used?

Castor oil is used in a variety of products, it has over 700 industrial uses. Examples include oil-based formulations of lubricants and grease, functional fluids and process oils, coatings, polymers and foams, textile finishing agents, emulsifiers, and in cosmetic products (creams, soaps, perfumes, deodorants, and other cosmetics). The oil is therefore used in a variety of industries from electronics to cosmetics to textile to plastics.

Castor oil and the shoe industry

To avoid use fossil fuels with the consequent overwhelming resource depletion situation in which we live today, the shoe industry, amongst many other industries, is utilizing more and more renewable resources such as castor oil. Castor oil is a good alternative to petroleum-based chemicals as the oil can be converted into several materials such as synthetic textiles and hard plastic.

Bio-based polymer have comparable and sometimes better properties than petroleum-based polymers and have a lower carbon footprint when compared to similar materials. The oil goes through a polymerization process which turns the oil into pellet forms suitable for typical application of thermoplastic polymer such as injection molding and industrial filaments. The bio-based polymer made from castor oil can therefore be used in multiple parts of a shoe which can help reduce waste and encourages a sustainable development in the shoe industry.

Arkema Rilsan® PA 11 and Pebax® Rnew® TPEs

The French material supplier Arkema utilizes castor oil as renewable feedstock to produce their two flagship material families Rilsan® PA 11 and Pebax® Rnew® thermoplastic elastomers (TPE-A).  These are part of their range of Advanced-Bio-Circular (ABC) materials, providing a solution for a circular economy. Their products are used in innovating industries as their Rilsan® PA 11 and Pebax® Rnew® materials are proven to be high-quality materials in the most demanding applications. Their focus is on recycling and producing high performance products with a long lifetime.

A typical athletic shoe has an outsole made from rubber or thermo plastic whilst the upper, midsole, insole and inside lining are made from synthetic material. Pebax® can be used in midsole components such as shank systems, propulsion plates and heel counters whilst also providing a high energy return. Pebax® can also be used to produce foam midsoles. Outsoles, such as cleated footwear, made from Pebax® are lightweight but still rigid, flexible and have a high energy return. Inside lining can be made from Rilsan® PA 11 which can be turned into a breathable and light material. (To learn more about polymers, check out our blog post about injection molding)

Rilsan® PA 11 is a polyamide, a synthetic polymer, with a specific crystallinity profile and is 100% bio sourced. It uses castor oil as a base which is a 100% renewable origin.

Benefits of Rilsan® PA11:

  • Flexible
  • Dimensional stability
  • Easy to process.
  • Accommodates countless additives and filling agents.
  • Wide range of working temperatures
  • Impact, fatigue, and abrasion resistance


Parts therefore have a longer lifetime which reduces waste. The material is used to produce yarns for the upper or laces and other synthetic material parts in shoes such as plates or outsoles.

Pebax® (PEBA TPE family) are made up of rigid polyamide blocks and soft polyether blocks, giving this material a large flexibility spectrum. They find application as high rebound foams for midsole, propulsion plates or shanks and outsole plates in cleated footwear. A cleated footwear made from Pebax® can bend 90 degrees without breaking and can endure more than 50,000 washing cycle.

Benefits of Pebax®:

  • Large flexibility spectrum
  • Low weight, elasticity, comfort, toughness, and flexibility
  • Advantages to TPU: 20% lighter, more reactive and responsive

Midsole foams, midsole inserts and outsoles are all fabricated with Pebax® materials.

What changes are needed to make the castor plant more available and user friendly?

Several global programs are also trying to create a castor plant with a high seed yield, increased oil content in the seed and adapted to mechanical harvest. For the latter, the plant should be short (ideally half the size of current plants), have a steady growing state and produce a minimum number of leaves. This would help minimize the losses as well as not cause clogging in the machines. Until the present moment, there has been no success to cultivate a seed which comprises the elements from above.

However, an increase of the yield of the current varieties of castor plants can be achieved using better agricultural practices, with optimized irrigation or spacing between plants for example.

Summary

Castor oil is used in a variety of industries and is seen as a promising bio-based material for the future. Challenges remain in the development of mechanical harvesting and extension of this crop.to make it even more available.

Benefits

  • High availability
  • Grows in a variety of tropical climates
  • Adapts to drought
  • Non-food competition
  • Highly profitable for the farmers
  • Dried beans have good shelf life, meaning it can be stored for a longer amount of time without turning bad
  • Castor oil-based polymers are biobased, non-biodegradable, non-toxic, and offer a better sustainability profile
  • Prevent the depletion of fossil resources

Challenges

  • Extension to other regions to follow the growth will require time and efforts
  • Development of mechanical harvesting requires optimization in the machines

*This article is created in cooperation with experts from Arkema to provide you a deeper inside into this topic. It is not sponsored or paid in any way.

If you liked this article, make sure to follow our Social Media channels and leave your feedback. You can contact us anytime via LinkedIn, Instagram & Facebook. We are happy to receive any feedback and tell us what other topics are of interest to you. We will try to address them in the near future.


Thanks for checking out our blog!
How safety footwear enhances protection in the workplace

How safety footwear enhances protection in the workplace

Safety shoes have an important place in the workplace. They protect the feet against injuries and help to reduce the number and severity of accidents. They can protect against punctures, cuts, burns and impact whilst also offering the individual a better grip when walking on a specific surface.

They have to follow basic requirements and offer additional protection for their area of application. For example, when working on a boat, the surface can be very slippery, so it is important to have a shoe which allows the individual to move around without the fear of slipping. For someone working with electricity, the shoe can prevent electrical hazard. Workers in the forest can also encounter a slippery surface from moss but there is also the possibility of getting cut when working with chainsaws. A safety shoe made from cut resistant materials can help prevent getting cut.

Navigation

What are safety shoes?

Process of making a safety shoe

Fundamental requirements of safety footwear

Process of making a safety shoe

· Safety category S1

· Safety category S2

· Safety category S3

· Safety category S4

· Safety category S5

· Safety category S6 + S7

Summary

What are safety shoes?

Professional footwear can be distinguished into two categories. The first category is work footwear, meaning that the shoe is within the anti-slip and water repellent criteria, but the toecap and insole are not impact resistant.

The second category is called safety footwear, which is a shoe that must meet the EN ISO 20345 norms. This requires the shoe to have a minimum impact resistance of 200 Joules at the front-end part of the shoe and to be slip resistant on smooth and greasy floors in industrial environments. Different specific protections are then added onto the shoe to fulfill the protection criteria the shoe is meant for.

Process of making a safety shoe

A safety shoe begins with a conceptual design, which is then tested until it satisfies the requirements. The material for the upper part of the shoe is chosen depending on the functionality the shoe is supposed to have. The sole and the toe cap are also based on the function of the shoe.

Once all the materials have been chosen, the parts for the upper are cut out, assembled and then placed on the shoe last. Once on the shoe last, the toe cap is added underneath the main fabric and the shoe gets pressed together by a machine to help the shoe take form and make the toe cap fit well around the front part. Thermoplastic is then injected into the molds for the sole to then produce the outsole. Once the sole is connected to the upper part of the shoe, a safety shoe has been made. (You are interested in learning more about the specific requirements, when making a shoe last? Then click here.)

Fundamental requirements of safety footwear

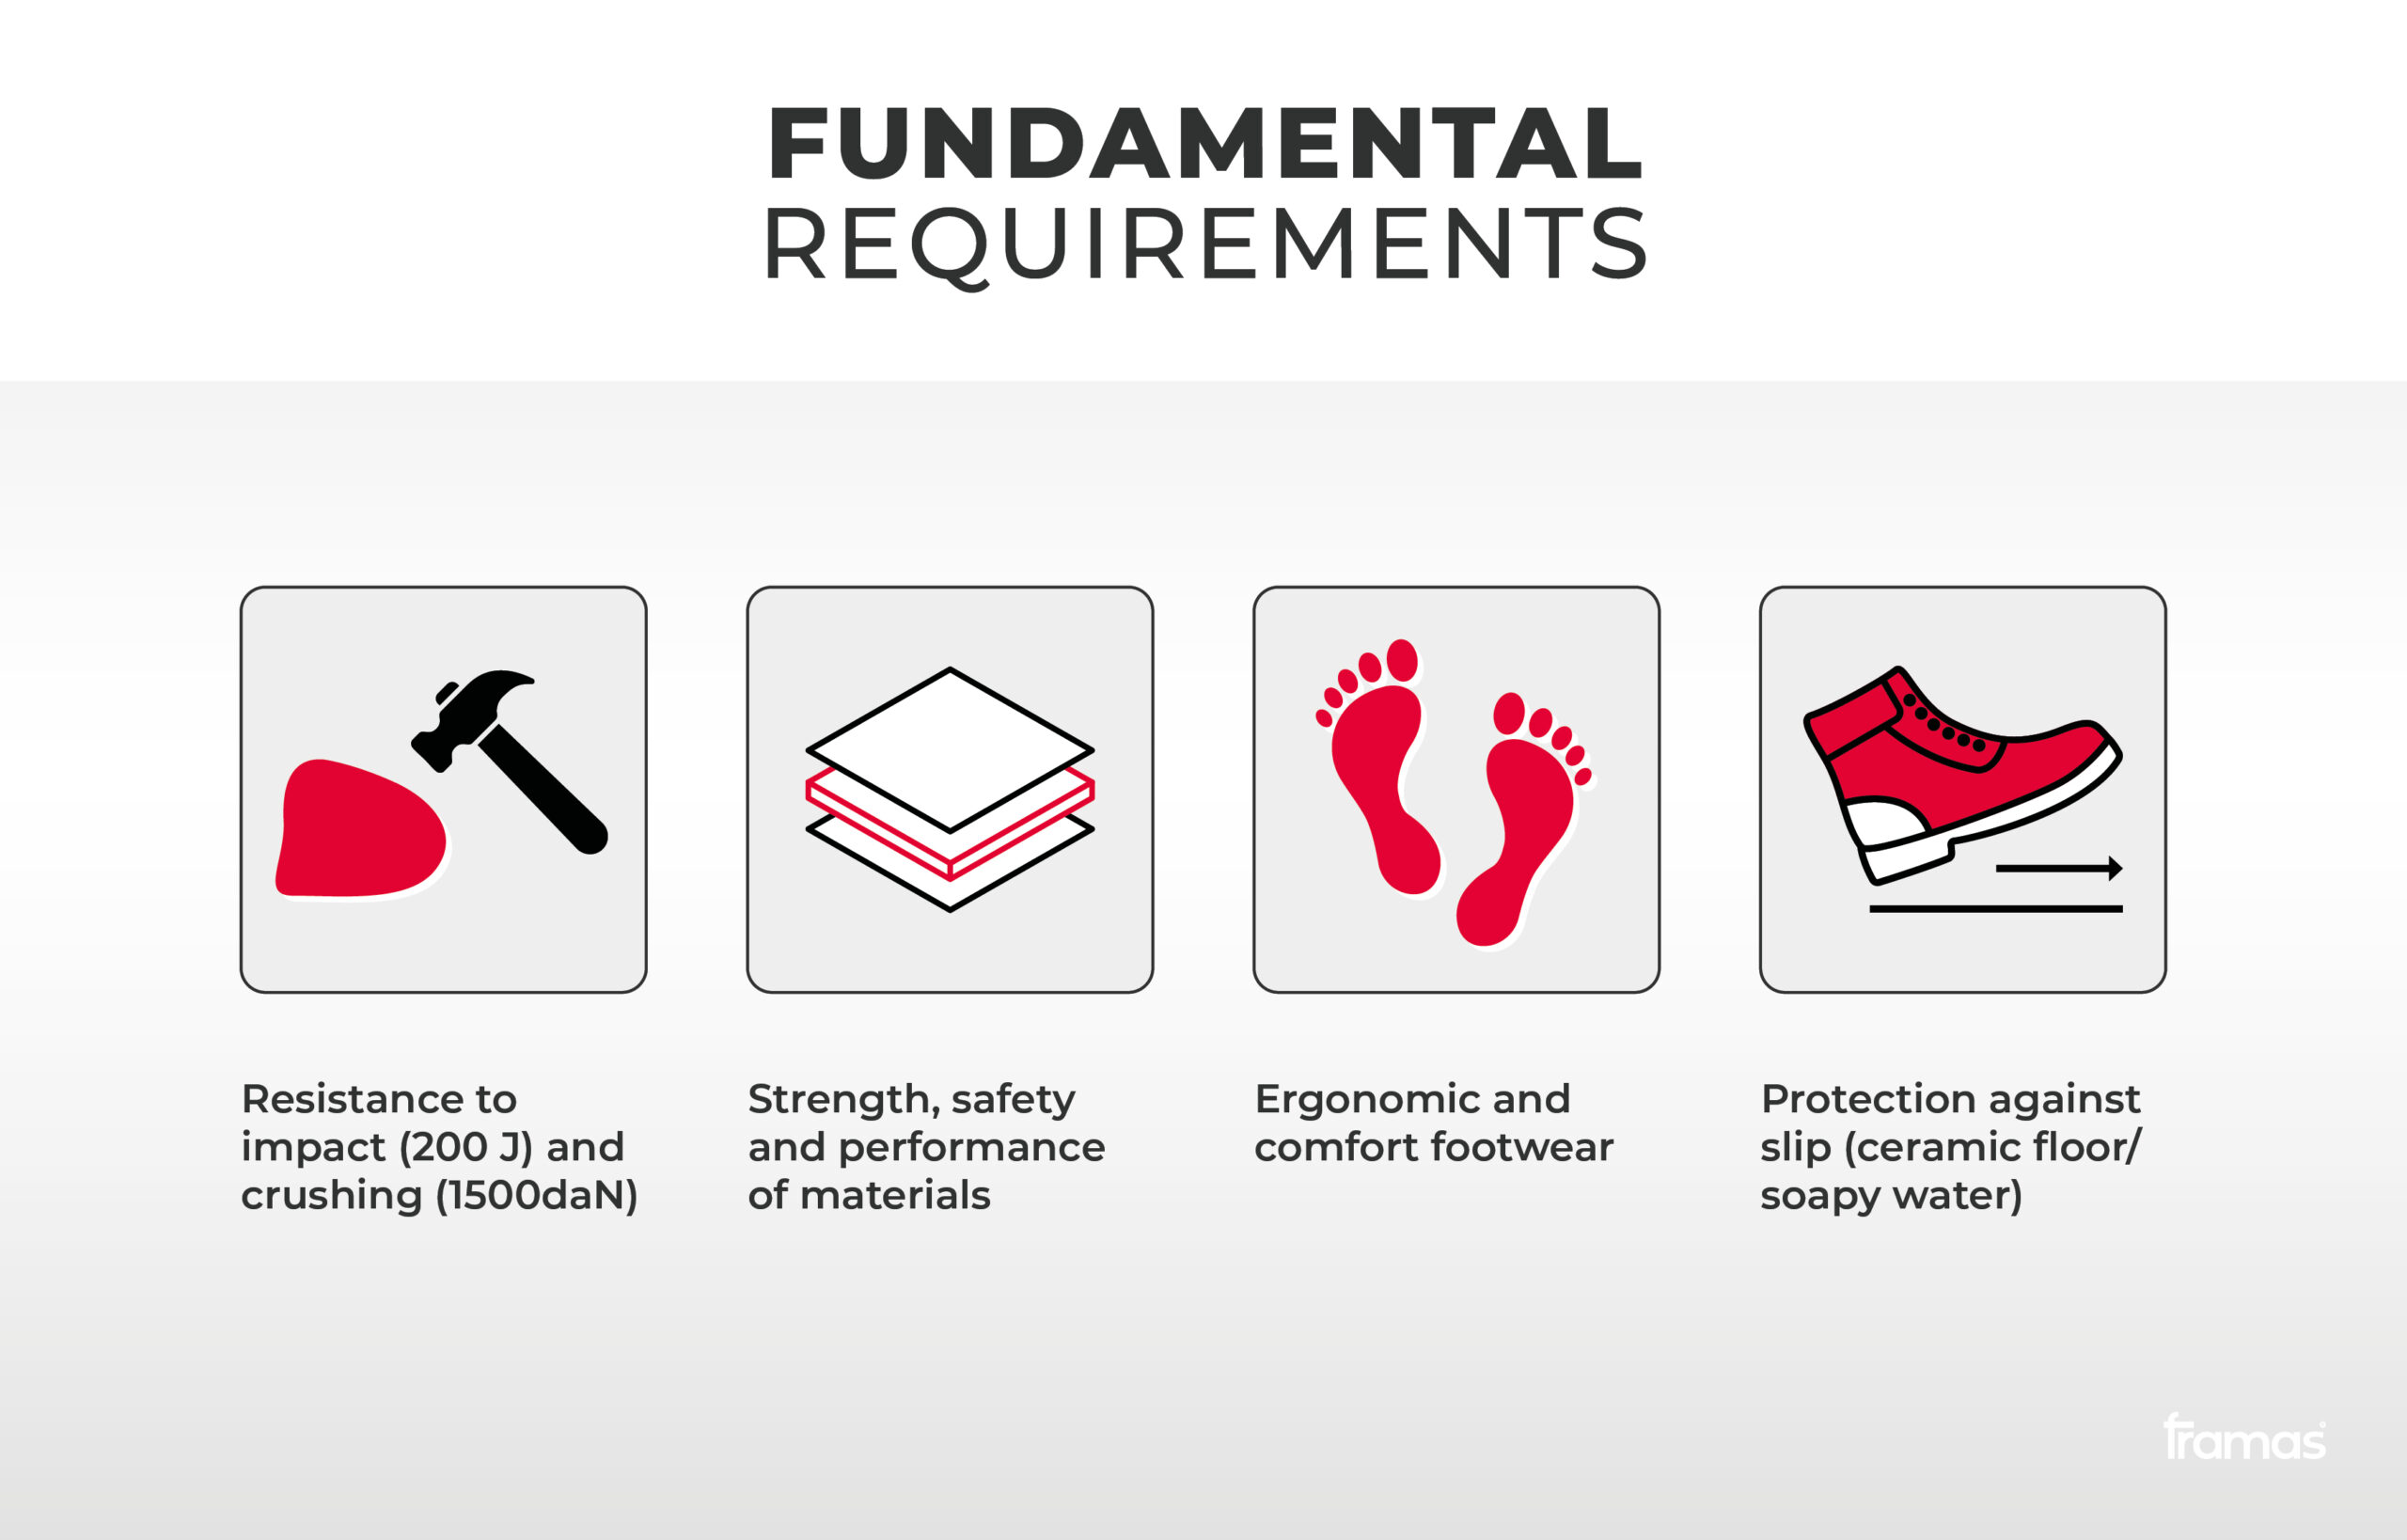
The basic requirements of a safety shoe can be found in the standard basic (SB) degree of protection. This includes a sole which is anti-slip, anti-abrasion oil resistant and anti-static. The non-slip properties must be true on ceramic tiles with cleaning agents (SRA), on steel floor with glycerin (SRB) and on the two types of floors combined (SRC).

Furthermore, the materials used to build the shoe have to be water resistant, breathable, hard wearing, and strong. The shoe needs to be comfortable, and the toe cap needs to be impact and crushing resistant. The toe cap can be made from steel, plastic or aluminum and needs to have an impact resistance of 200 Joules. This means the toe cap should withstand a weight of 20kg from a fall height of 1 meter. A SB safety shoe provides the minimal amount of protection but provides more protection than a normal work shoe.

Process of making a safety shoe

All safety shoes must meet these basic requirements but there are additional requirements depending on the shoe’s area of application. The additional safety features on the safety shoes are depicted on the label via a symbol and can be divided into 3 categories: complete footwear, instep and the sole.

Complete footwear includes the following:

1. Puncture resistant (P) insoles, which are resistant to a puncture force of 1,100N.

2. Conductive footwear (C) which, by evaporating electrostatic charges, is electrical resistant from 0 to 100 kilohms.

3. Antistatic footwear (A) dissipates electrostatic charges between 100 and 1000 kilohms.

4. Heat resistant soles (HI) allows an insulation against heat up to 150 degrees.

5. Cold resistance soles (CI) allow an insulation against cold up to -17 degrees.

6. The heel area must absorb a minimum of 20 Joules energy (E). 

7. Metatarsal protection (M) provides additional safety for any of the bones in the foot.

8. Ankle protection (AN) adds additional ankle protection.

9. Cut resistant (CR) features are zones of the shoe which are resistant to getting cut.

10. Waterproofing (WR) means that the entire shoe must be waterproof.

Instep requirements are specifically directed towards the middle part of the foot. There is only one additional requirement, which is that the upper part of the shoe is resistant to water entering and the absorption of water (WRU).

The sole has two requirements. It can be resistant to contact with heat (HRO)  for temperatures up to 300 degrees and can also additionally be resistant to hydrocarbons (FO) which are highly combustible chemicals.

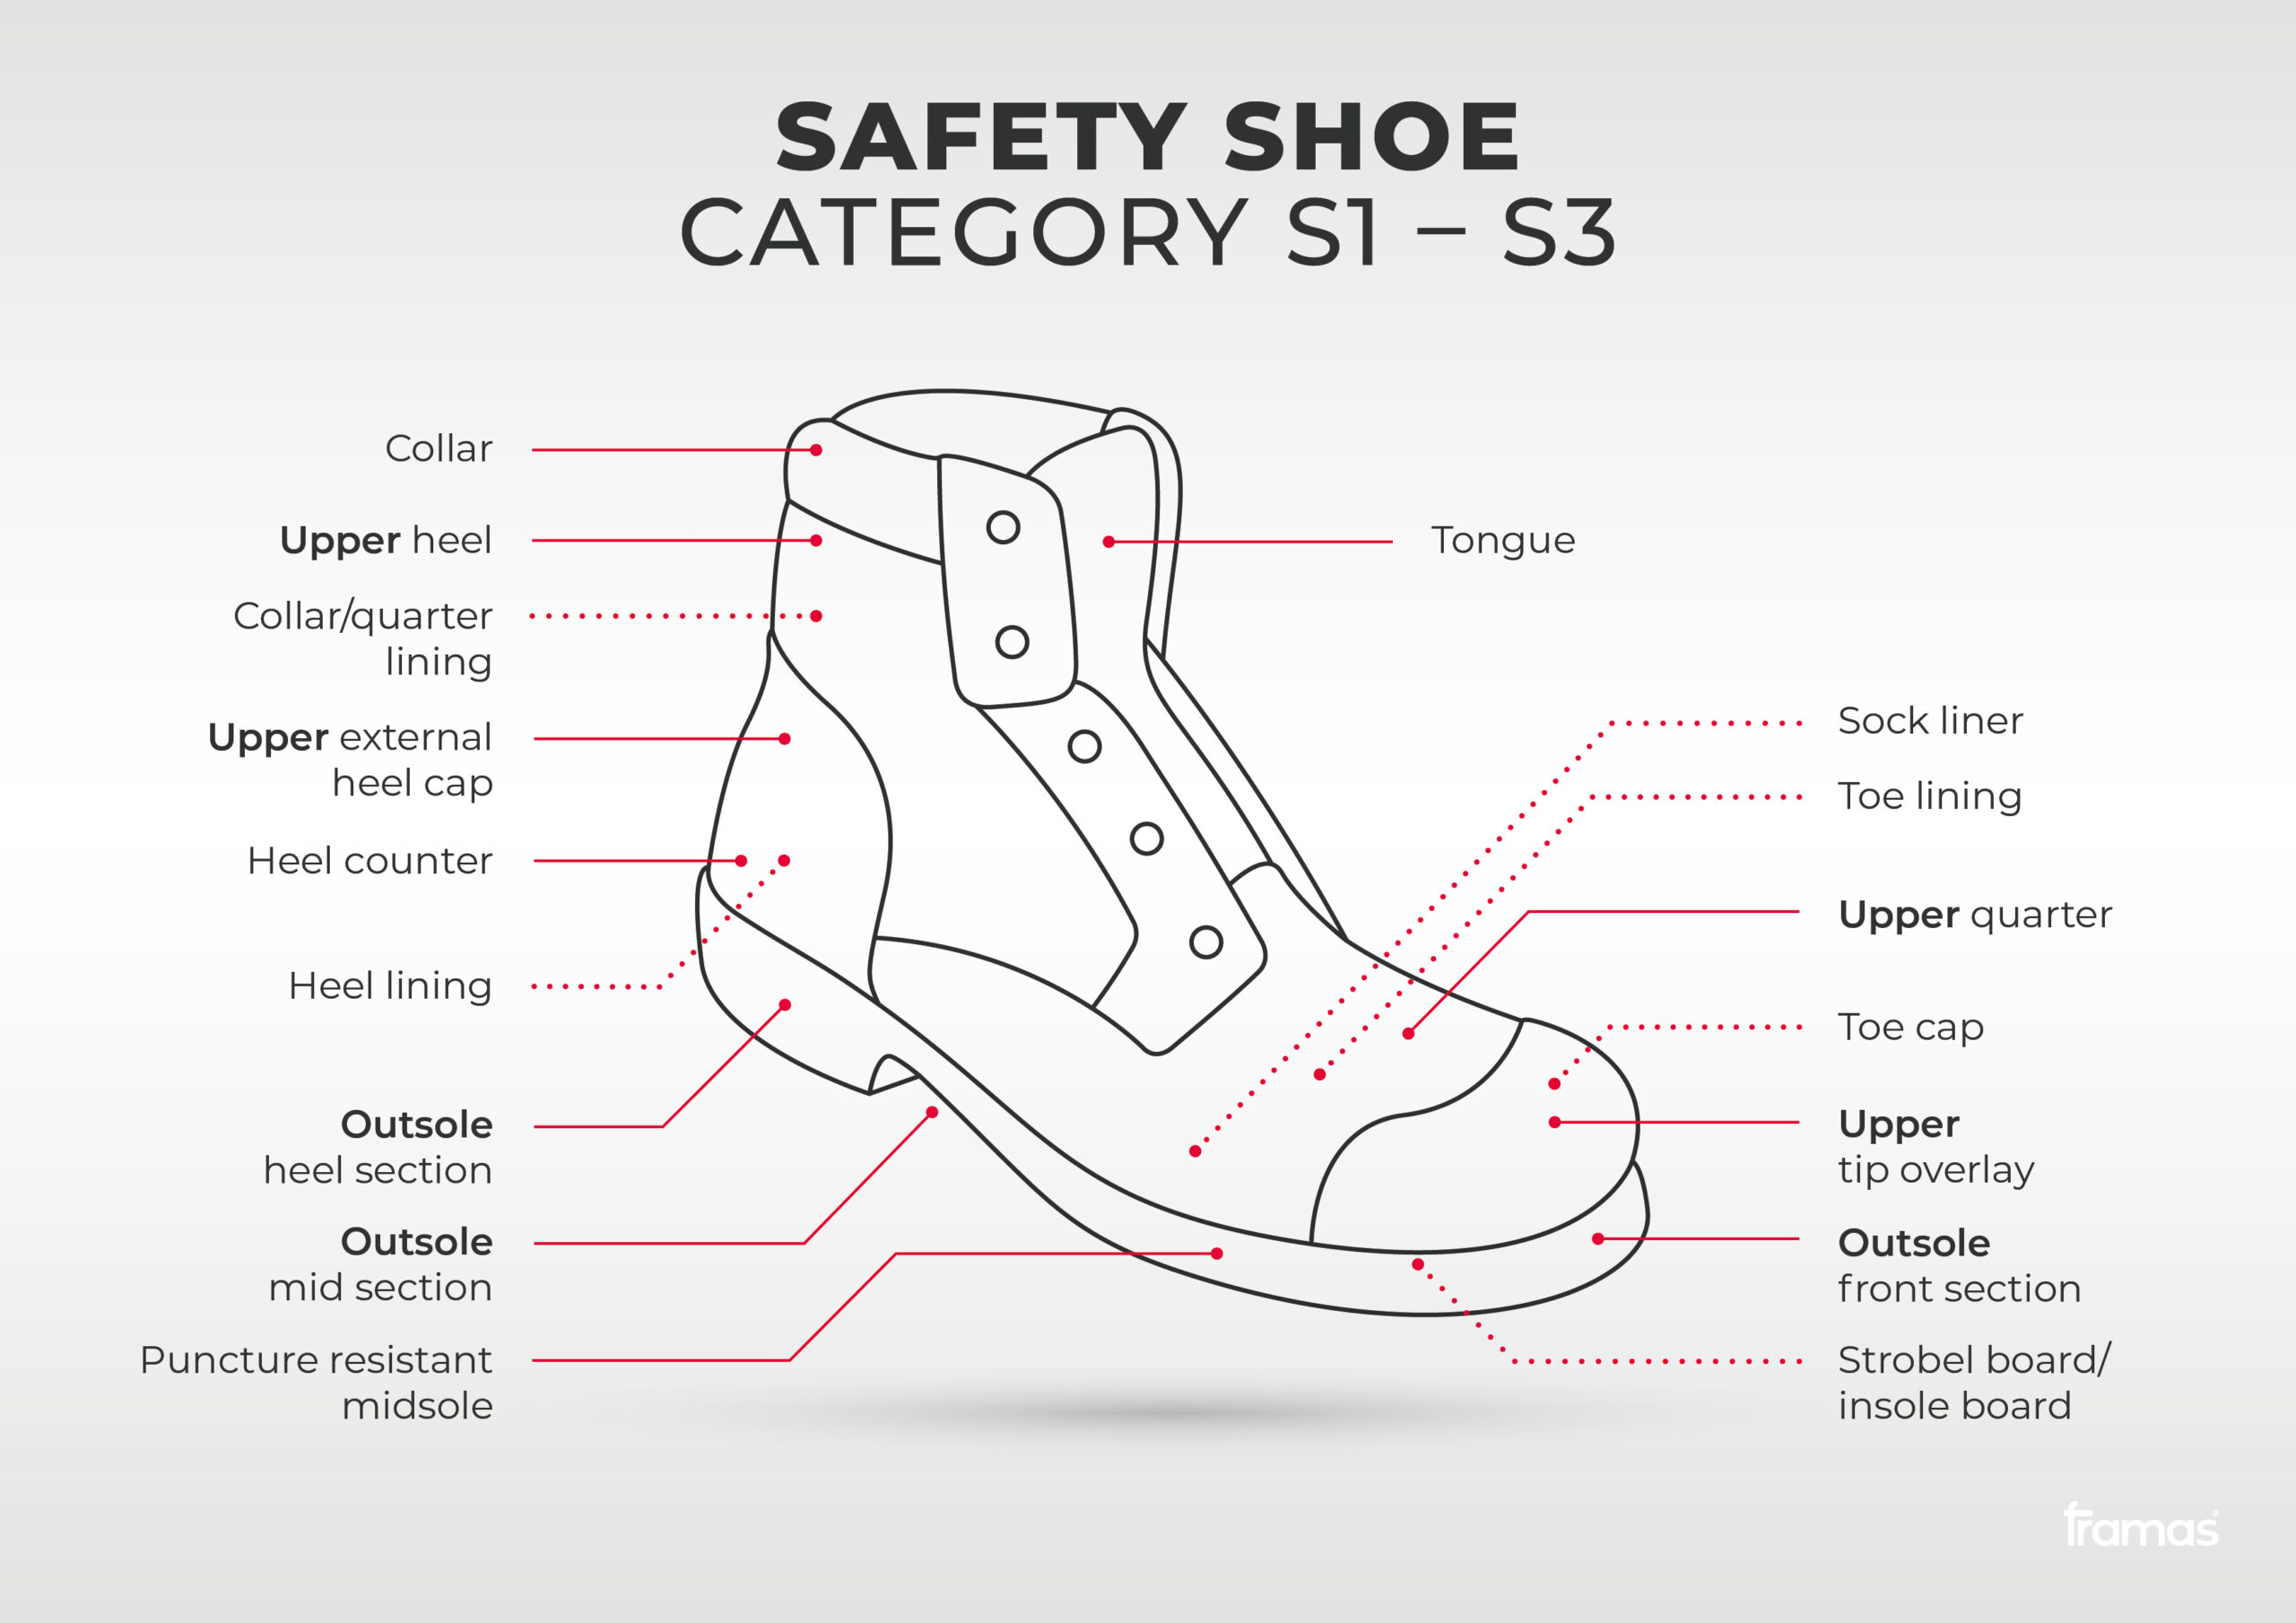
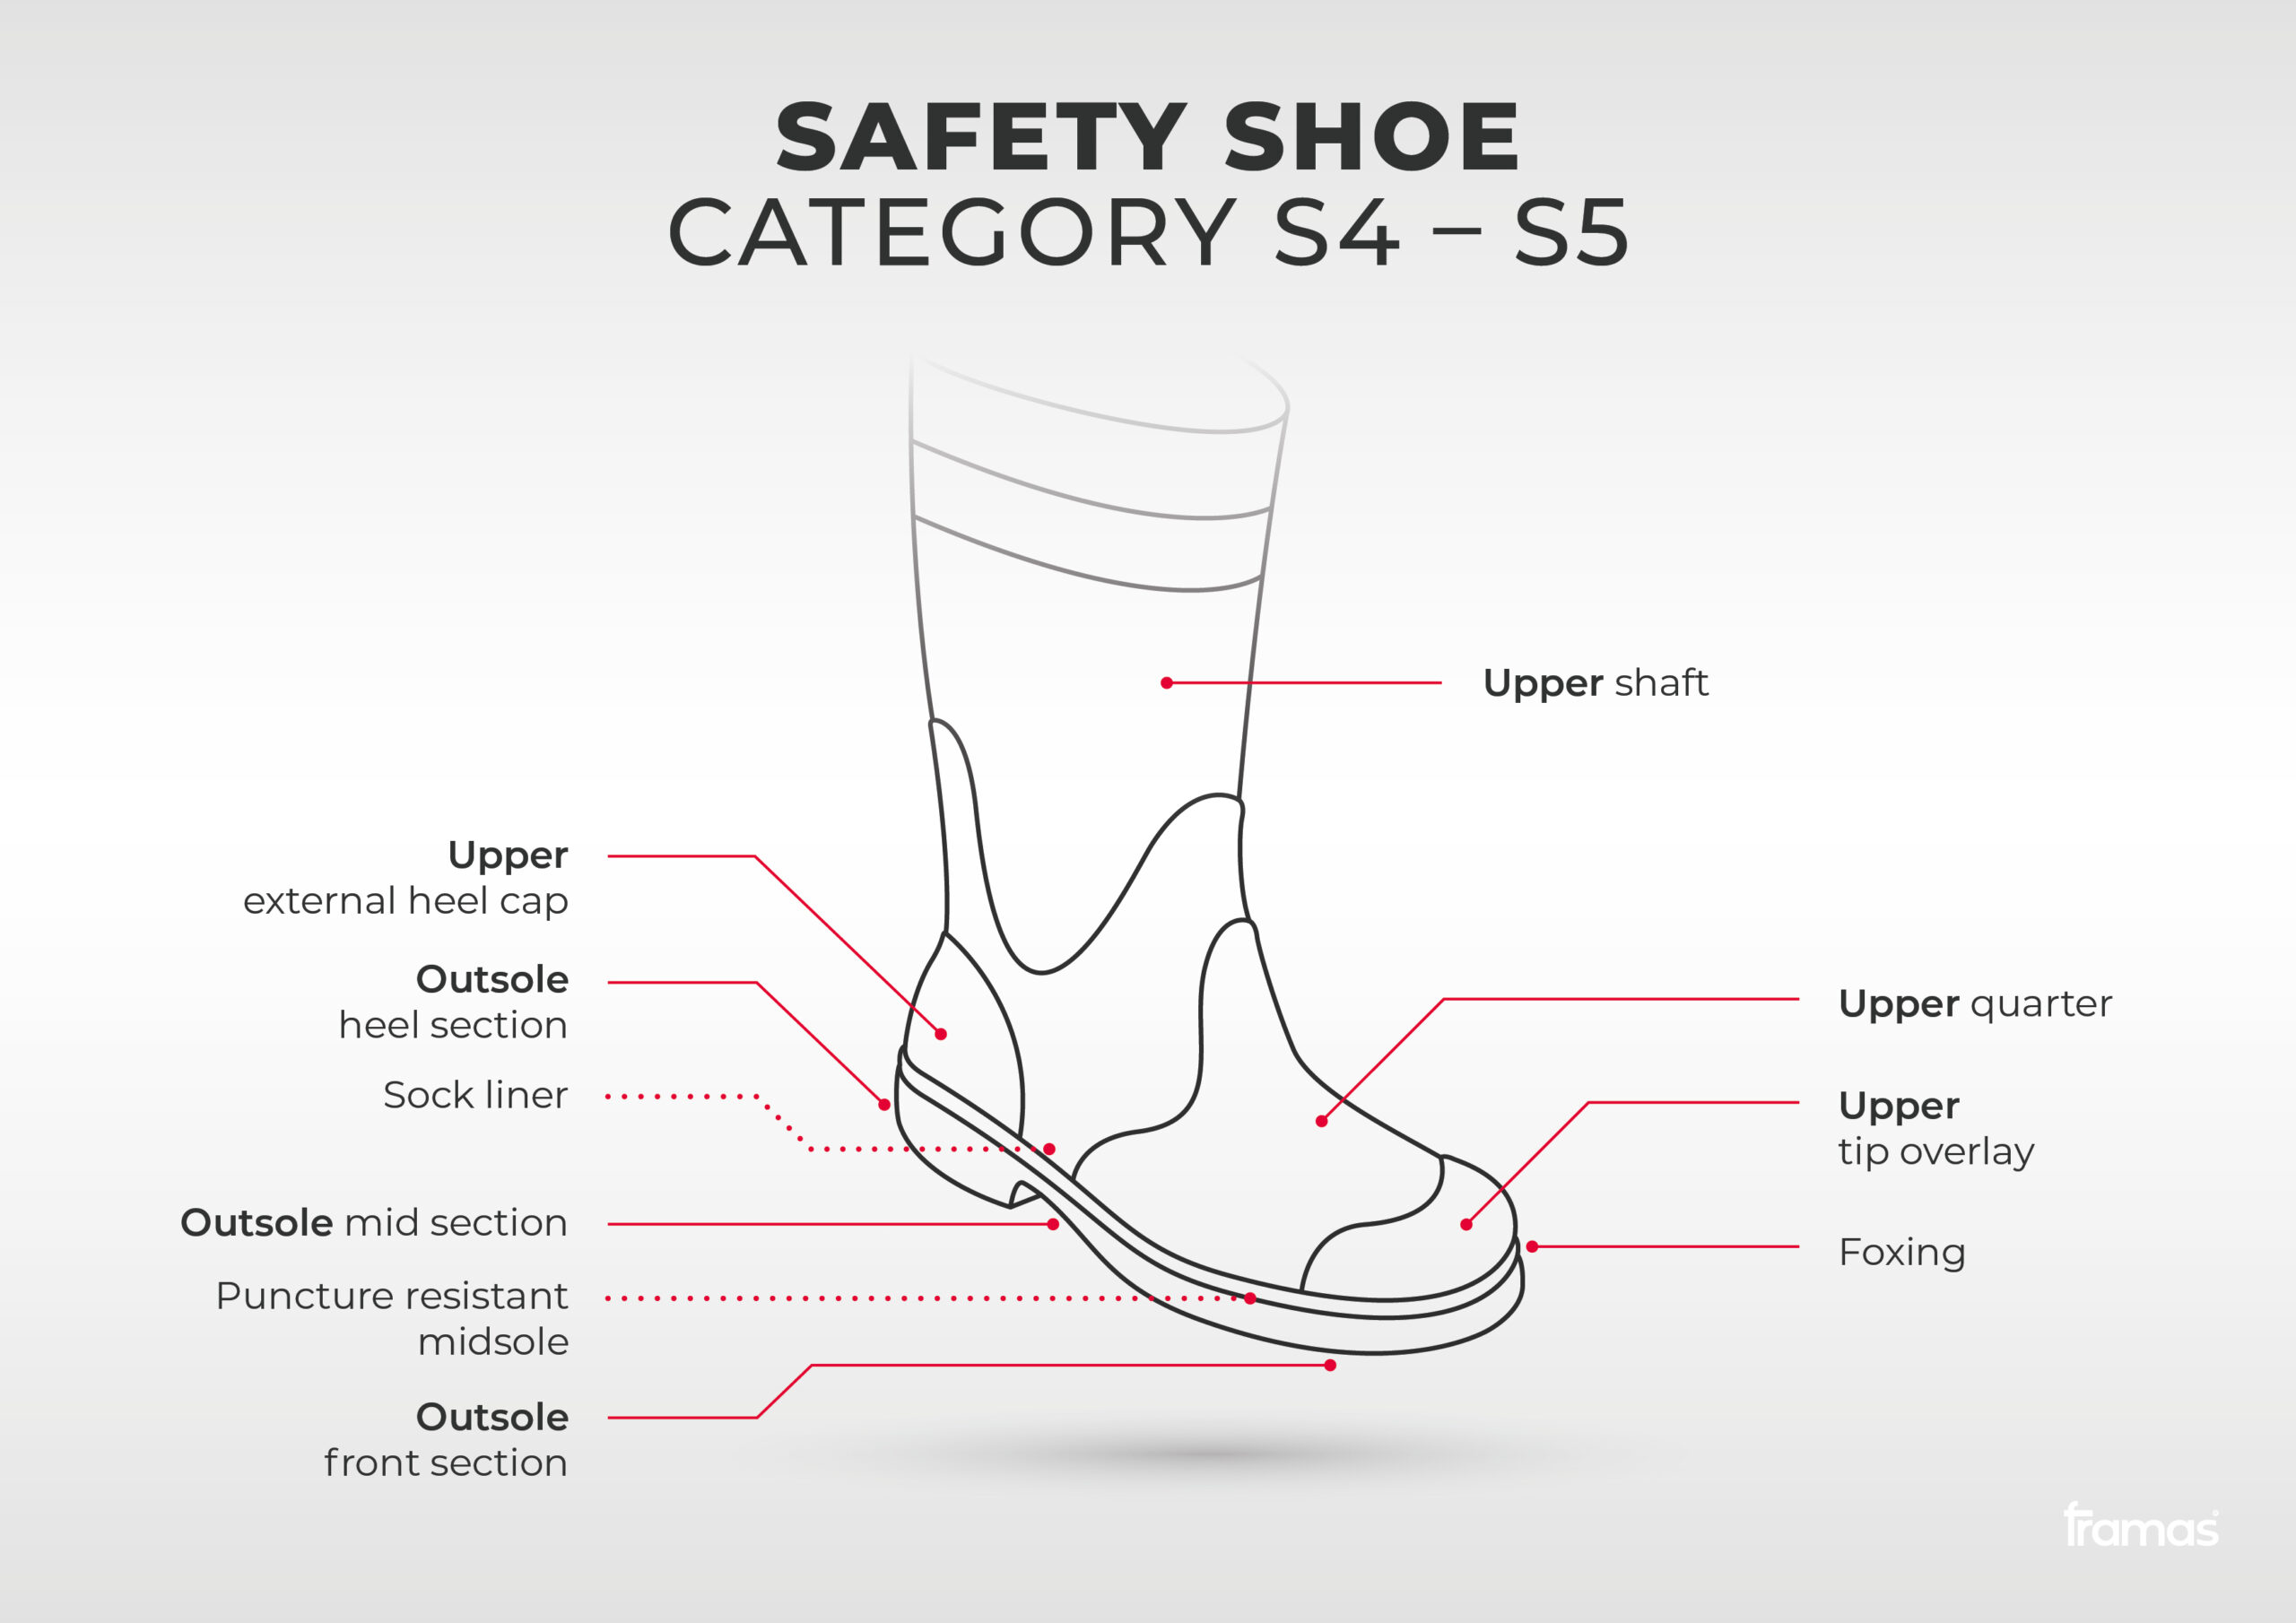
The different degree of protection provided by these safety shoes are indicated by the S, meaning standard, and a number. The higher the number, the more extensive the protection which goes from S1 up to S7. Safety shoes can be divided into two categories depending on the material the footwear is made from. The first category has a leather or other synthetic material upper (S1-S3, S6, S7) whilst the second category has an upper made from rubber, PVC or PU (S4 and S5).

Do you want to learn more about different plastics used in injection molding. Then check out our blog post here.

1. Safety Category S1

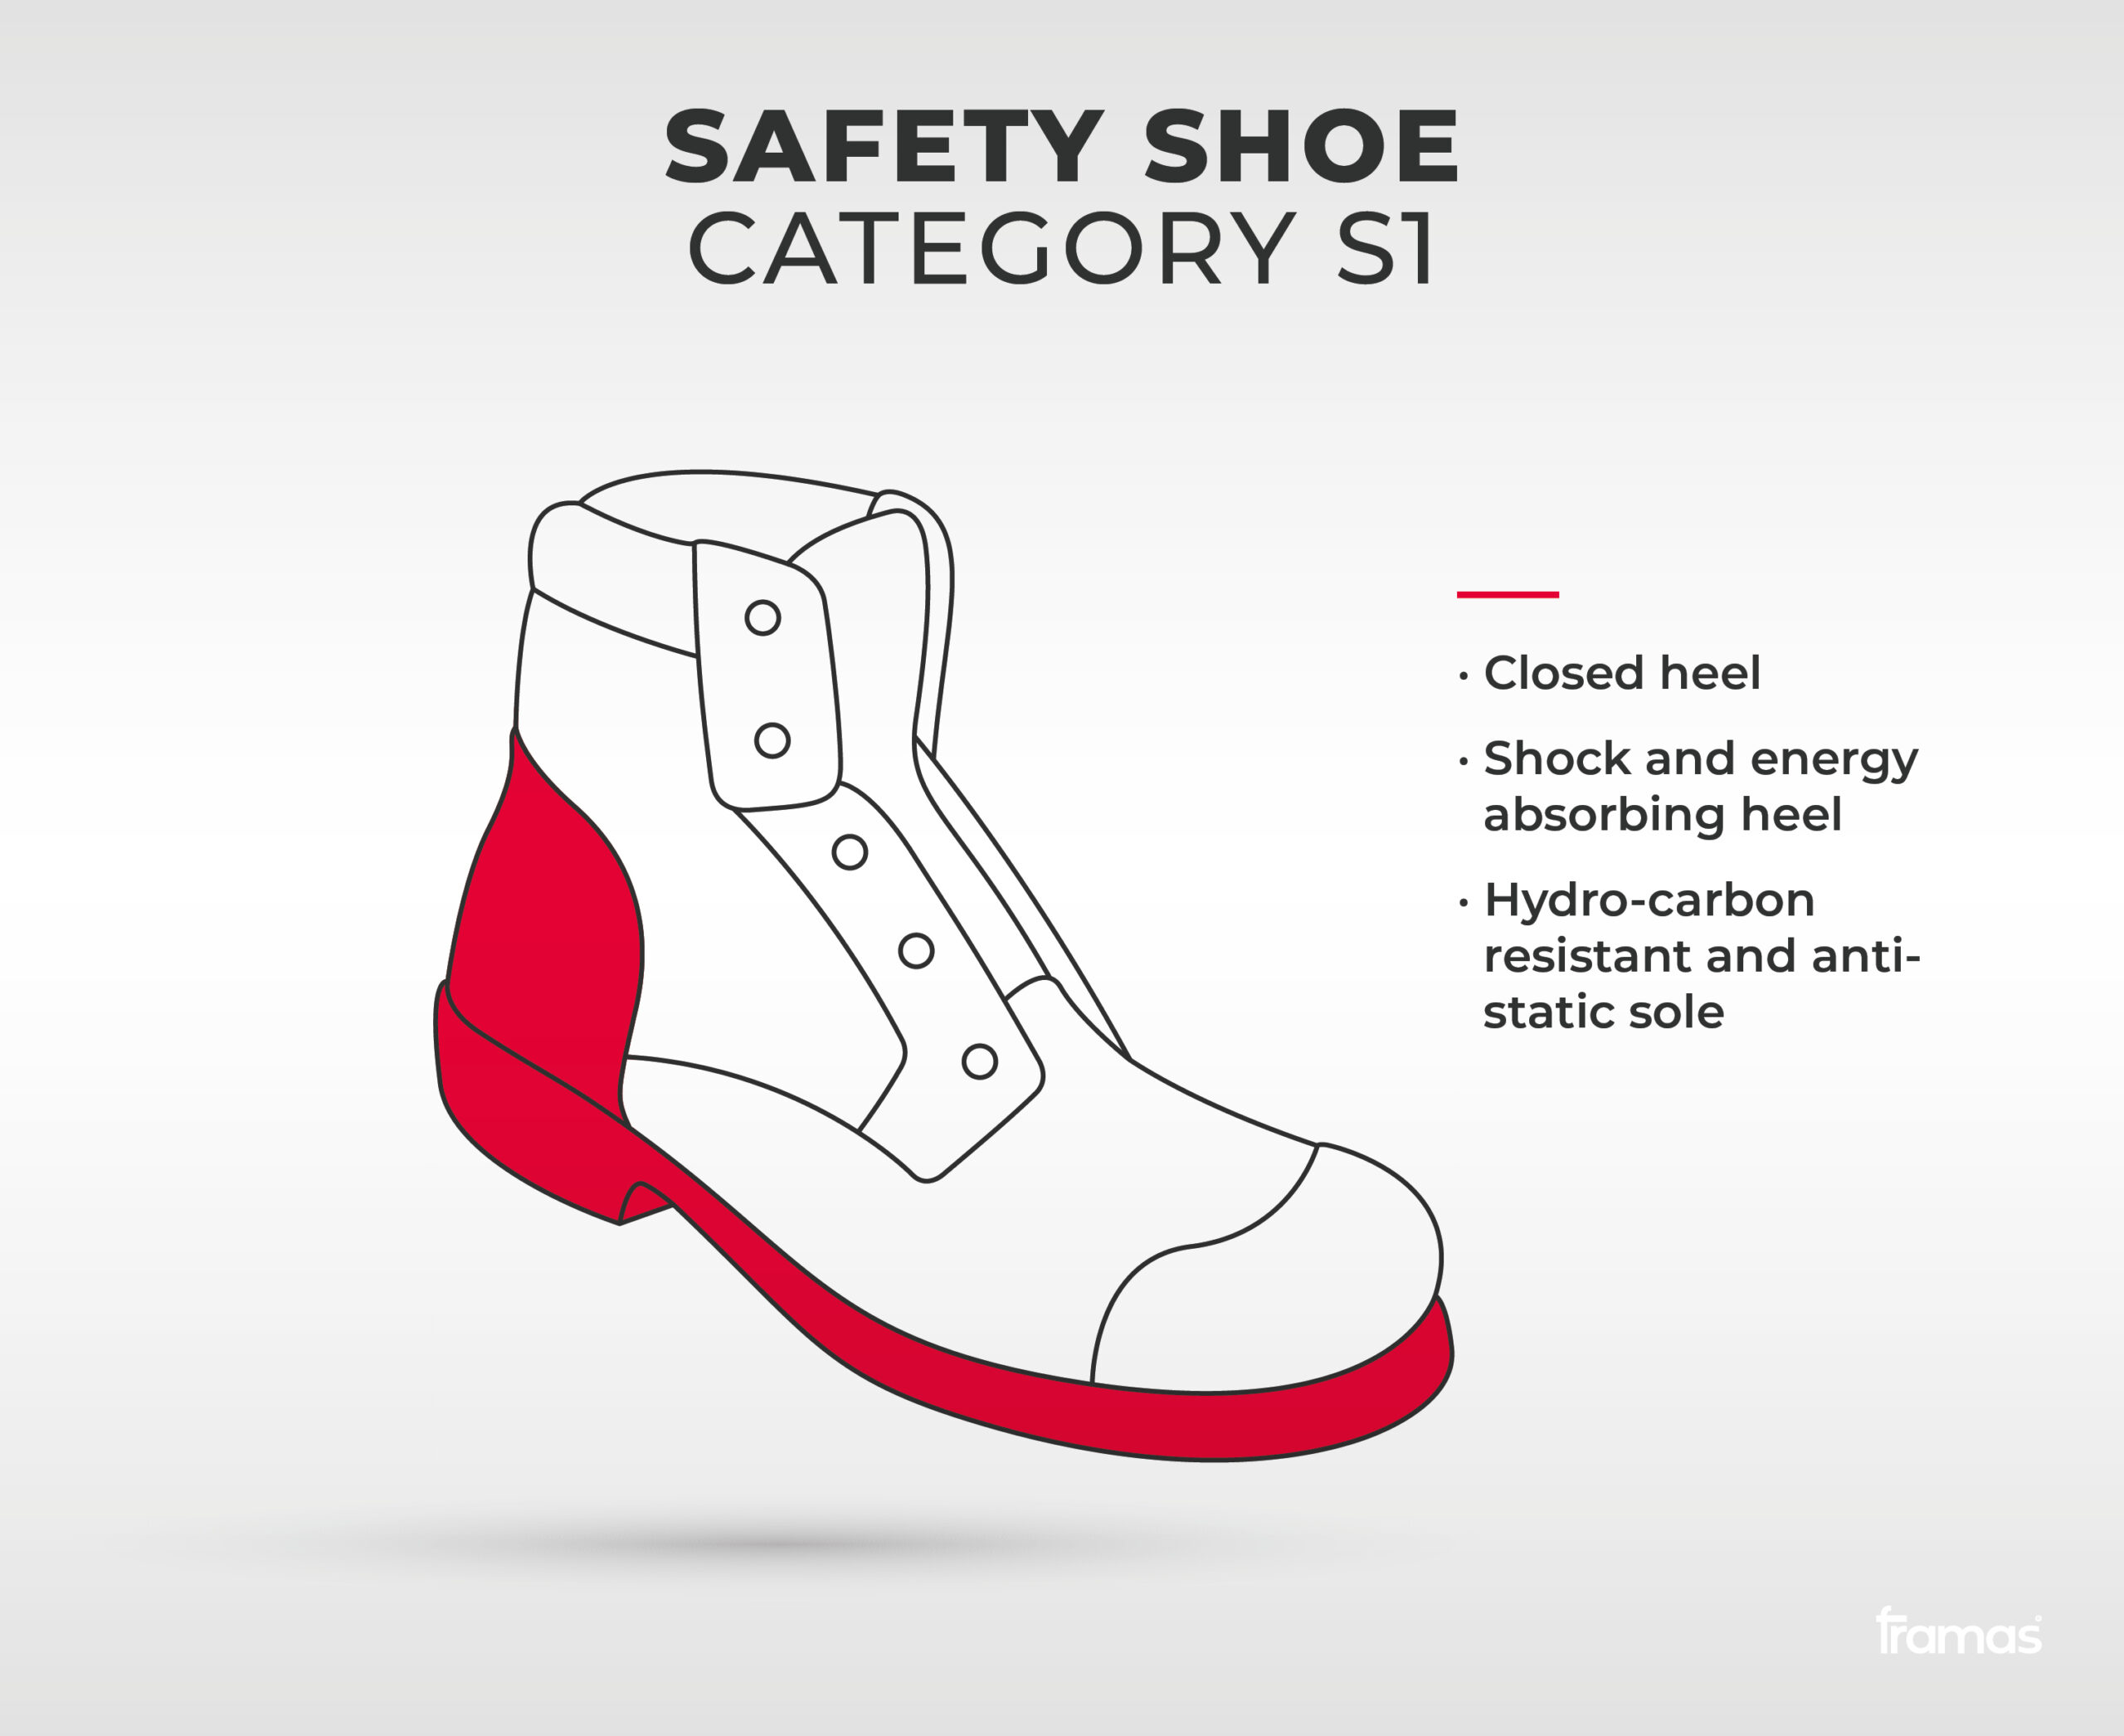
The degree of protection S1 meets all the basic requirements (SB) and additionally has closed, shock and energy absorbing heel (E). In addition the sole must be hydro-carbon resistant (FO) and anti-static.

S1 is good for interior activities in dry places where the importance of the shoe is to have basic protection. Contact with water tends to be non-existent. This applies to jobs such as electricians, mechanics, and craftsmen.

2. Safety Category S2

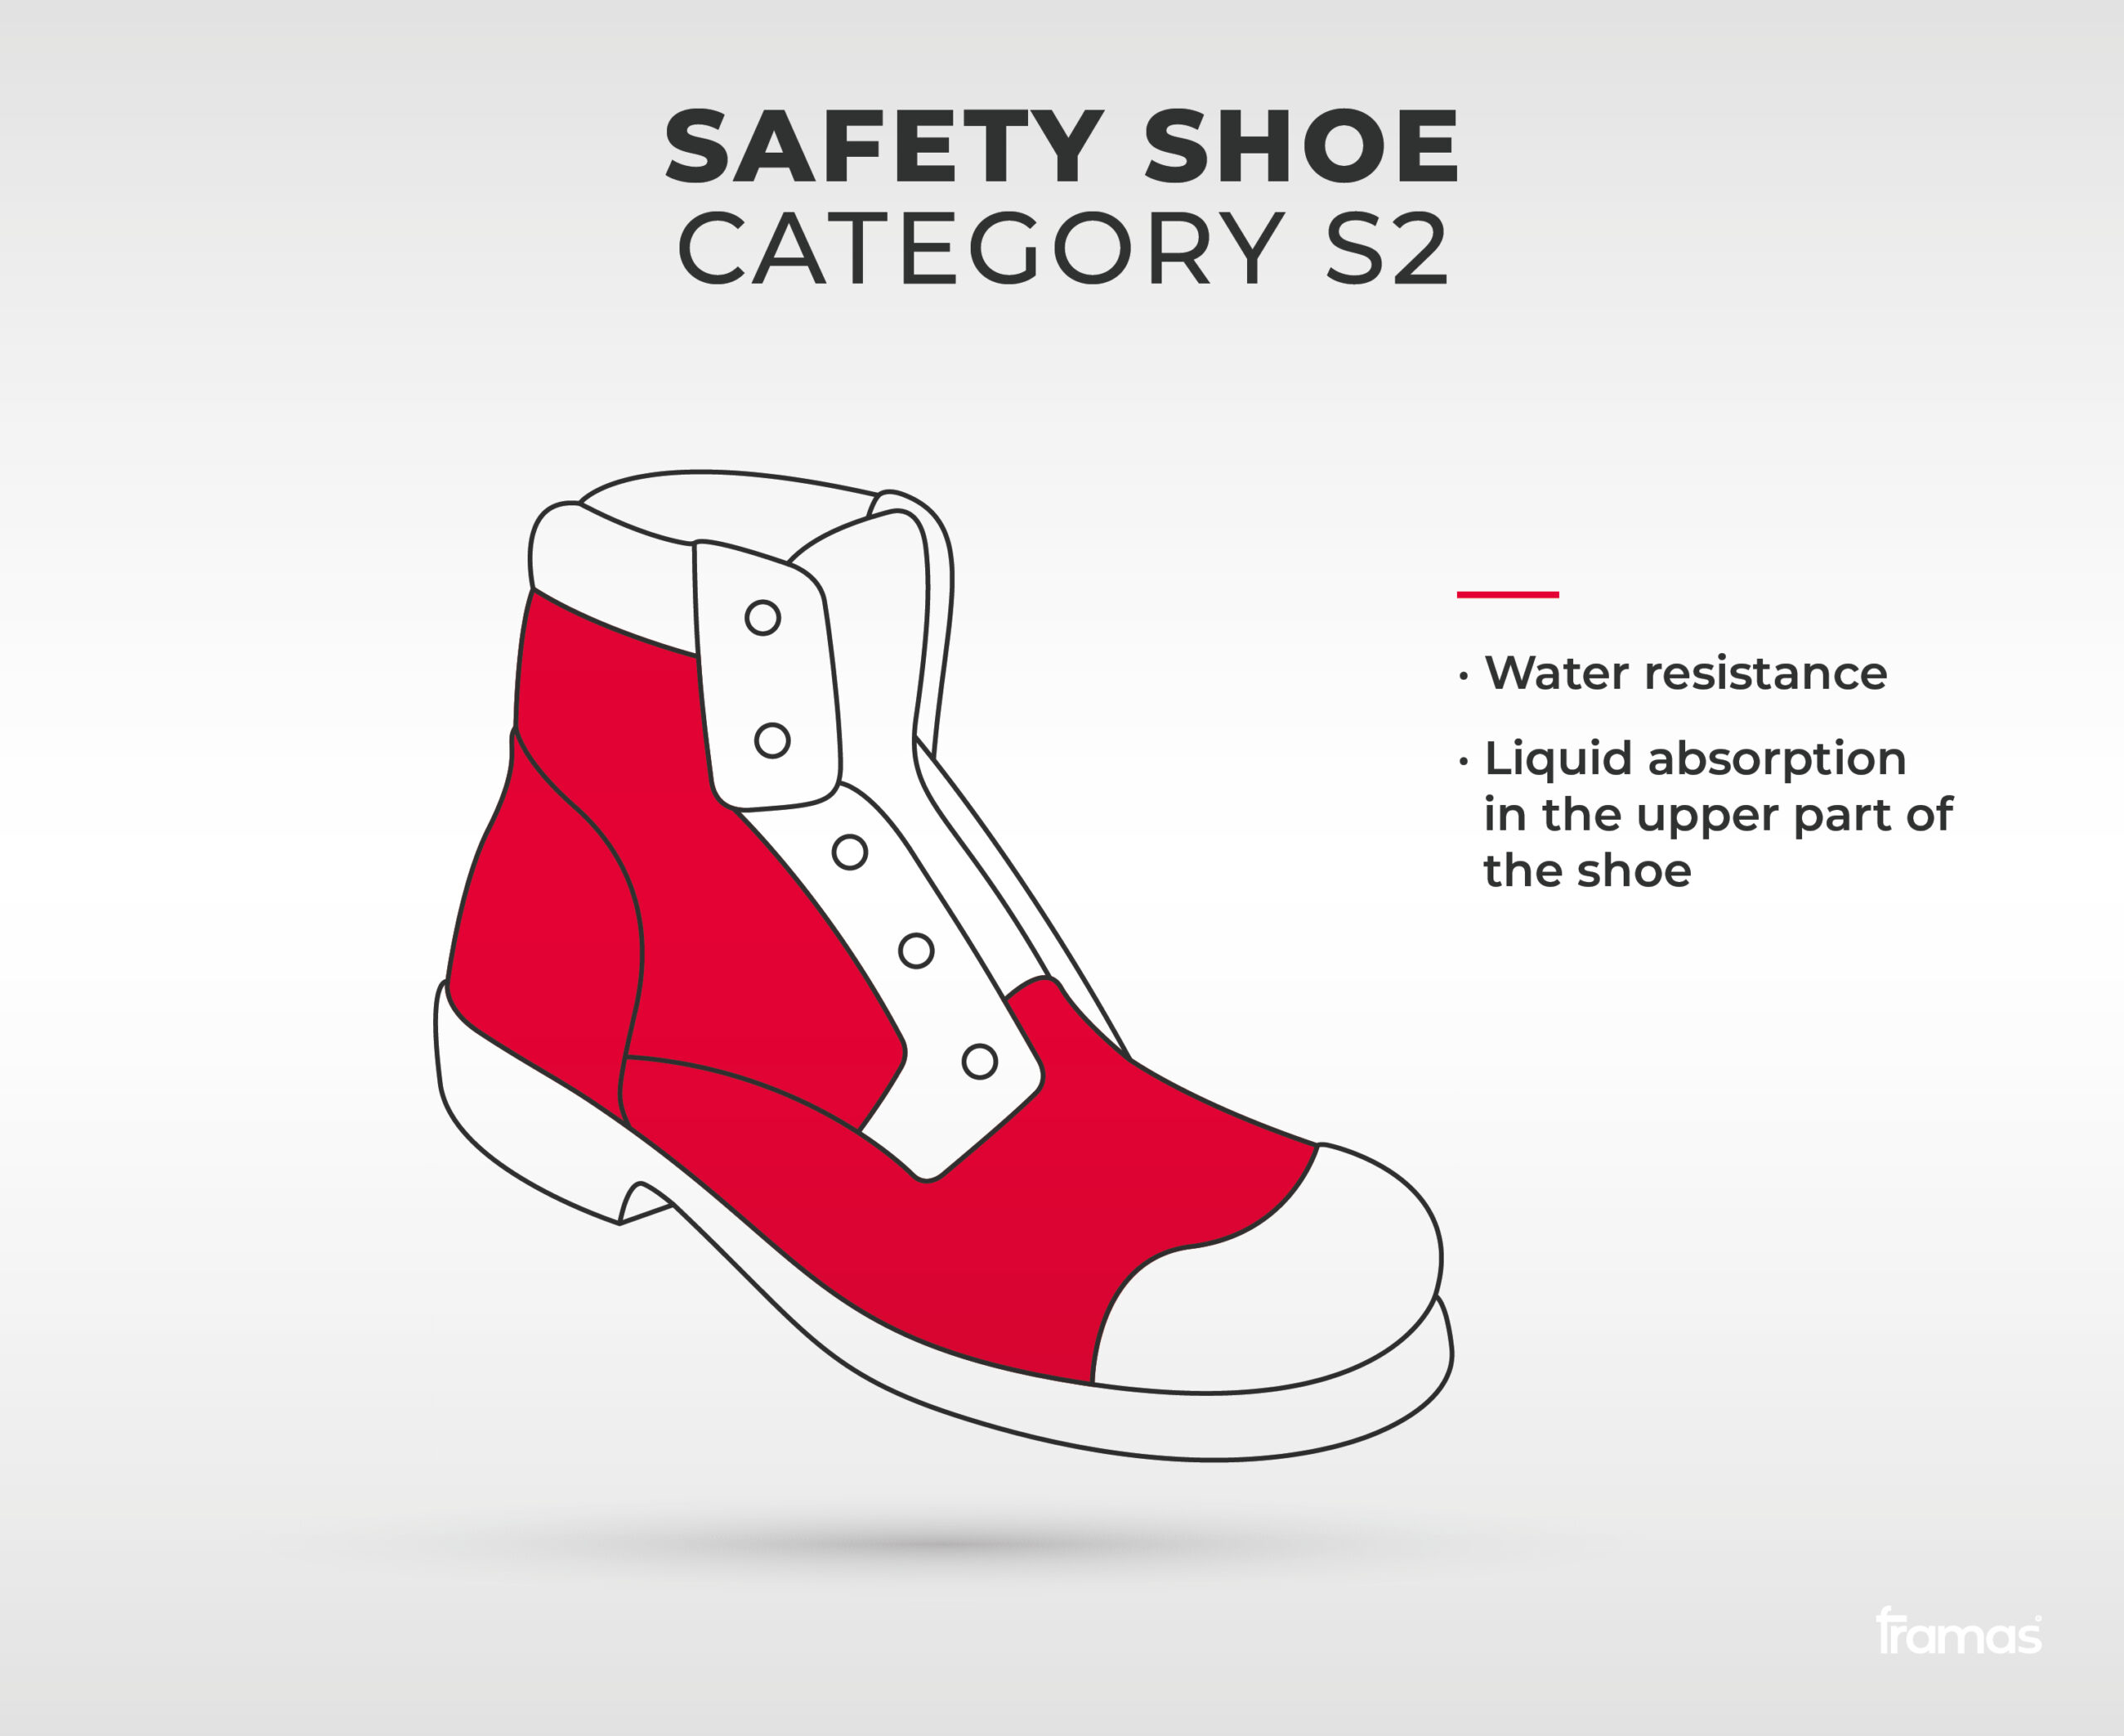
S2 meets the basic requirements and those of category S1, whilst also providing resistance to water and liquid absorption in the upper part of the shoe.

Safety shoes which follow the S2 requirements are useful in work areas with a high level of humidity where basic protection is still sufficient. This can be useful for someone who works in the food industry in the storage and the transportation. An airport worker would need an S2 safety shoe but with a plastic toe cap which is lighter than metal and allow to have a metal-free shoe which is beneficial in airports.

3. Safety Category S3

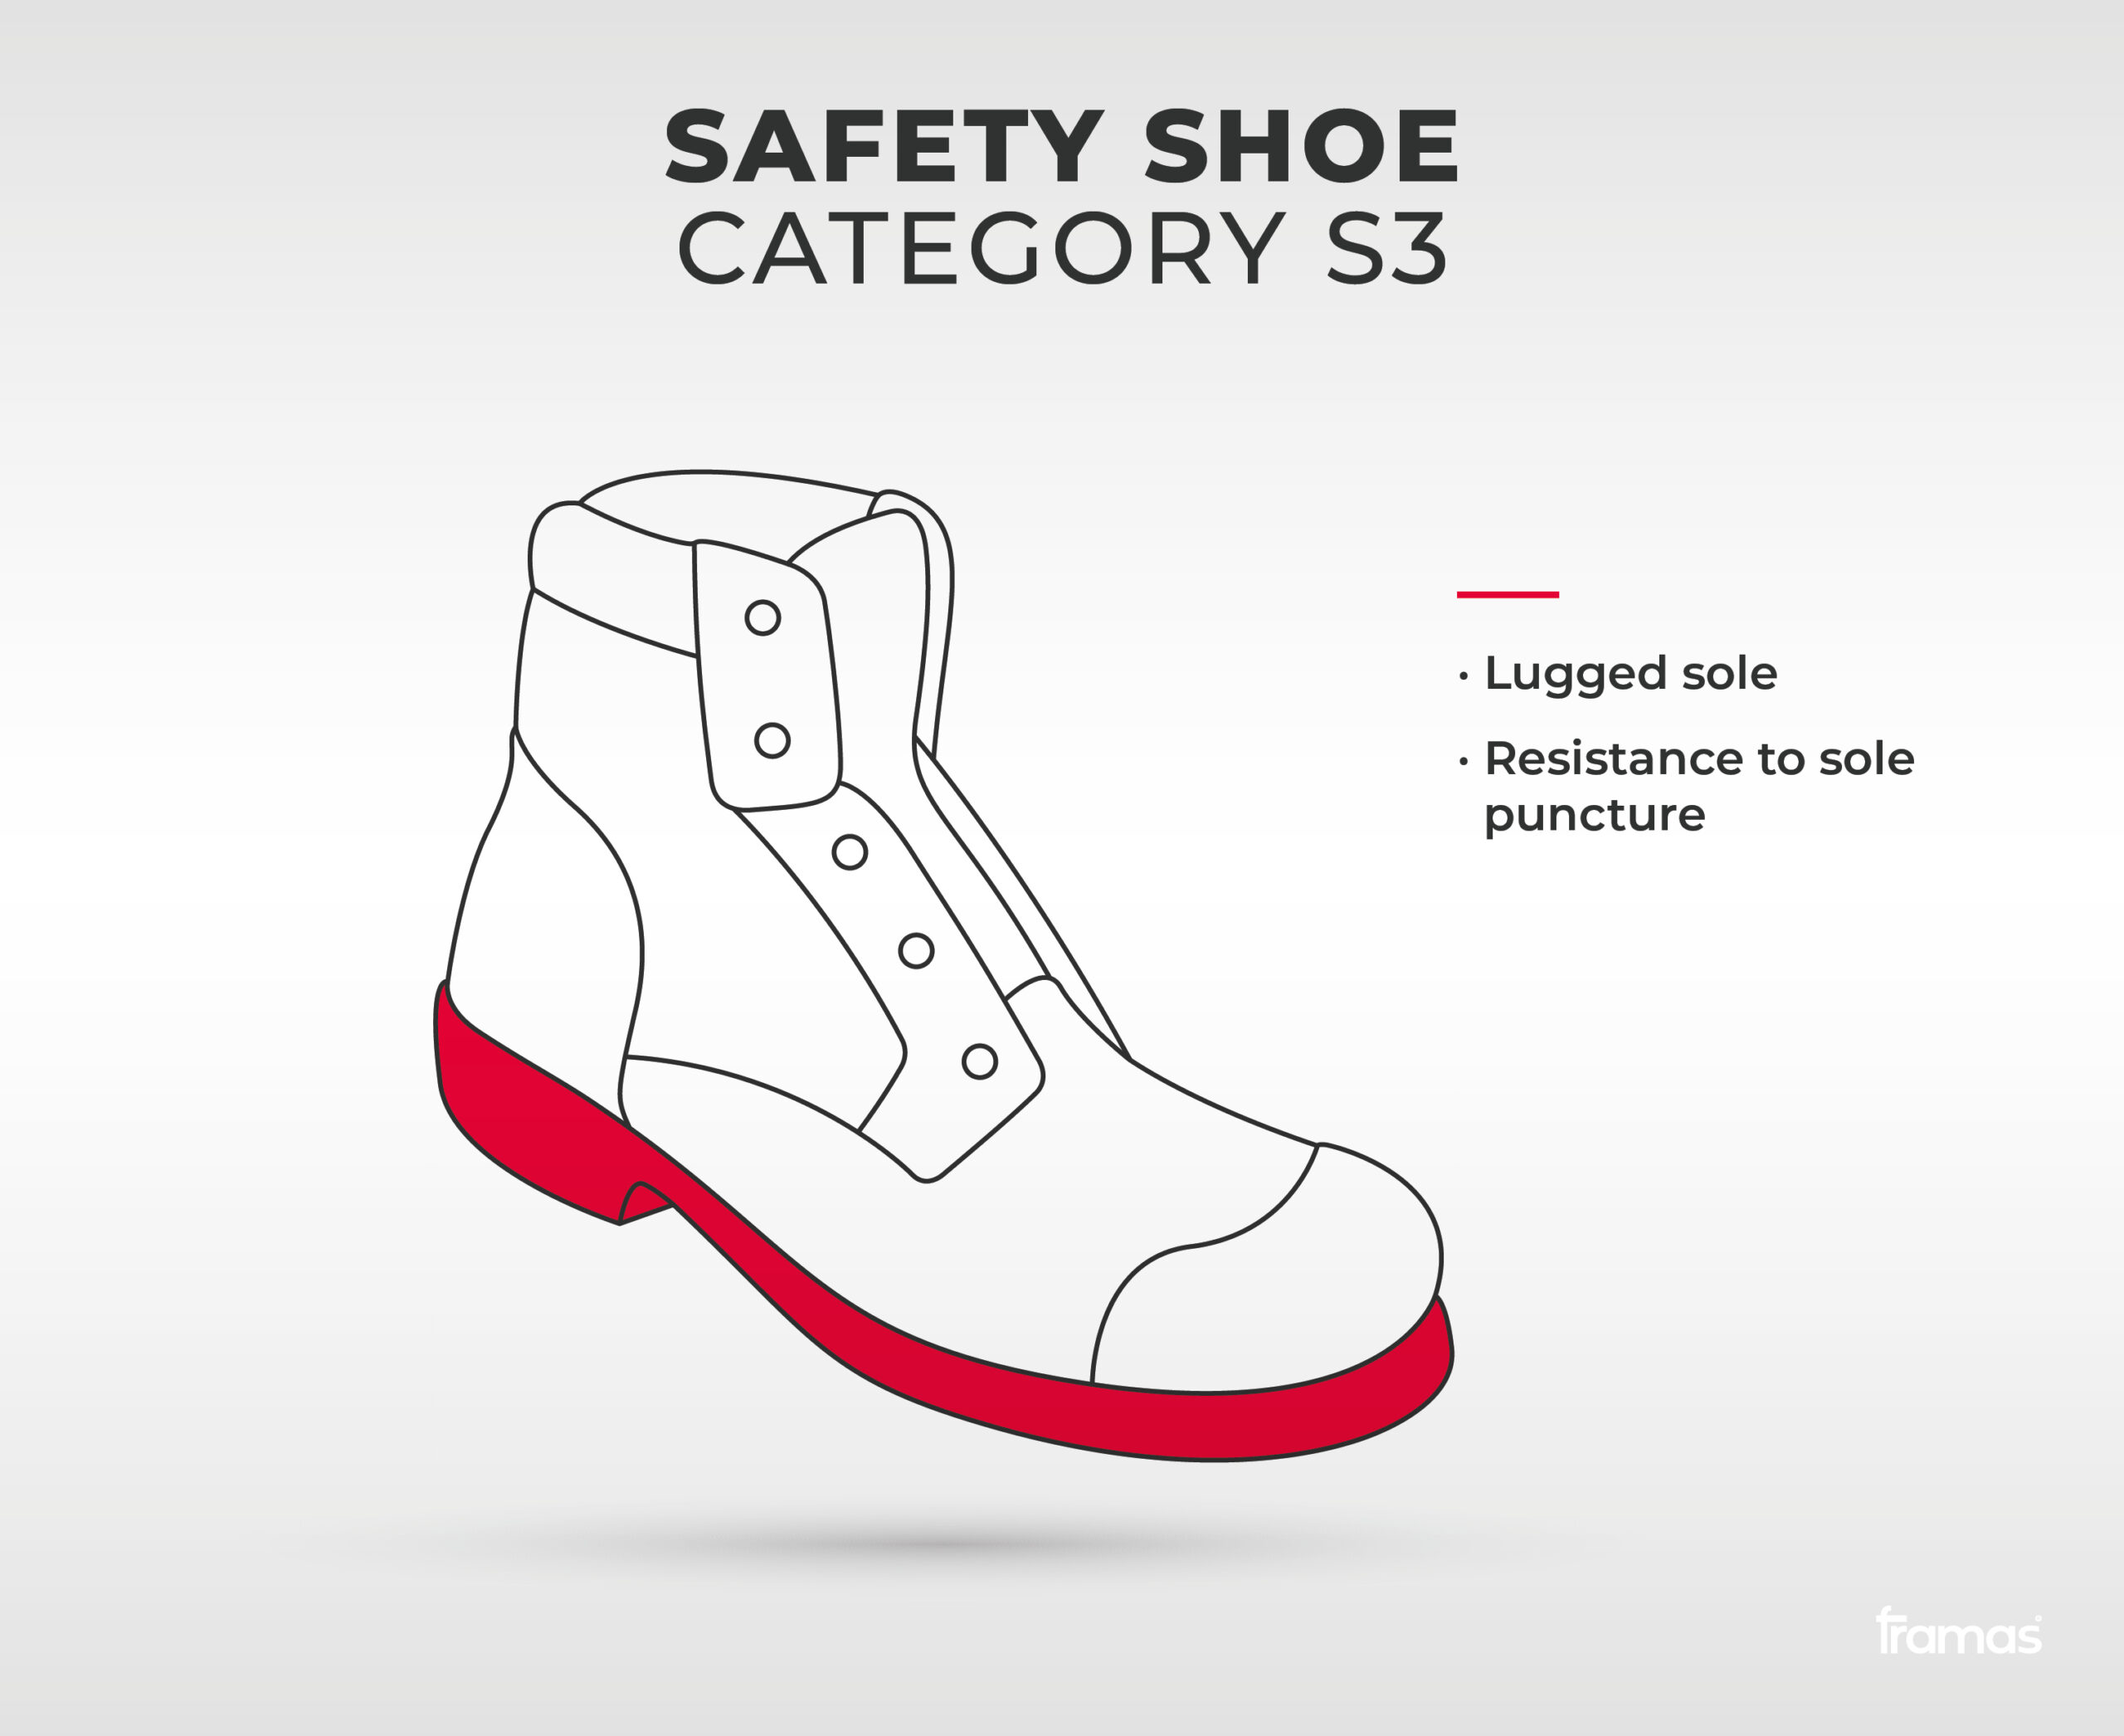
S3 meets the standards of category S2 and provides a lugged sole and a resistance to sole puncture. A lugged sole is a thicker outer sole with deep indentations.

Activities which happen in hostile work situations would benefit from S3 safety shoes. The shoe allows the person to have basic protection on their feet with the upper part of the shoe being water resistant and to have a sole which is thick and sturdy. Jobs in mining, agriculture, factories, or construction often use shoes with the S3 standard. A forestry worker needs protection against sharp working tools and slippery surfaces. This calls for a safety shoe with S3 requirements and cut resistant features. Production or factory workers also wear S3 safety shoes as they need to protect their feet from materials falling and be able to move around comfortably.

4. Safety Category S4

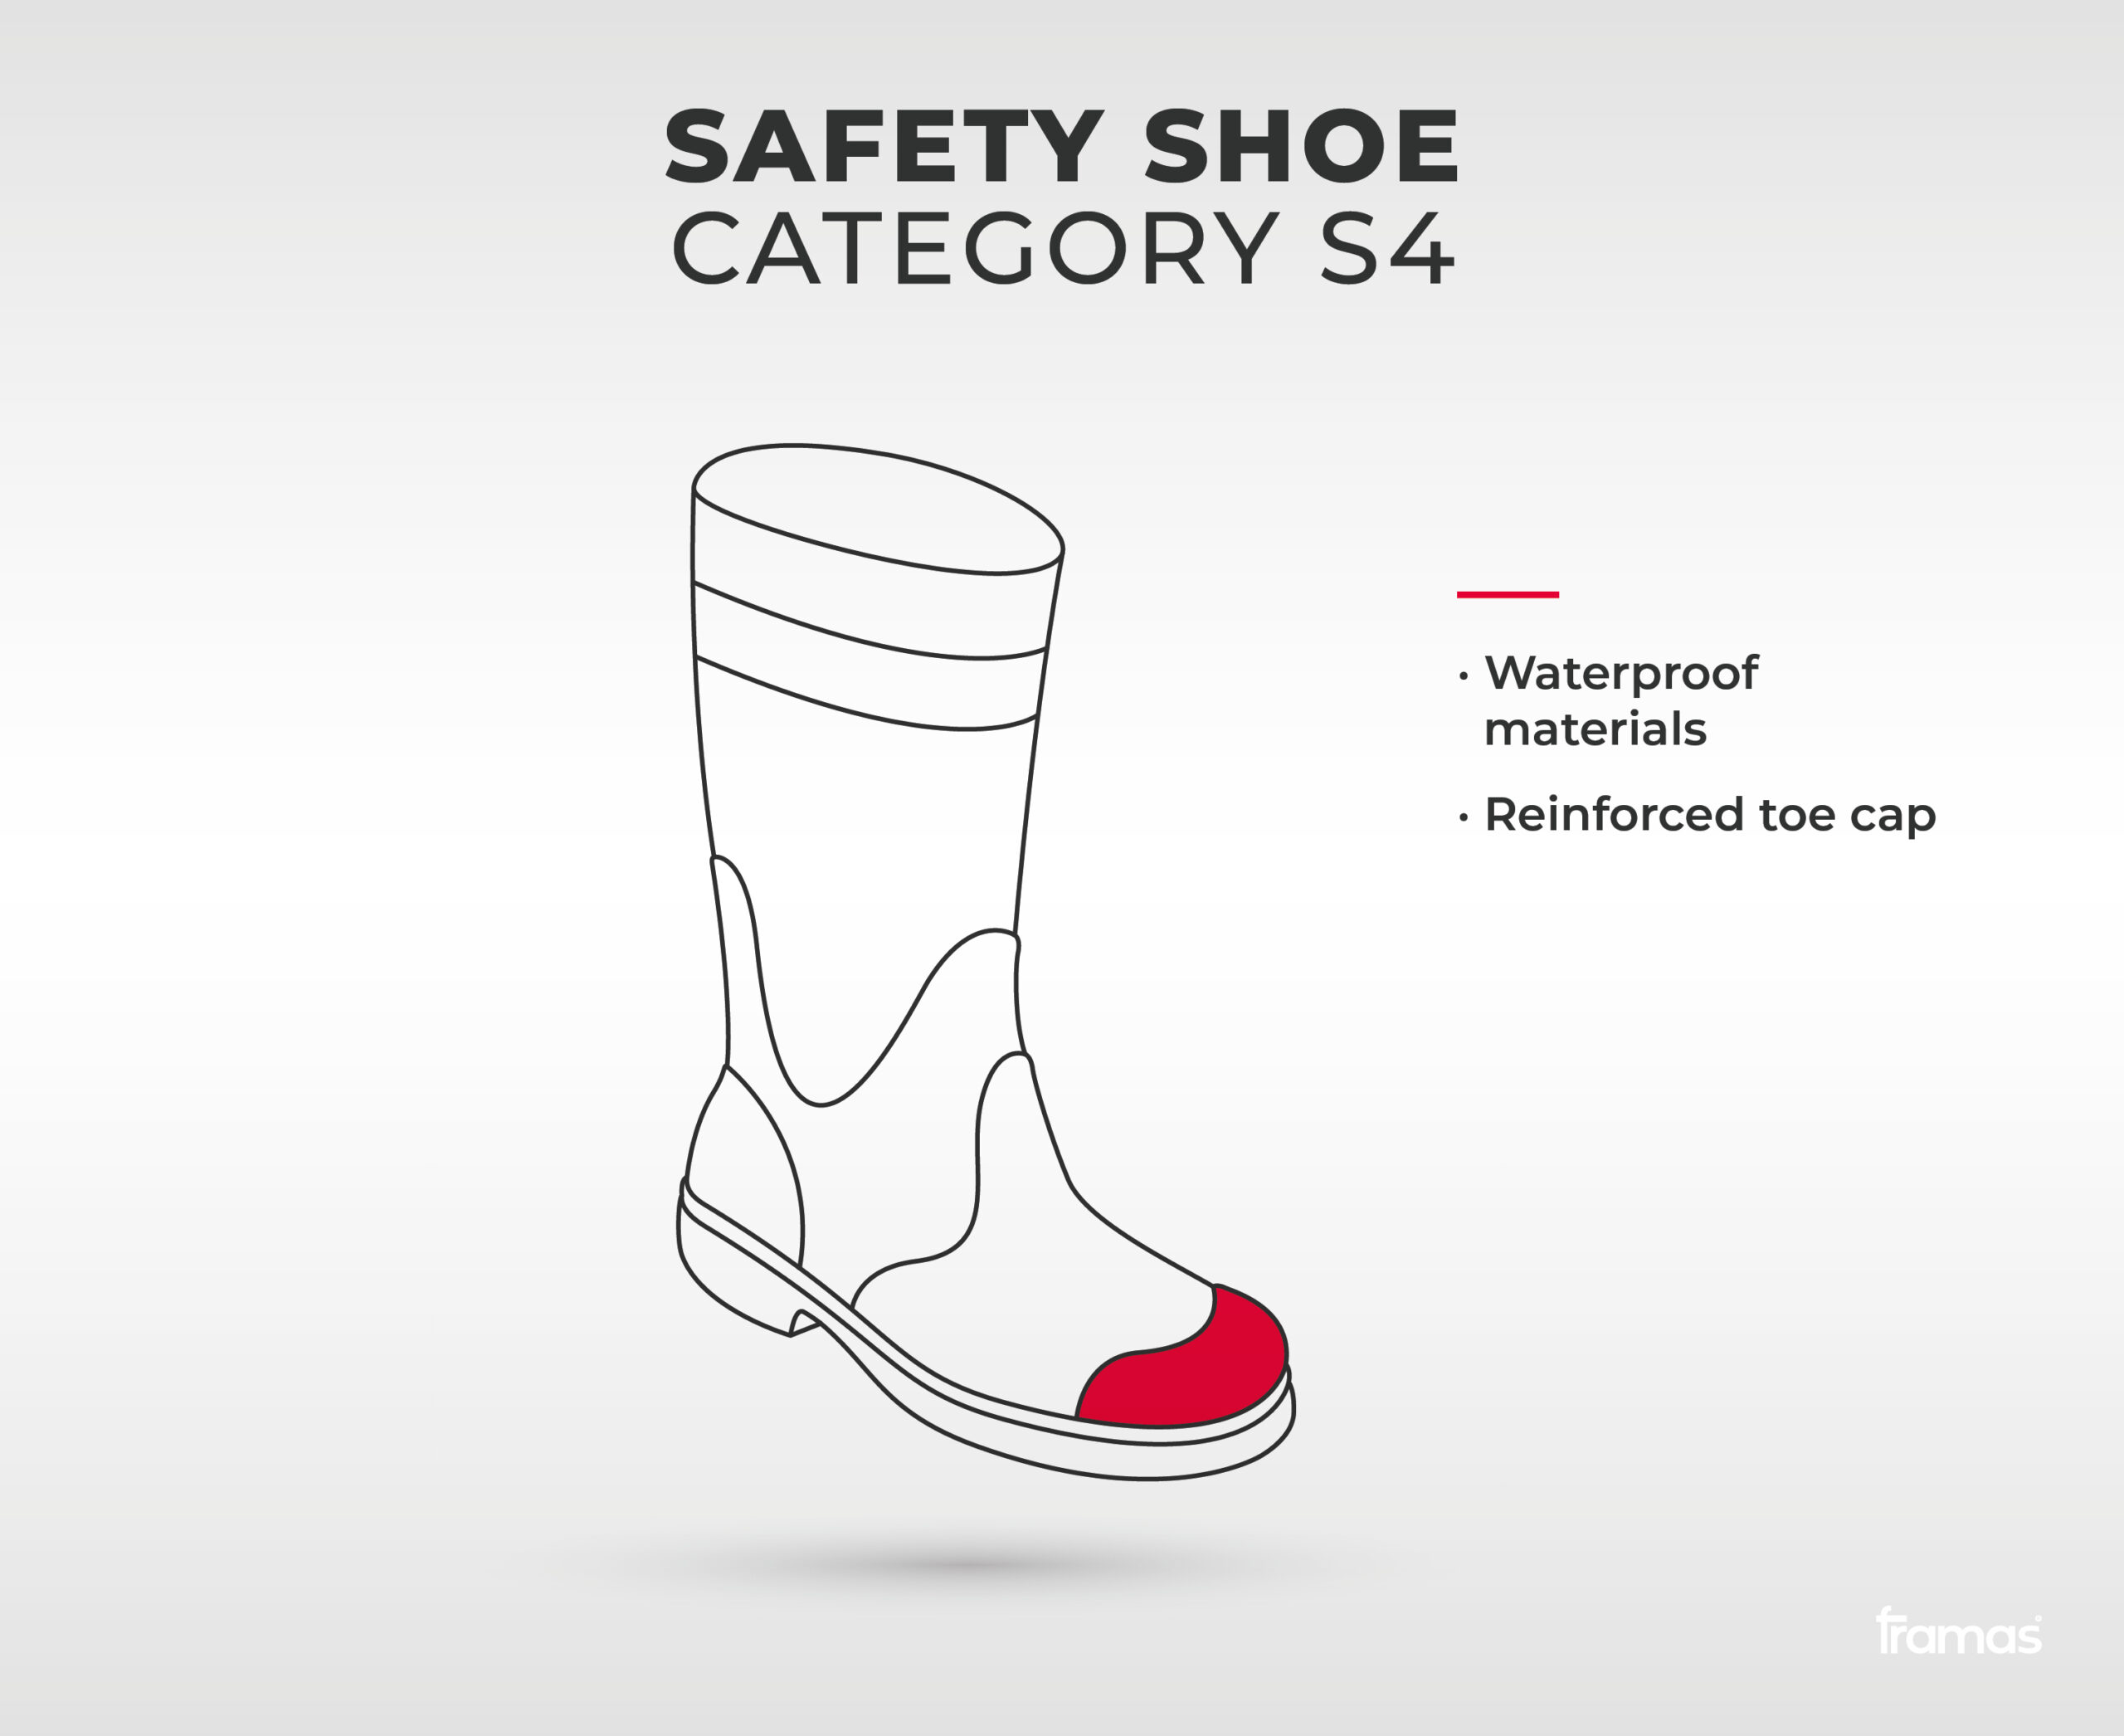
Boots with a S4 certification have a reinforced toe cap and are made of waterproof materials. The boots are not only water resistant, but they are meant to not let any water penetrate into the boot.

5. Safety Category S5

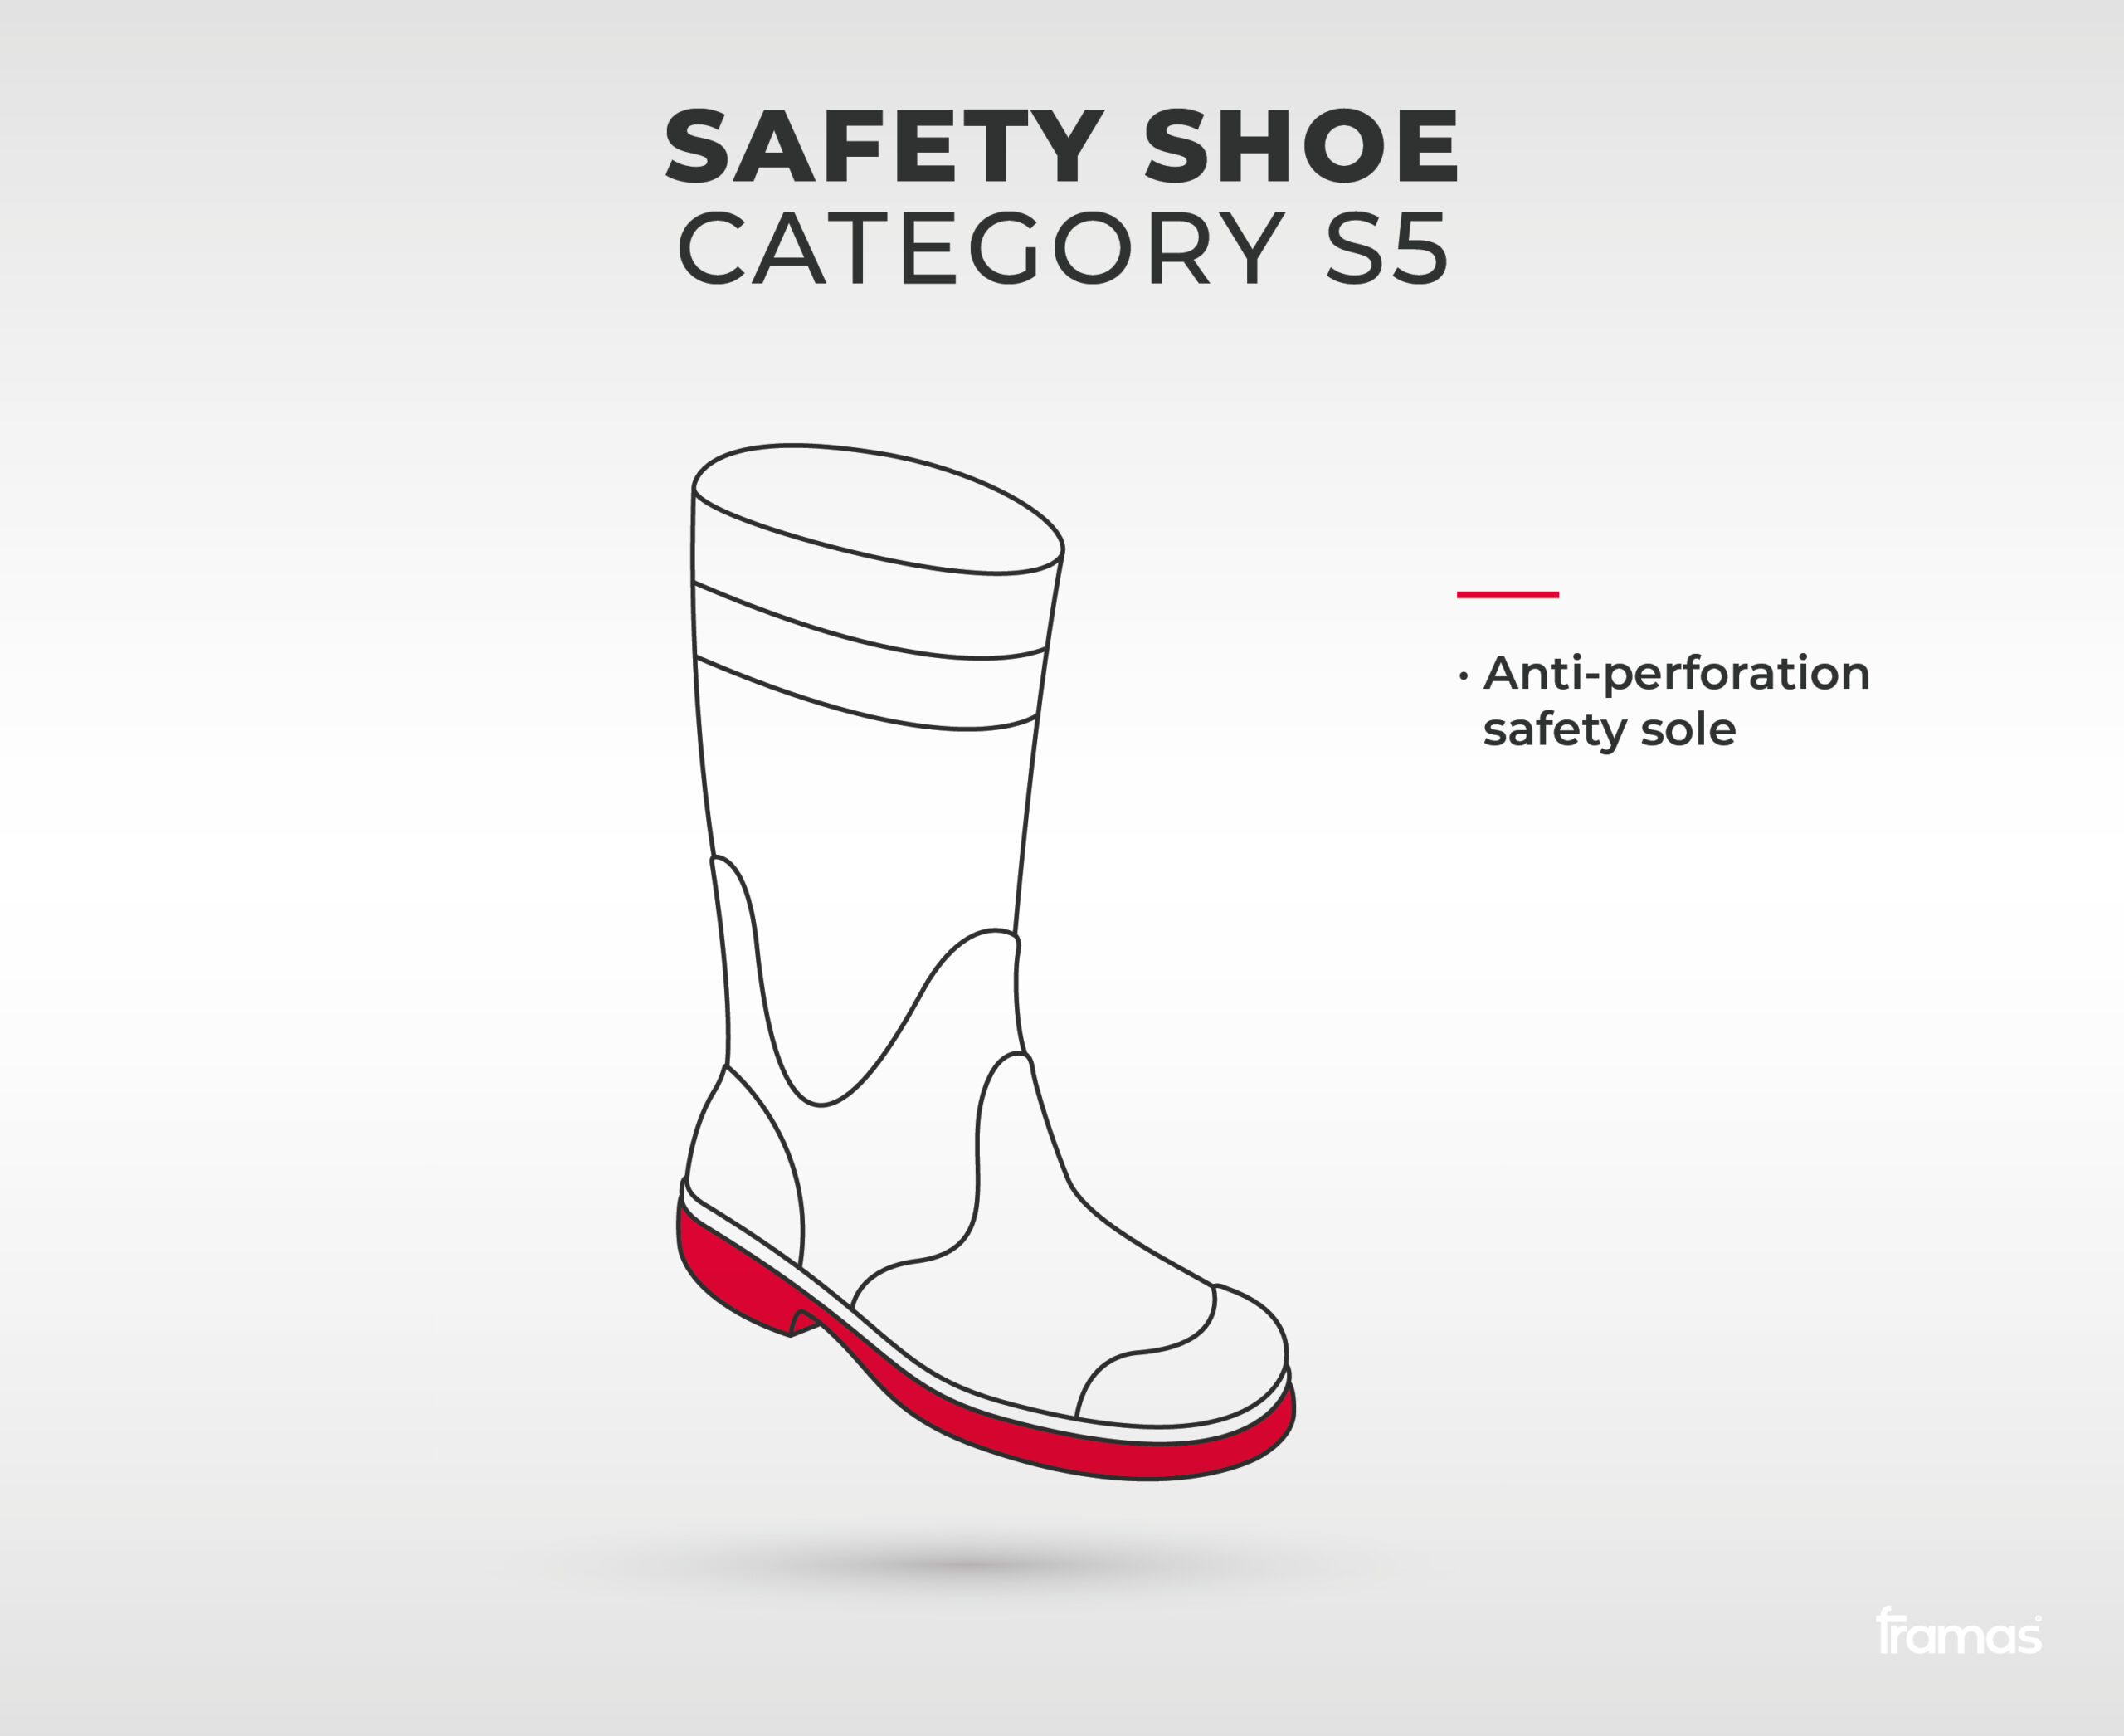
S5meets the same standard as S4 and additionally has an 2anti-perforation safety sole made of steel or a strong and durable synthetic material.
People working on boats or near any body of water would benefit from a S4 or S5 safety shoe as they are waterproof and allow for a good sole grip.

6. Safety Category S6 + S7


S6 has the same specification as S2 but the whole shoe is water resistant.

S7 refers to the S3 category and the whole shoe is water resistant. A fireman encounters multiple elements such as fire and water. Therefore, the entire shoe must be heat and water resistant. It must ensure that the high heat will not enter the shoe. The sole must be thick enough to stabilize the foot of the fireman when walking on challenging terrain. Shoes with a S7 certificate would come into consideration as they offer the most safety and the whole shoe is water resistant.

Yet, shoes made for the fire department usually follow their own safety standard EN 15090. S6 and S7 safety shoes were introduced as additional protection classes in June 2022 after the EN ISO 20345 norm was reviewed. Because they are freshly introduced, their presence in the safety footwear market is still limited.

Summary

In summary, a safety shoe is used in multiple applications to help protect the feet from any injuries and to facilitate movement in the workplace. There are basic requirements which all safety shoes must follow but they differ in their degree of protection. S3 shoes have the most extensive protection in the market at the moment.

If you liked this article, make sure to follow our Social Media channels. You can contact us anytime via LinkedIn, Instagram & Facebook. We are happy to receive any feedback and tell us what other topics are of interest to you. We will try to address them in the near future.


Thanks for checking out our blog!